ChromeOS has become a pretty stable operating system these days; since more people are adopting it. That said, you might not prefer using Google Chrome on your Chromebook. Or maybe, you might want to shift to your favorite browser like Opera; then you’re in the right place. And you might want to install Firefox on Chromebook.
Mozilla Firefox is an excellent alternative to Google Chrome. ChromeOS runs on a Linux-based kernel, and installing Firefox on ChromeOS is reasonably straightforward.
This guide will show you how to install Firefox on Chromebooks running on ChromeOS.
Step by Step Gudie to Install Firefox on ChromeOS Easily
There are two different Chromebooks — Intel or AMD Chromebooks and ARM-based Chromebooks. There is one universal method and two other methods based on the Chromebook you use.
Here’s how you can use install Firefox on any computer running ChromeOS:
Installing Firefox on Any Chromebook Using Play Store
You can install the Android version of Firefox from the Google Play Store available on your Chromebook. Follow these instructions to know how you can do it.
- Open Google Play Store on your Chromebook.
- Search for Mozilla Firefox and hit the Install button. You can install any of the available Firefox versions and it should work.

- Once downloaded and installed, you can open and use the Firefox app on your Chromebook.
Despite that, the core of this Firefox is for mobile and tablet devices. It’d be best to go with this app’s more optimized desktop version.
Install Firefox on Intel or AMD-based Chromebook
If you want to get the whole desktop experience, you should go with the Linux-based Firefox for your Chromebook.
The Android version from the Google Play Store comes stripped off from many features. Here’s how to install the desktop version of Firebox on your Chromebook with an Intel or AMD-based processor.
- Enable Linux on your Chromebook. If you don’t know how to do it, you can check our guide here.
- When the terminal is open, type the following command and Press the Y key if prompted.
sudo apt install flatpak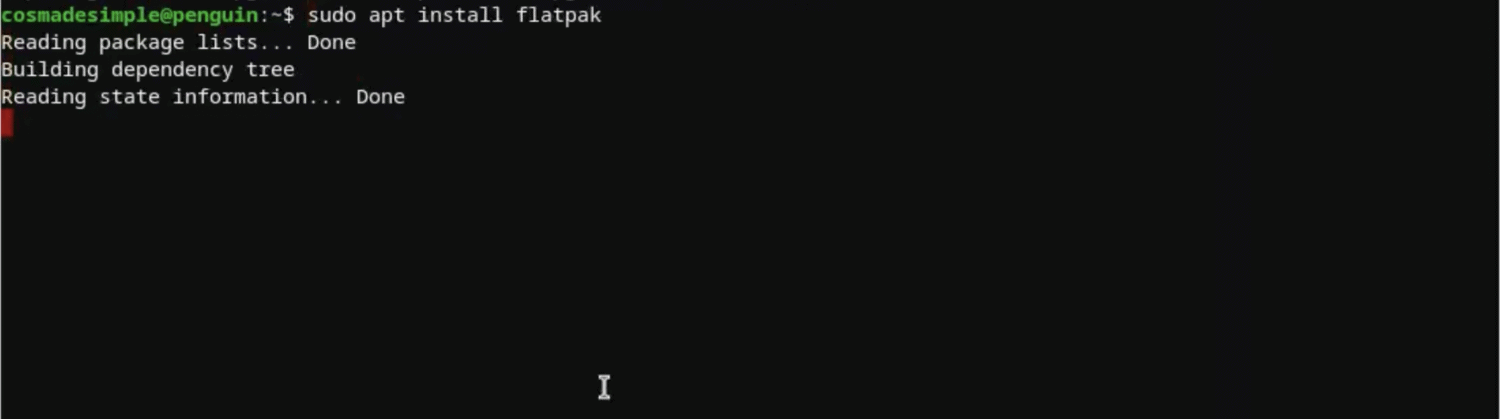
- Install Firefox with Flatpak using the following command. Type 1 if you get a prompt.
flatpak install firefox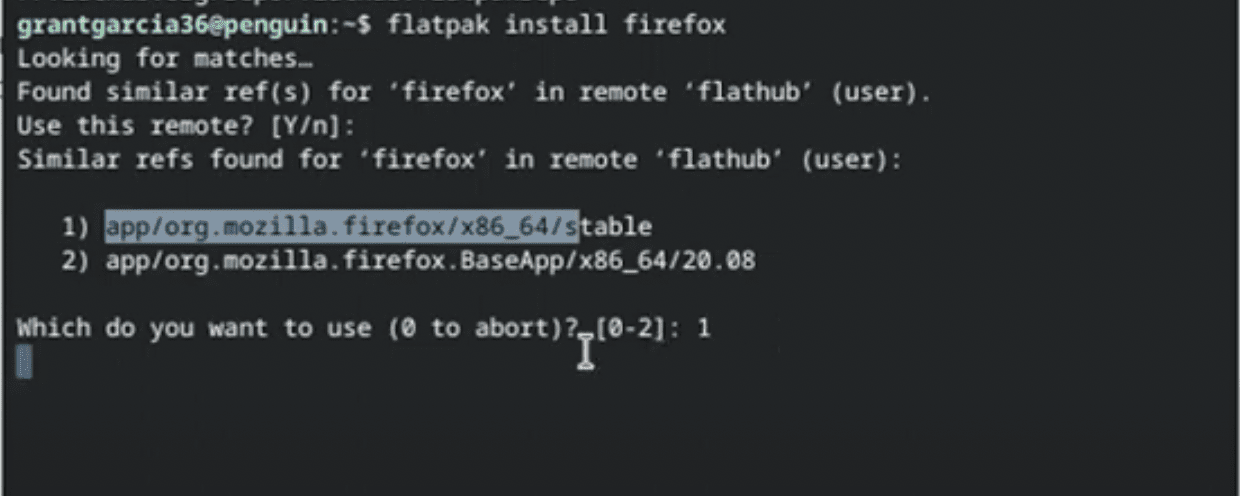
- Follow the on-screen prompts, and make sure to choose Firefox, that has official Mozilla URL in its description.
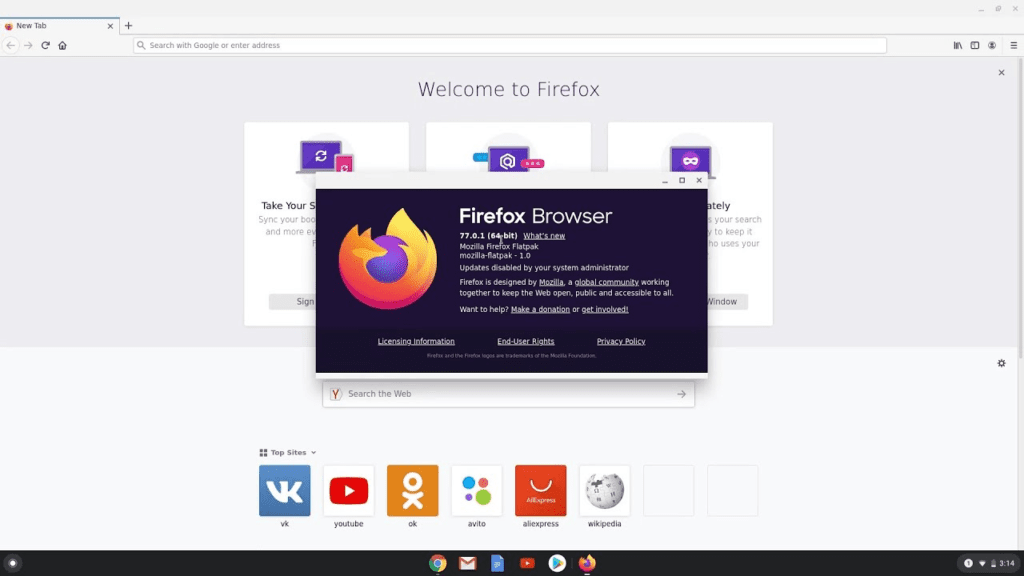
Once installed, you can now launch Firefox using the “Linux apps” folder present in the app drawer.
Note that the first launch will take some time after the installation. After some time, you’ll be able to use your freshly-installed Firefox browser on your Chromebook.
Installing Firefox ESR Version on ARM-based Chromebook
There are many Intel and AMD-based Chromebooks, alongside you see few ARM-based Chromebooks in the market like the HP X360 and many others.
The process of installing Firefox on ARM-based Chromebooks is quite different but easy. If you have one, here’s how you can install Firefox on it on ARM-based Chromebooks.
- First you need to enable Linux on your Chromebook.
- When the terminal opens up, enter the following command. Press the Y key when you receive a prompt.
sudo apt install firefox-esr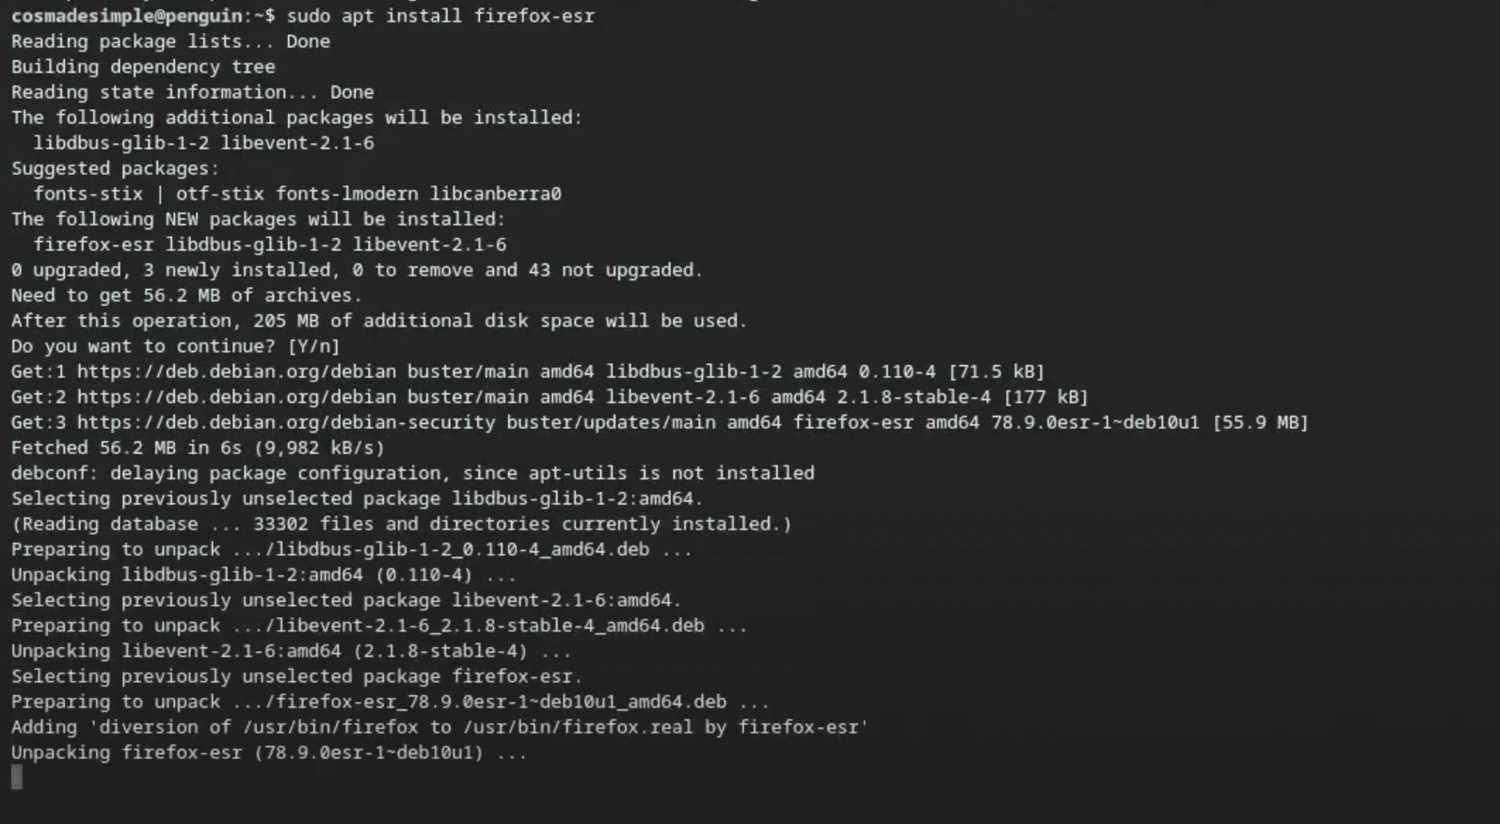
- Launch Firefox from the Linux apps folder in your app drawer once the installation is done.
We’ve installed the ESR version of Firefox, where ESR stands for Extended Support Release. It is an official version of Firefox but made for business organizations, schools, and universities.
However, you’ll receive updates to this release a little late from the standard version, probably in the next major release. That said, the ESR version will receive regular security updates, and you don’t have to worry about it.
Installing Firefox Standard Version on ARM-based Chromebooks
If you don’t like the ESR version of Chromebook, you can also install the standard version. Here’s how you can install the standard version of Firefox on ARM-based Chromebooks.
Note: You need to follow the above steps and first install the ESR version to continue with this process.
- Open the Linux terminal.
- Type the following command to remove ESR version without removing the basic files.
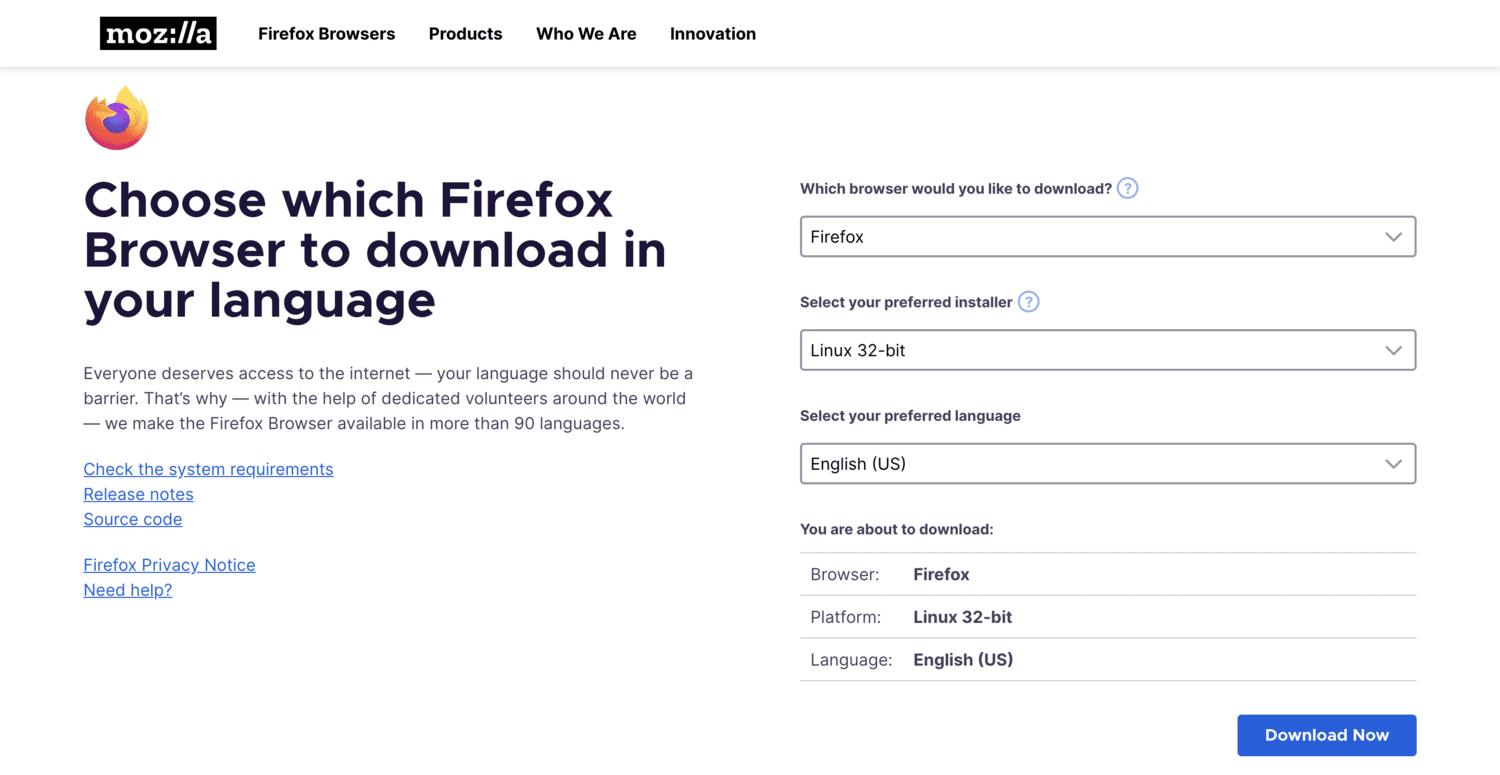
sudo apt remove firefox-esr - Visit the following link to download the setup file for the standard Firefox version.
- Select the preferred installer as Linux 32-bit or Linux 64-bit based on your model.
- Click on the Download Now button to proceed with the download.
- Rename the downloaded file as firefox.tar.bz
- Now copy the renamed file to where your linux folder is installed. You can use the Files app to locate the directory.
- Open the Linux terminal again, and type the following command. This command will install the Nano editor on you computer.
sudo apt install nano - Extract the .tar file you downloaded from the Firefox website using the following command.
tar -xvjf firefox.tar.bz - Type the following command in the Terminal after the extraction to put the Firefox icon in the taskbar.
sudo nano /usr/share/applications/firefox.desktop - Open the Nano Editor from the Linux apps folder in the app drawer, and type the following command.
sudo nano /etc/apt/sources.list - The editor will show you some pre-written lines. Now copy the text from this Gist, and paste it into the editor.
[Desktop Entry]
Name=Firefox
Comment=Browse the World Wide Web
GenericName=Web Browser
X-GNOME-FullName=Firefox Web Browser
Exec=/home/USERNAME/firefox/firefox %u
Terminal=false
X-MultipleArgs=false
Type=Application
Icon=firefox-esr
Categories=Network;WebBrowser;
MimeType=text/html;text/xml;application/xhtml+xml;application/xml;application/vnd.mozilla.xul+xml;application/rss+xml;application/rdf+xml;image/gif;image/jpeg;image/png;x-scheme-handler/http;x-scheme-handler/https;
StartupWMClass=Firefox-esr
StartupNotify=trueNote: In the sixth line of the above code, replace USERNAME with your actual username.
Save the above text using Ctrl + O key and exit the editor. This code will update the browser to the standard version, and you’ll be able to use the latest standard Firefox version.
Despite that, you’ll need to update it manually every time. To update Firefox manually, type the following command in the terminal.
sudo apt update && sudo apt dist-upgrade
Also, you might not get the Firefox icon in the dock as expected. In such a situation, you can save your work, and reboot your Chromebook to see it.
Also Read: How to Install and Run Chrome OS Flex on Your Windows PC
Install Firefox on Any Chromebook Easily within 5 minutes
We hope you installed Firefox on Chromebook successfully. As we mentioned above, there are multiple methods available to install Firefox on your Chromebook. Whichever method you choose, you’ll be able to use Firefox without any problem in less than 5 minutes.
Whatever is the use case for you, you can enjoy the best of Google’s Chrome and Mozilla’s Firefox in the same Chromebook. If you have any queries or suggestions regarding this guide, you can leave them in the comments below.
thanks for your guidance, but where is the text of point 12?
Point 12 has been updated with the code. You can also find the code here.