Google’s Chromebooks run on ChromeOS, a general-purpose operating system with unique features and tools. If you didn’t know, ChromeOS runs on the Linux environment. Despite that, enabling Linux on Chromebook isn’t generally accessible to users. It takes your usual Chromebook to the next level if you unlock Linux.
That said, unlocking the Linux environment isn’t easy as you’d think. But you need not worry about it. This article will guide you through the process of enabling and installing Linux on your Chromebook.
Enabling Linux on your Chromebook (2026)
There are multiple ways to enable Linux on your Chromebook. However, we’ll go through the simplest methods to get Linux on ChromeOS.
If you didn’t know, Crostini is a feature available on Chromebook that lets you develop software on your Chromebook. It enables you to install Linux IDEs, command-line tools, and many more with ease. Only a few devices listed below come with Crostini, named Linux (Beta) on them.
List of Chromebooks supporting Linux (Beta)
| Manufacturer | Device Models |
|---|---|
| Acer | Chromebook 11 (C732, C732T, C732L, C732LT) Chromebook 11 (CB311-8H, CB311-8HT) Chromebook 11 N7 (C731, C731T) Chromebook 13 (CB713-1W) Chromebook 14 (CB3-431) Chromebook 15 (CB3-532) Chromebook 15 (CB315-1H, CB315-1HT) Chromebook 15 (CB515-1H, CB515-1HT) Chromebook 514 Chromebook R11 (CB5-132T, C738T) Chromebook R13 (CB5-312T) Chromebook Spin 11 (CP311-H1, CP311-1HN) Chromebook Spin 11 (R751T) Chromebook Spin 13 (CP713-1WN) Chromebook Spin 15 (CP315) Chromebook Tab 10 Chromebox CXI3 |
| ASUS | Chromebook C202SA Chromebook C223 Chromebook C300SA / C301SA Chromebook C423 Chromebook C523 Chromebook Flip C101PA Chromebook Flip C213 Chromebox 3 (CN65) |
| CTL | Chromebook J41 / J41T Chromebook NL7 Chromebook NL7 / NL7T-360 / NL7TW-360 Chromebook NL7 LTE Chromebox CBx1 J5 Chromebook NL61 Chromebook |
| Dell | Chromebook 11 (3180) Chromebook 11 (5190) Chromebook 11 2-in-1 (3189) Chromebook 11 2-in-1 (5190) Inspiron Chromebook 14 2-in-1 (7486) |
| Pixelbook Pixel Slate Pixelbook Go | |
| HP | Chromebook 11 G5 Chromebook 11 G5 EE Chromebook 11 G6 EE Chromebook 14 G5 Chromebook 14A G5 Chromebook x2 Chromebook x360 11 G1 EE Chromebook x360 14 Chromebox G2 |
| Samsung | Chromebook 3 Chromebook Plus Chromebook Plus (LTE) Chromebook Plus (V2) |
| Lenovo | 100e Chromebook 300e/N23 Yoga/Flex 11 Chromebook 500e Chromebook Flex 11 Chromebook Ideapad C330 Chromebook Ideapad S330 Chromebook N22 Chromebook N23 Chromebook N23 Chromebook (Touch) N42 Chromebook ThinkPad 11e 3rd Gen Chromebook ThinkPad 11e 4th Gen Chromebook Yoga C630 Chromebook |
| Edugear | CMT Chromebook |
| Edxis | Education Chromebook (NL6D) |
| Haier | Chromebook 11 C |
| Mecer | V2 Chromebook |
| Multilaser | Chromebook M11C |
| PCMerge | Chromebook PCM-116T-432B |
| Poin2 | Chromebook 11C Chromebook 14 |
| Positivo | Chromebook C216B |
| Prowise | Chromebook Proline |
| Viewsonic | NMP660 Chromebox |
| Viglen | Chromebook 360 |
Enable Linux (Beta) on Chromebook using Crostini
That said, here’s how to enable Linux (Beta) if you have your Chromebook model listed above.
- Go to Settings on your Chromebook.
- Click on the Advanced to expand more options.
- Select the Developers option.

- Click on the Turn on button next to “Linux Development Environment.”
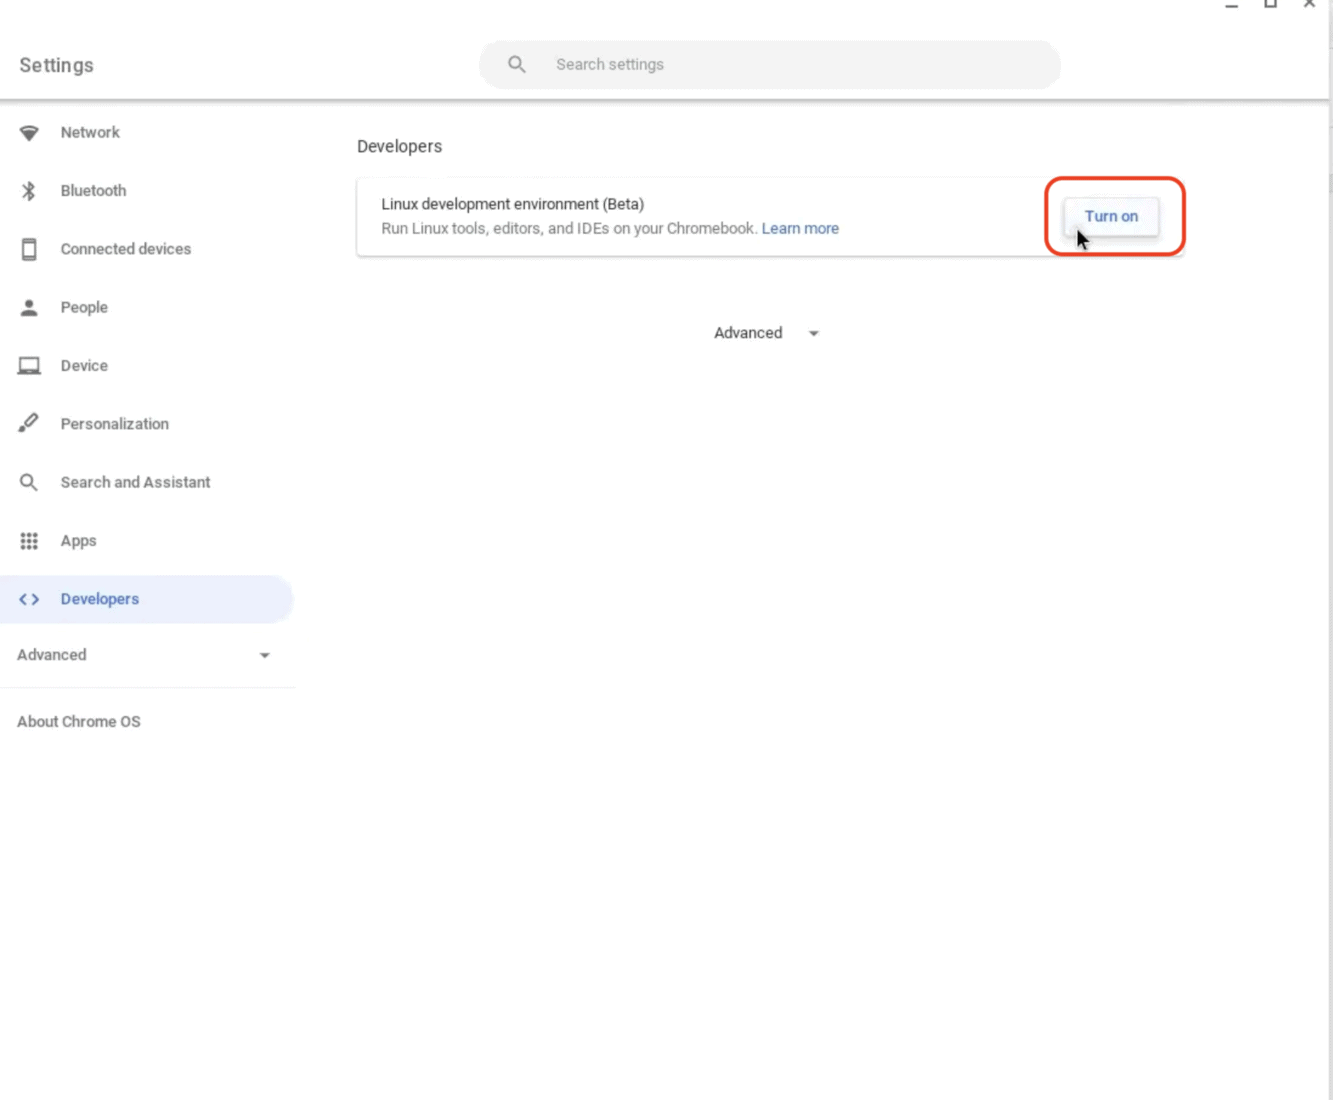
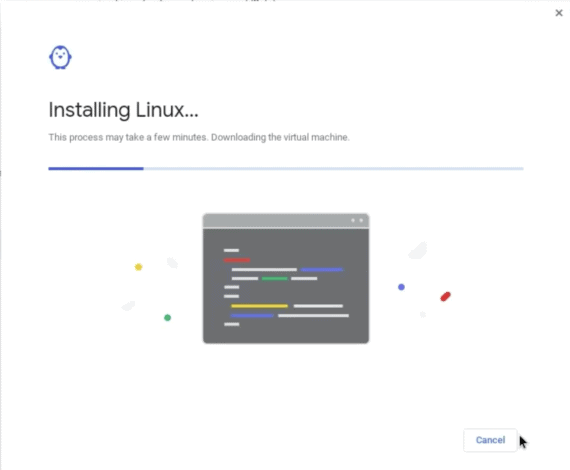
Go through the prompts, and it’ll automatically start downloading the required Linux files. Once done, your Linux container will be ready.
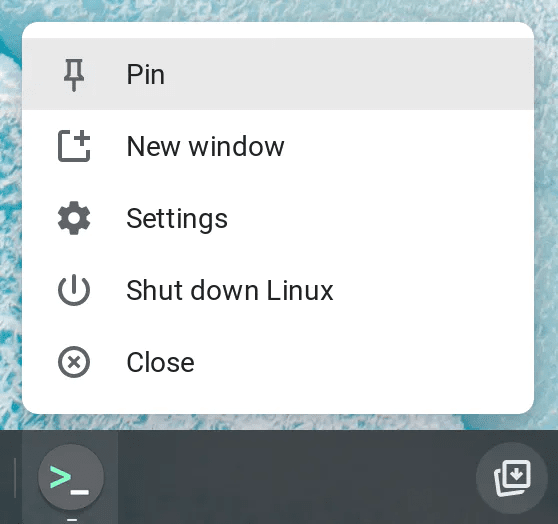
Once done, you’ll see a Terminal app opened on your Chromebook. It’s best to pin the Terminal app to the Shelf to get easy access.
Right-click on the Terminal app icon and click on the Pin option to pin it to the Shelf.
The next step will be to update the APT repository index and install it. To do so, type the following command in the Terminal app.sudo apt update
Once done, it will be ready to use the Linux container. You’ll be able to install Linux apps and packages with ease.
Also Read: How to Bypass “Your Connection is Not Private” Error on Google Chrome and Microsoft Edge
Conclusion
Unlocking Linux on your Chromebook gives your Chromebook more potential. If you intend to learn Linux, you can put it to great use, and you’ll see different things from your everyday computing.
Enabling Linux on Chromebook is easy, and it can be an excellent playground for you if you’re a beginner in Linux. If you have any questions or suggestions regarding this guide, you can leave them in the comments below.