Apple announced the new iPhone 13 on the stage recently. As exciting as it sounds to everyone, it is one of the best iPhones Apple released to this date. That said, iPhone still impresses many people, and you might be one of them too. Having said that, if you already own a phone (Android or iPhone), you would want to upgrade to the newer iPhone.
When upgrading to a new iPhone, you’d want to transfer your files, contacts, photos, messages, and many others. If you get the iPhone 13, you face this question — how to transfer data from an old phone to an iPhone 13?
There are multiple ways to transfer data from an Android to iPhone or an iPhone to iPhone. This guide will show you the best and efficient methods to transfer data from old phones to iPhone 13.
How to Transfer Files from Old Phone to iPhone
The methods are different for transferring files and data from an Android phone to the iPhone and an iPhone to the iPhone. We’ll show you the various ways to transfer data from Android to iPhone and also from an iPhone to iPhone.
Transfer Data from Android to iPhone
When you want to transfer Android files to iOS, there are two methods to perform the same. You can use an official app from Apple or a third-party app to perform the same.
1. Using Move to iOS app
For Android users, Apple introduced an official way to transfer files from Android to iOS with ease. You can use the “Move to iOS” app to move your contacts, messages, photos, and more from your Android device to your iPhone. However, there are some prerequisites that you need to take care of before using the Move to iOS app.
- Make sure that your Android phone has WiFi turned ON.
- Plug your Android device and iPhone to the charger.
- Check if the space on your iPhone is sufficient for the Android data.
- Don’t setup your iPhone before starting the process.
If you have done all of the above steps, here’s how you can transfer Android data to iPhone:
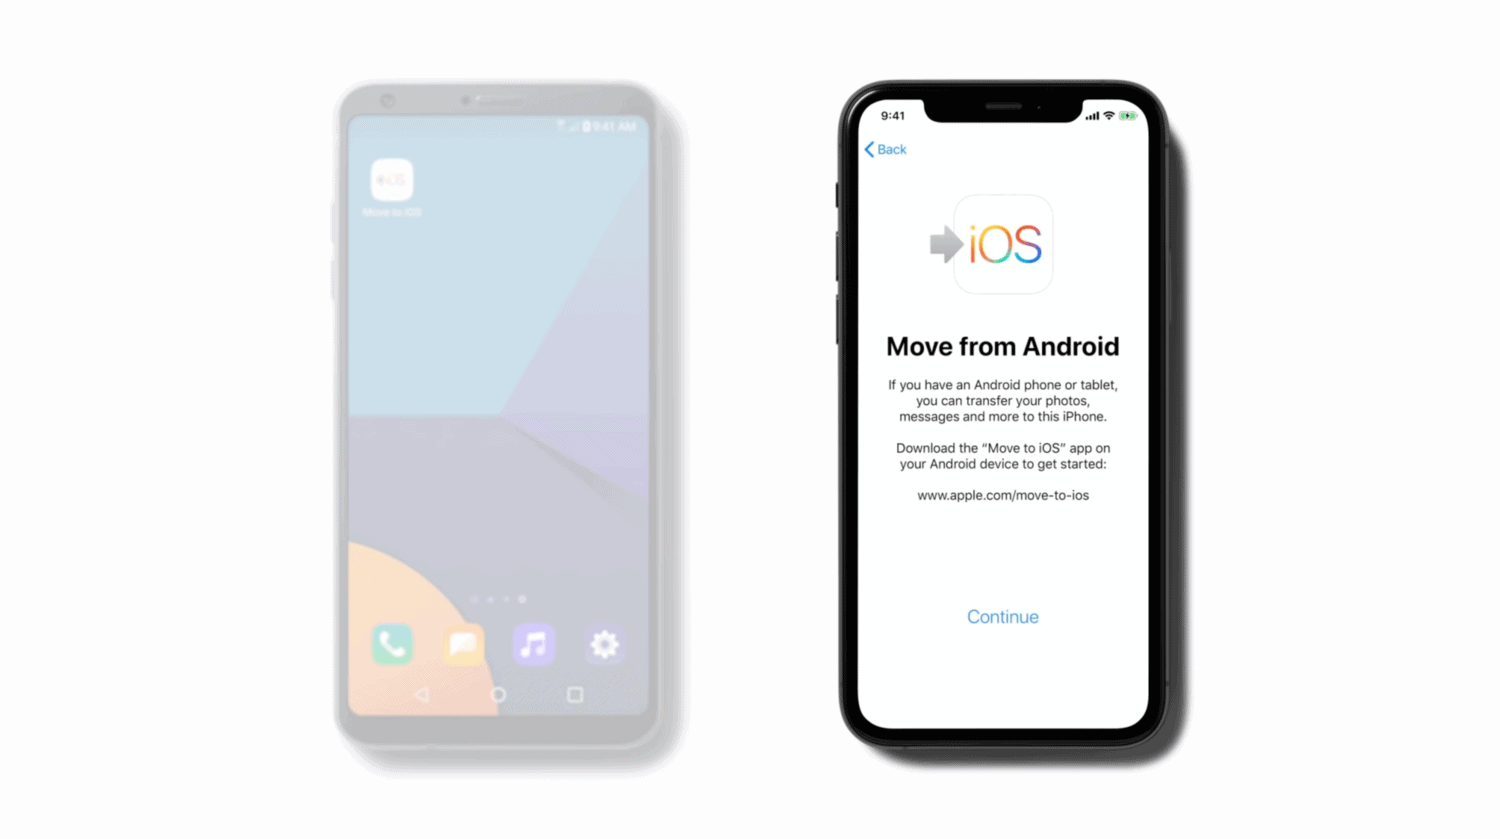
- Download the Move to iOS app on your Android device.
- Keep Continuing the Setup on your iPhone until you see Apps & Data screen.
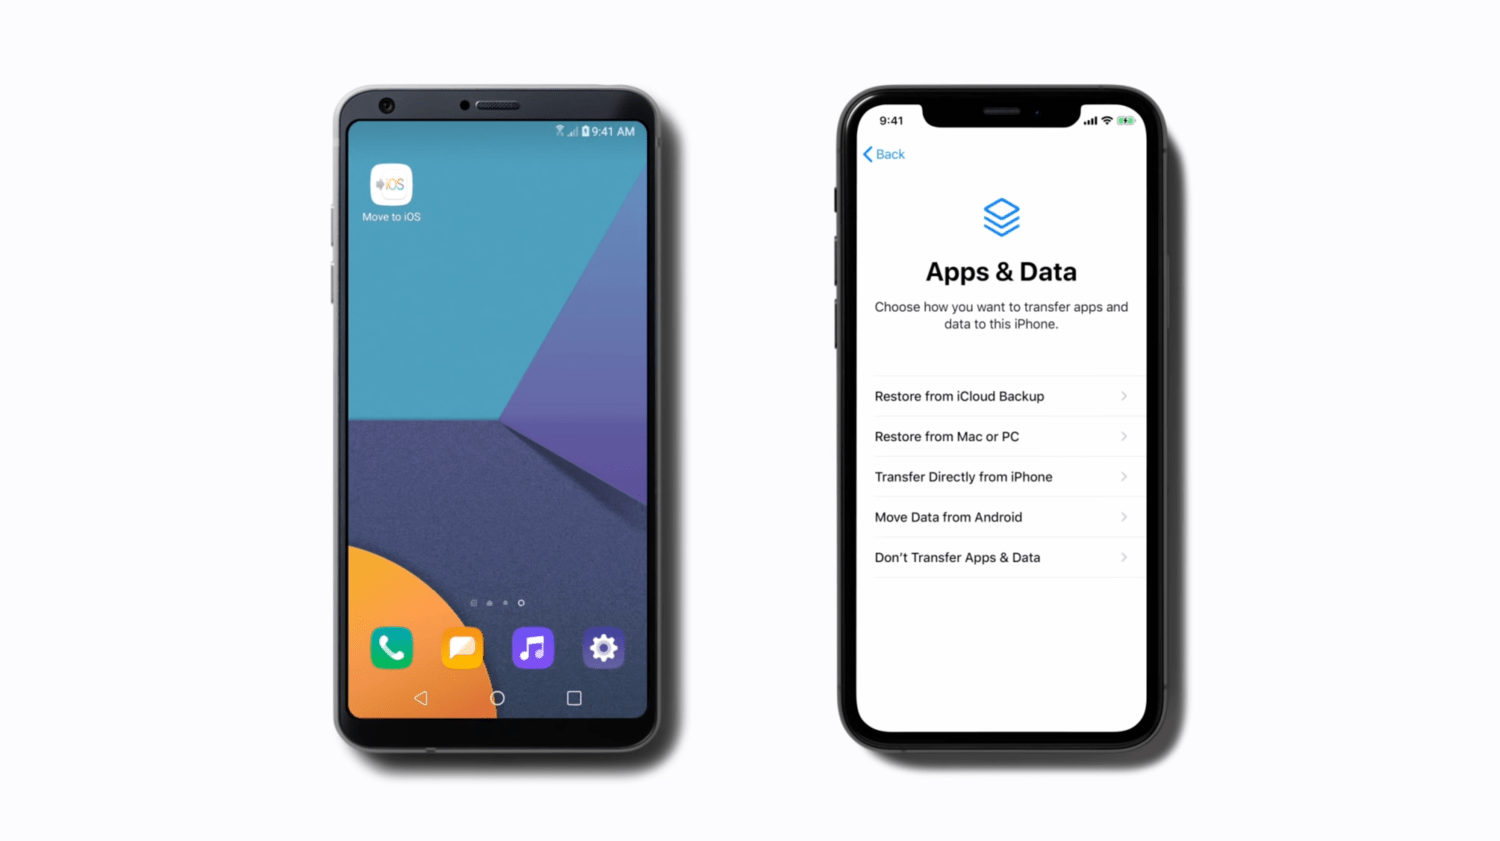
- Select the Move Data from Android option.
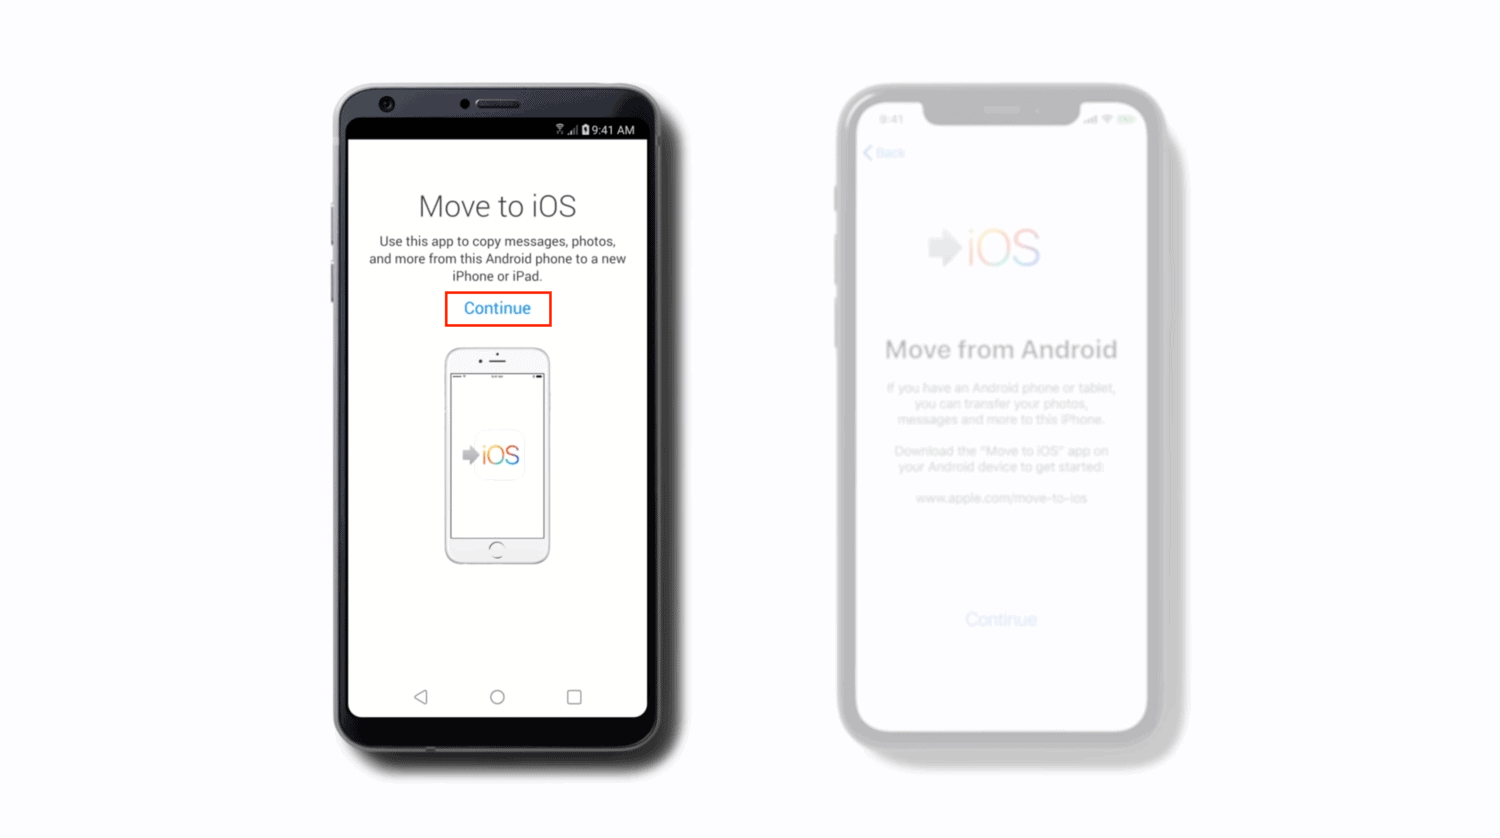
- Open the Move to iOS app on Android.
- Hit Continue on Android, and then tap Agree.
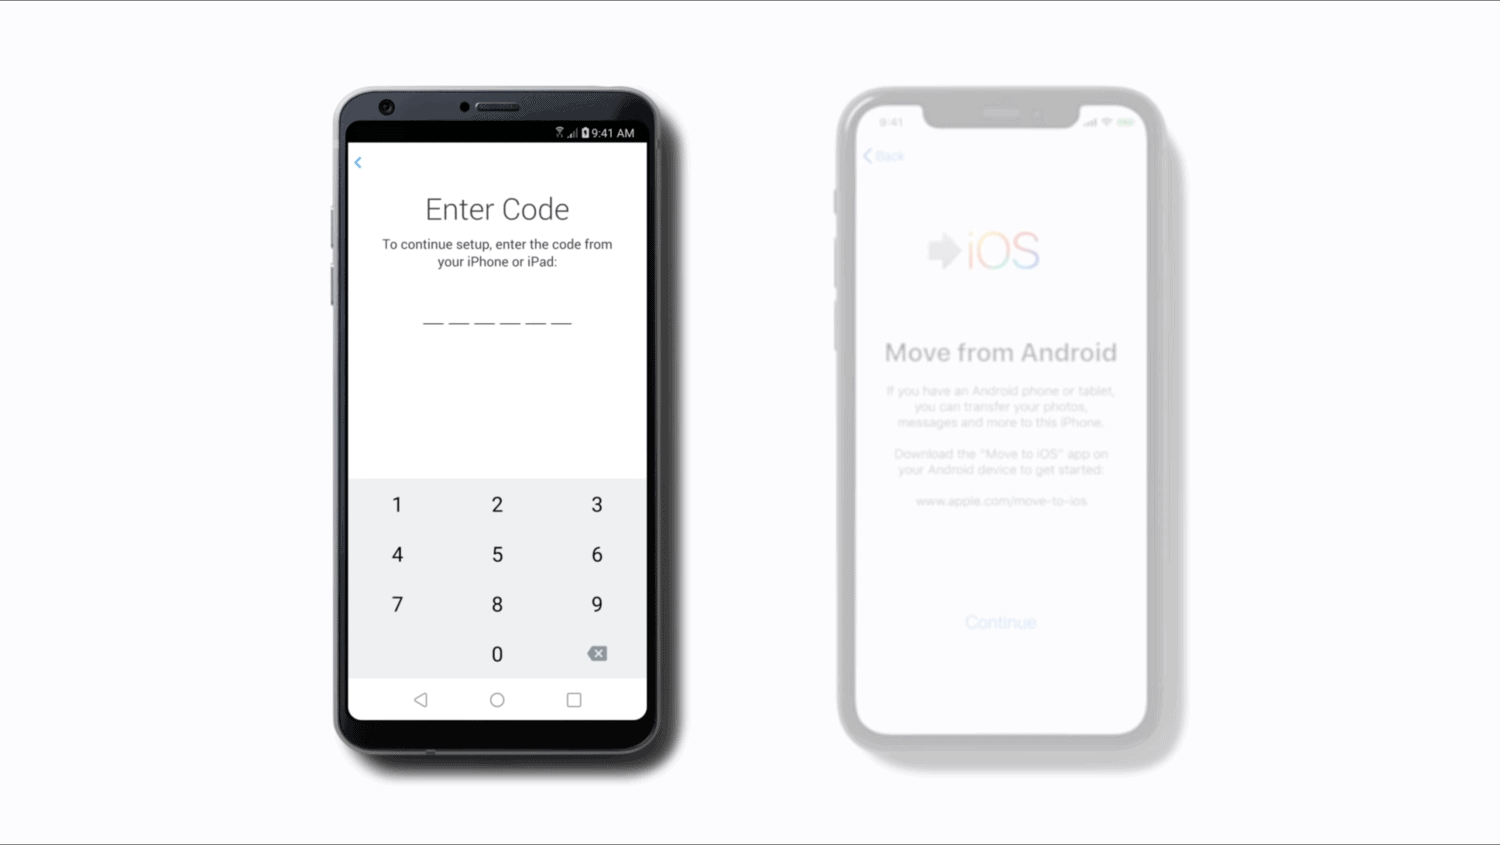
- Click Next on the top-right corner which will take you to the code screen.
- Tap Continue on your iPhone screen, and it’ll show you a code. It could be a 10-digit or 6-digit code.
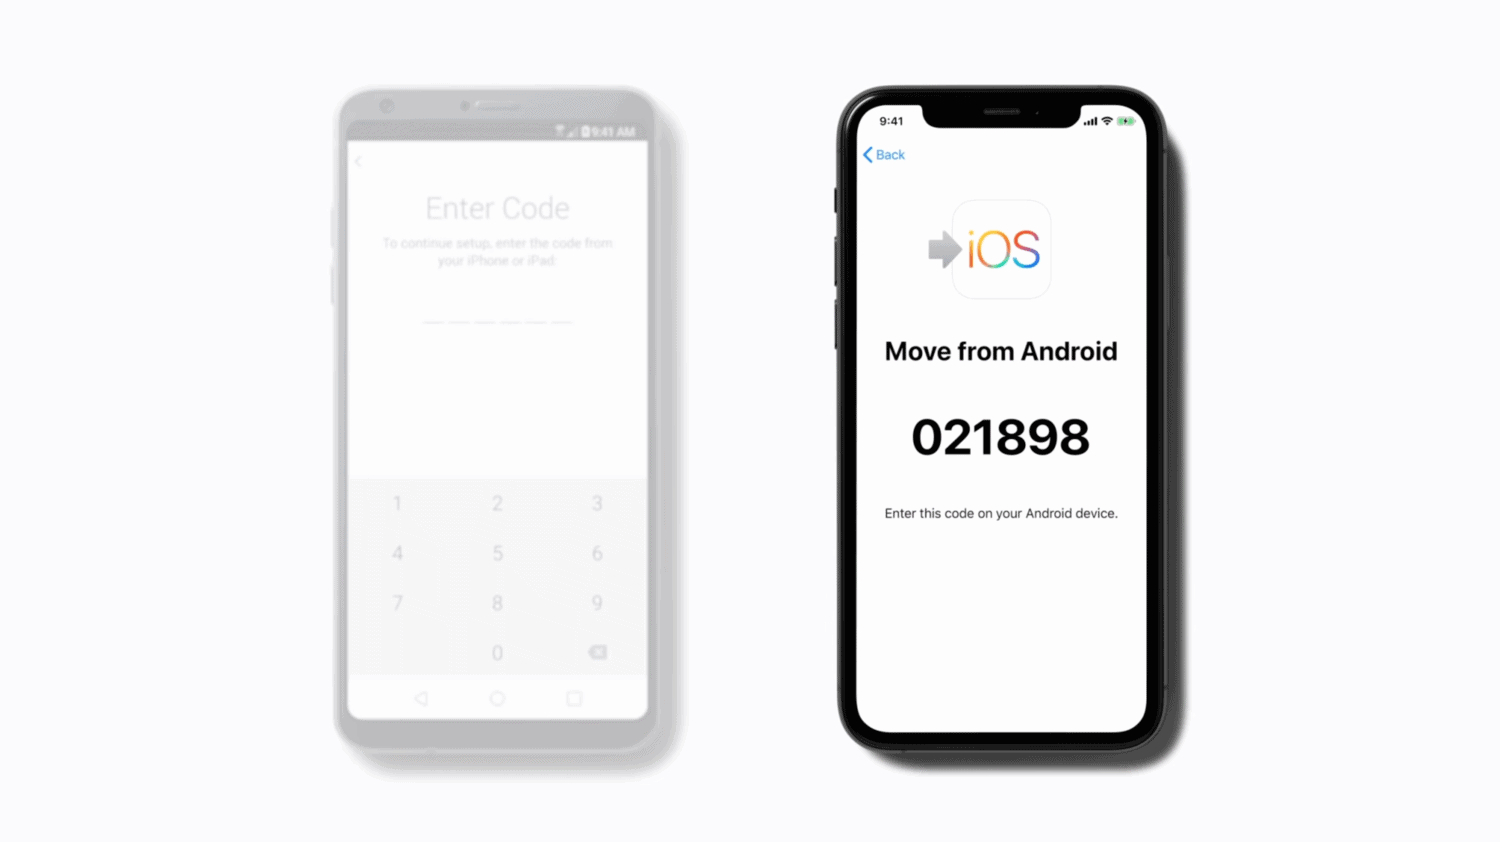
- Enter the code on Android that appears on your iPhone.
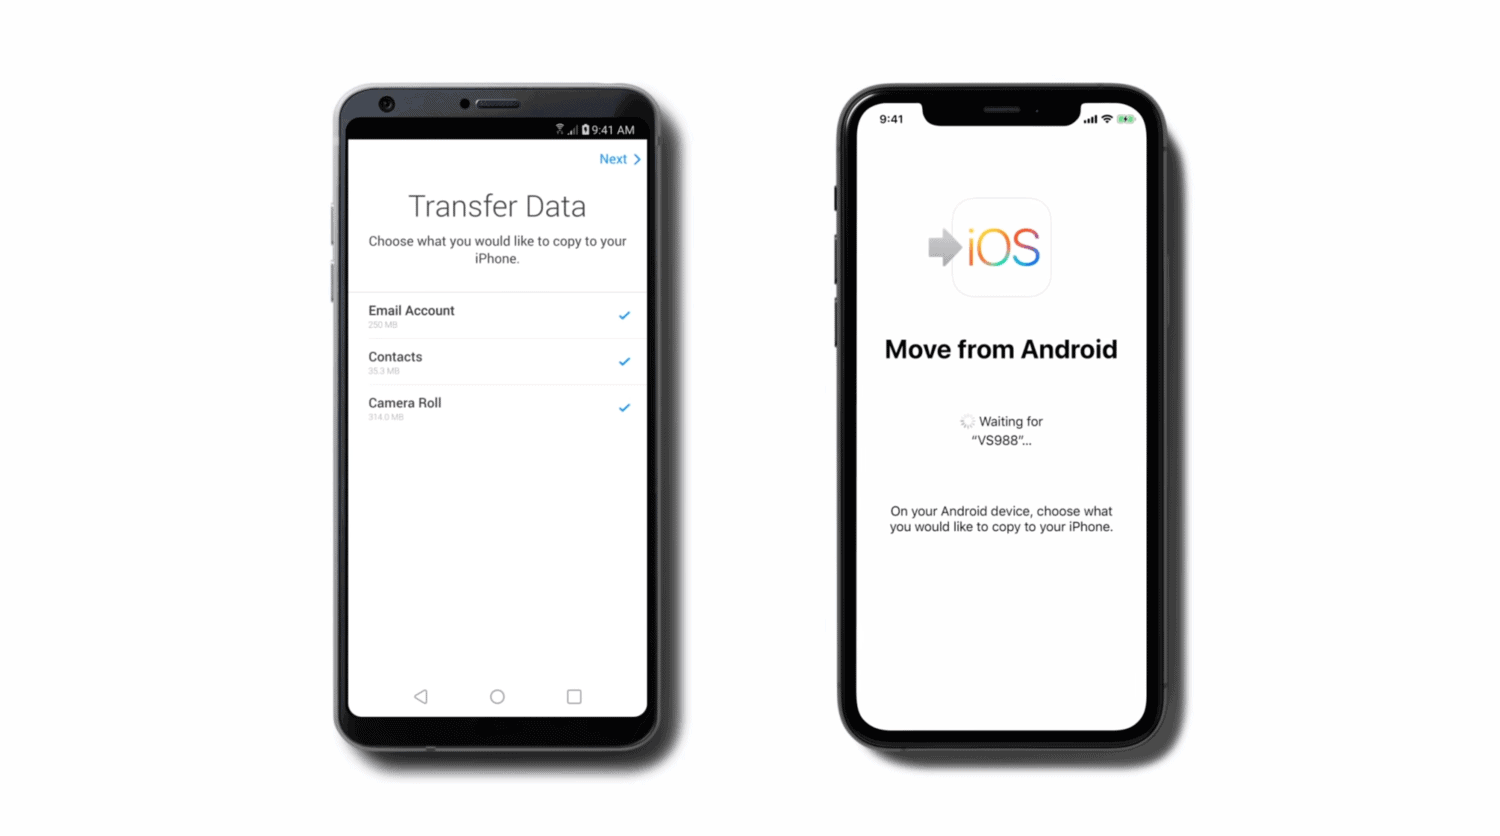
- Select what you want to copy from Android to the iPhone. By default, everything will be selected, so you can hit Next on the top-right corner.
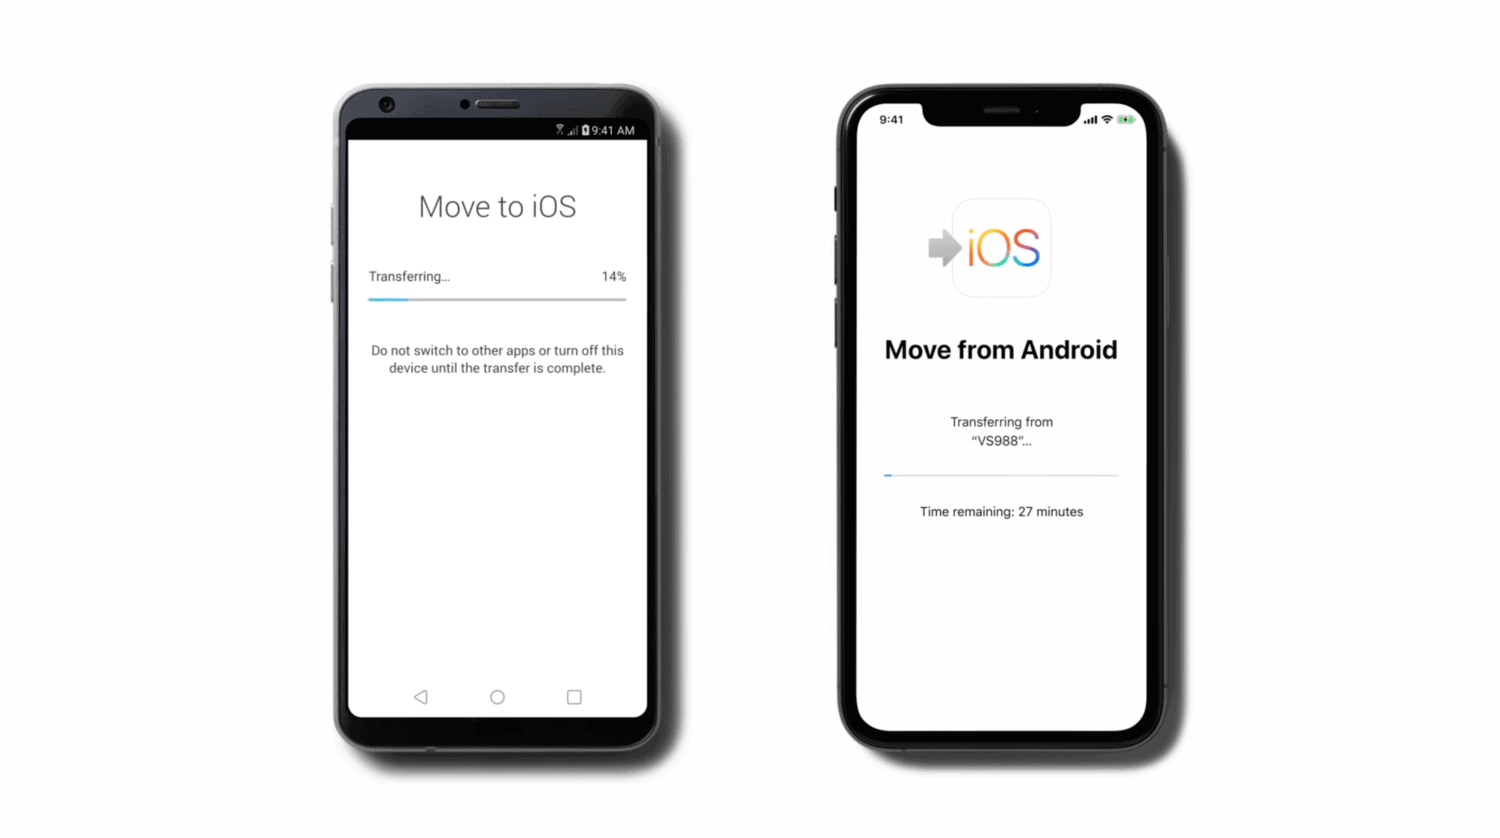
- The process may take a while to complete depending on the size of the data on Android. Wait for the iPhone to show that the process completed screen.
- Next, tap Done on your Android device.
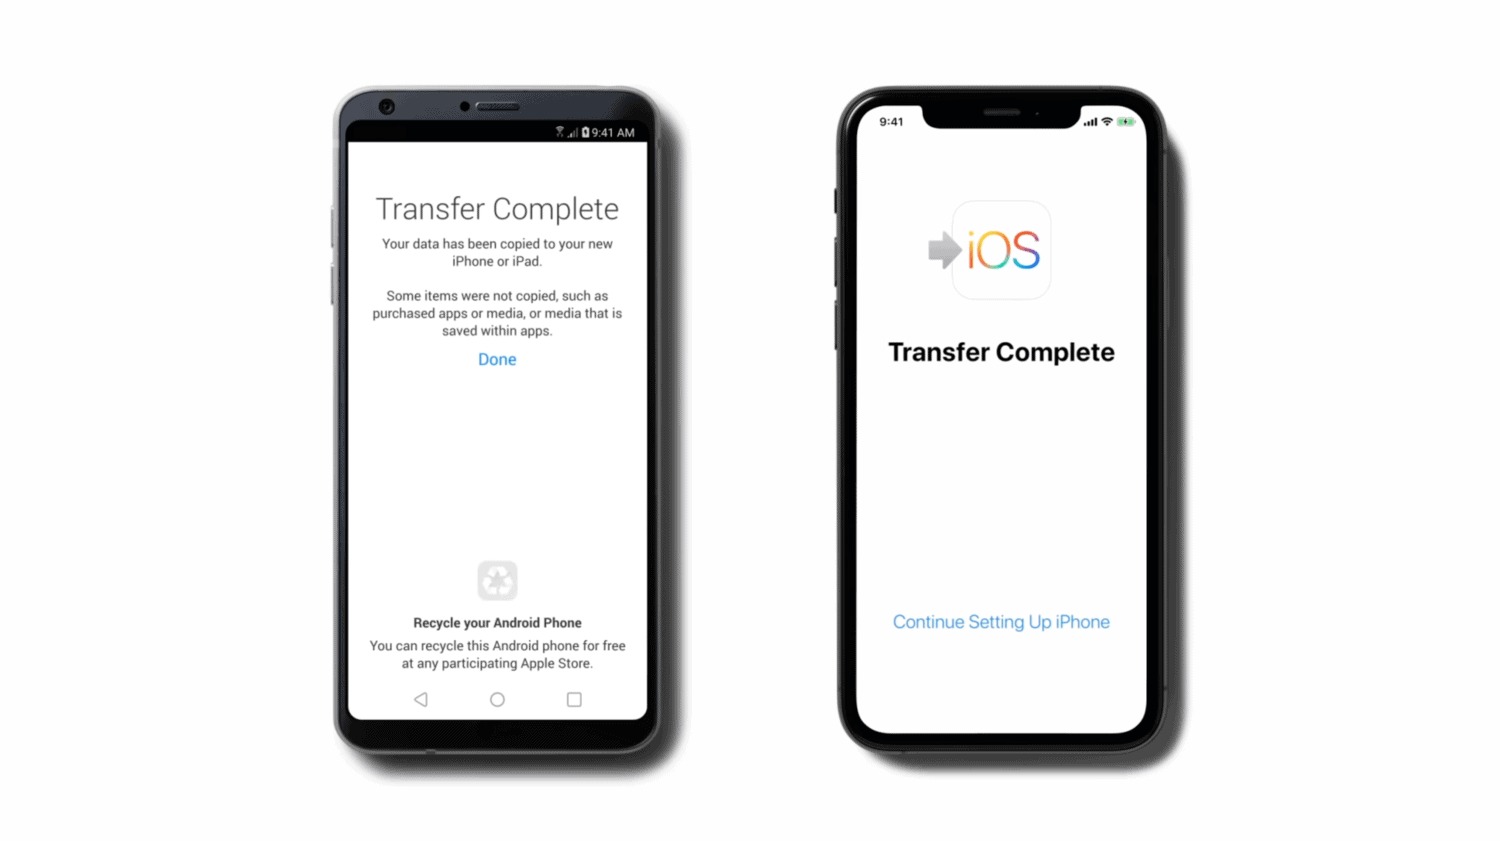
- Follow the on-screen instructions on your iPhone to complete setup, and it’ll be done!
Move to iOS App Problems
The “Move to iOS” app is a great option for Android users to transfer data from Android to an iPhone. However, it isn’t the perfect option. Here are some of the features that you’ll miss out on the Move to iOS app.
- The Move to iOS app can’t transfer the chats from your WhatsApp, songs, ringtones on your phone, and many others.
- The data transfer speeds aren’t ideal, and it may take a lot of time for the app to transfer the data. There are also chances of transfer termination for unknown reasons.
- Also, this only works if the iPhone isn’t setup, and doesn’t transfer the data from Android to iPhone if the iPhone is already configured.
While the Move to iOS app has its pros and cons, you can overcome those problems by using AnyTrans. The problems you’ll face when using the Move to iOS app can be avoided using the AnyTrans app.
2. Using AnyTrans
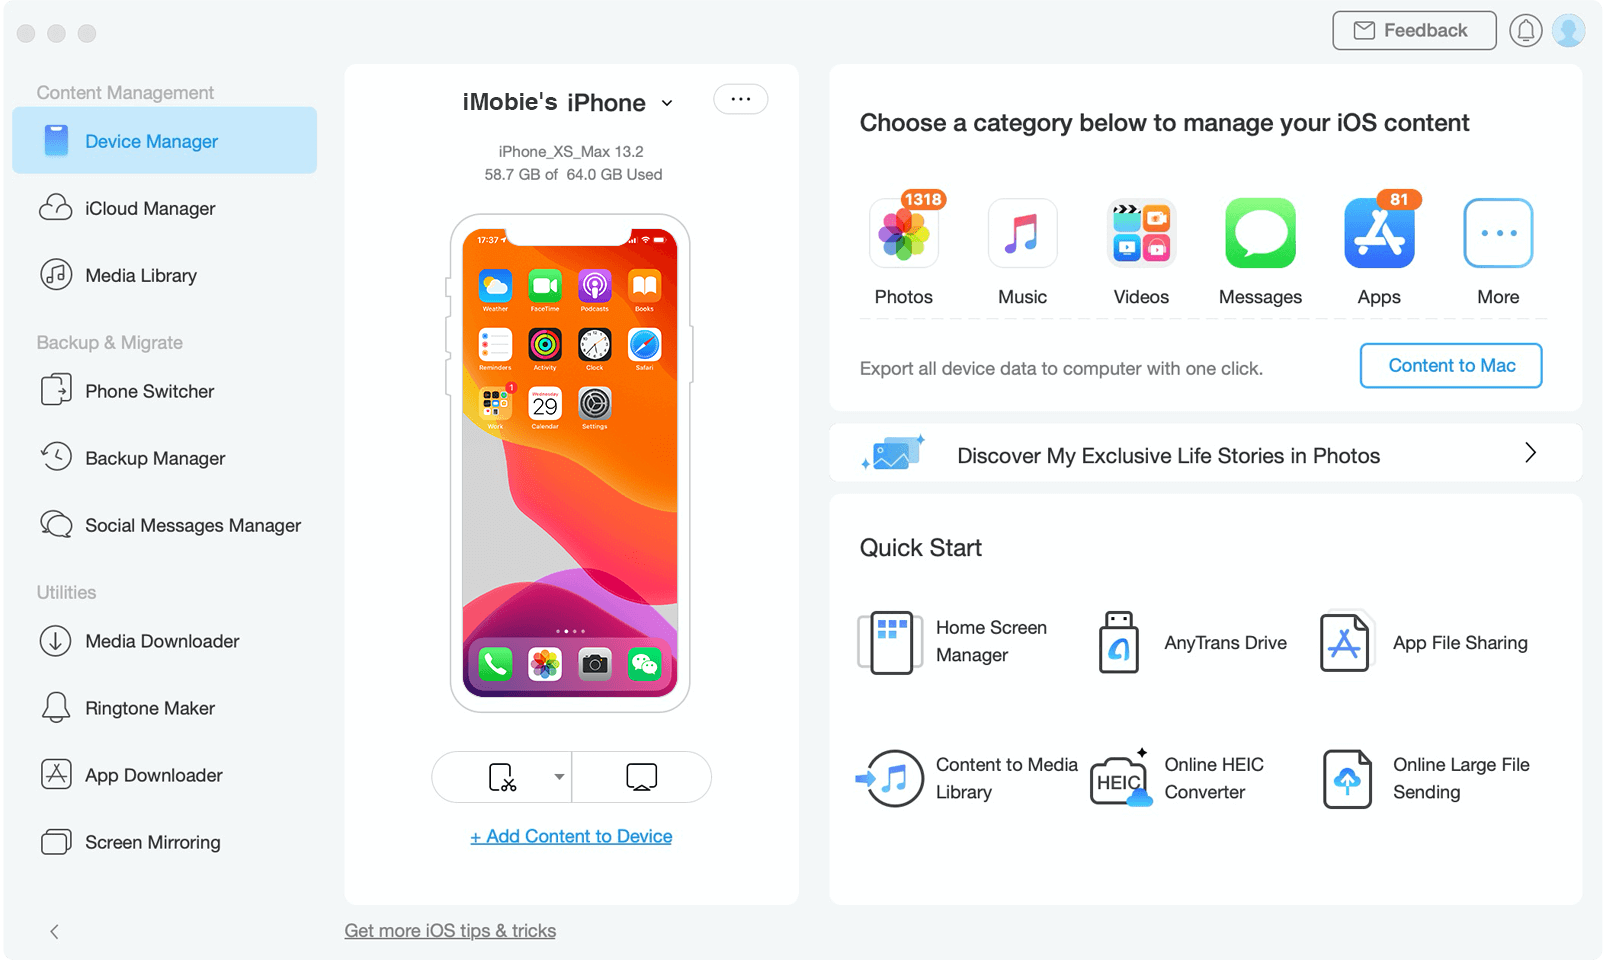
iMobie’s AnyTrans is the perfect solution to transfer data from an Android phone to an iPhone. It overcomes all the issues you’d face with the Move to iOS app. Consequently, this makes AnyTrans the best solution to transfer data from an Android to an iPhone.
With AnyTransfer, you can transfer all your Messages, including every attachment in there. Furthermore, you can also migrate your WhatsApp chats and media files; this isn’t possible when transferring files from Android to iPhone. Moreover, you can move photos, videos maintaining their respective album structure. AnyTrans can transfer your contacts, call logs, music files, ringtones, and possible documents from Android to iOS.
Besides that, you don’t need to Factory reset your iPhone to transfer files. Also, AnyTrans won’t overwrite the existing data, so you’ll not lose any data on your iPhone. In addition, you have the option to select which data to migrate, which is absent on the Move to iOS app.
Here’s how you can transfer data from Android to iPhone using AnyTrans‘ Phone Switch feature:
- Download AnyTrans on your PC or Mac. Make sure you’ve two USB cables so you can transfer files at once.
- Launch AnyTrans on your PC or Mac.
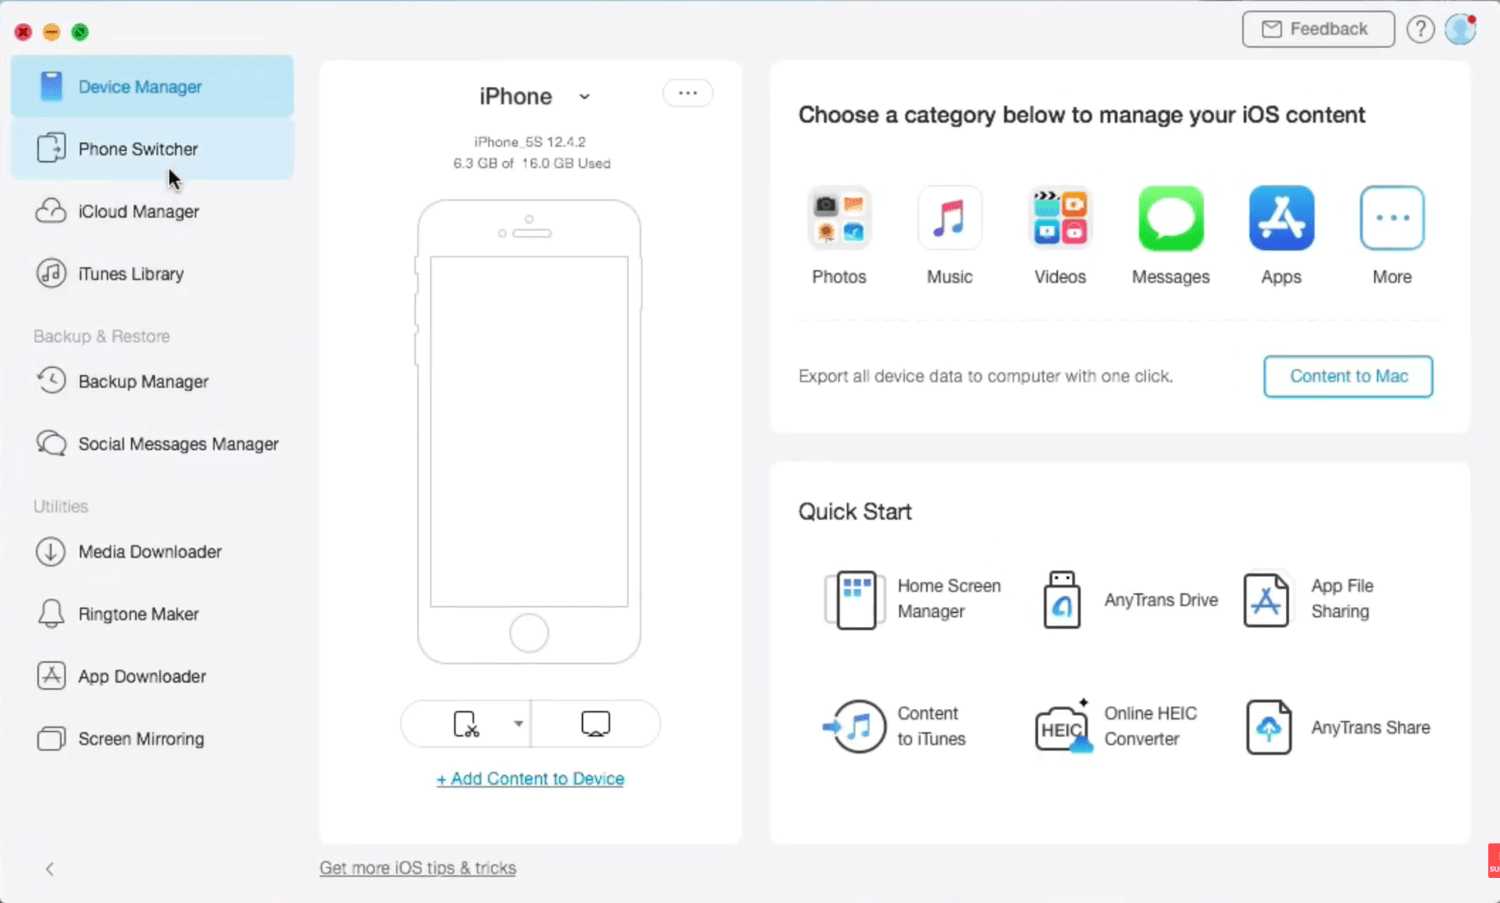
- Connect your Android smartphone and iPhone via USB cables.
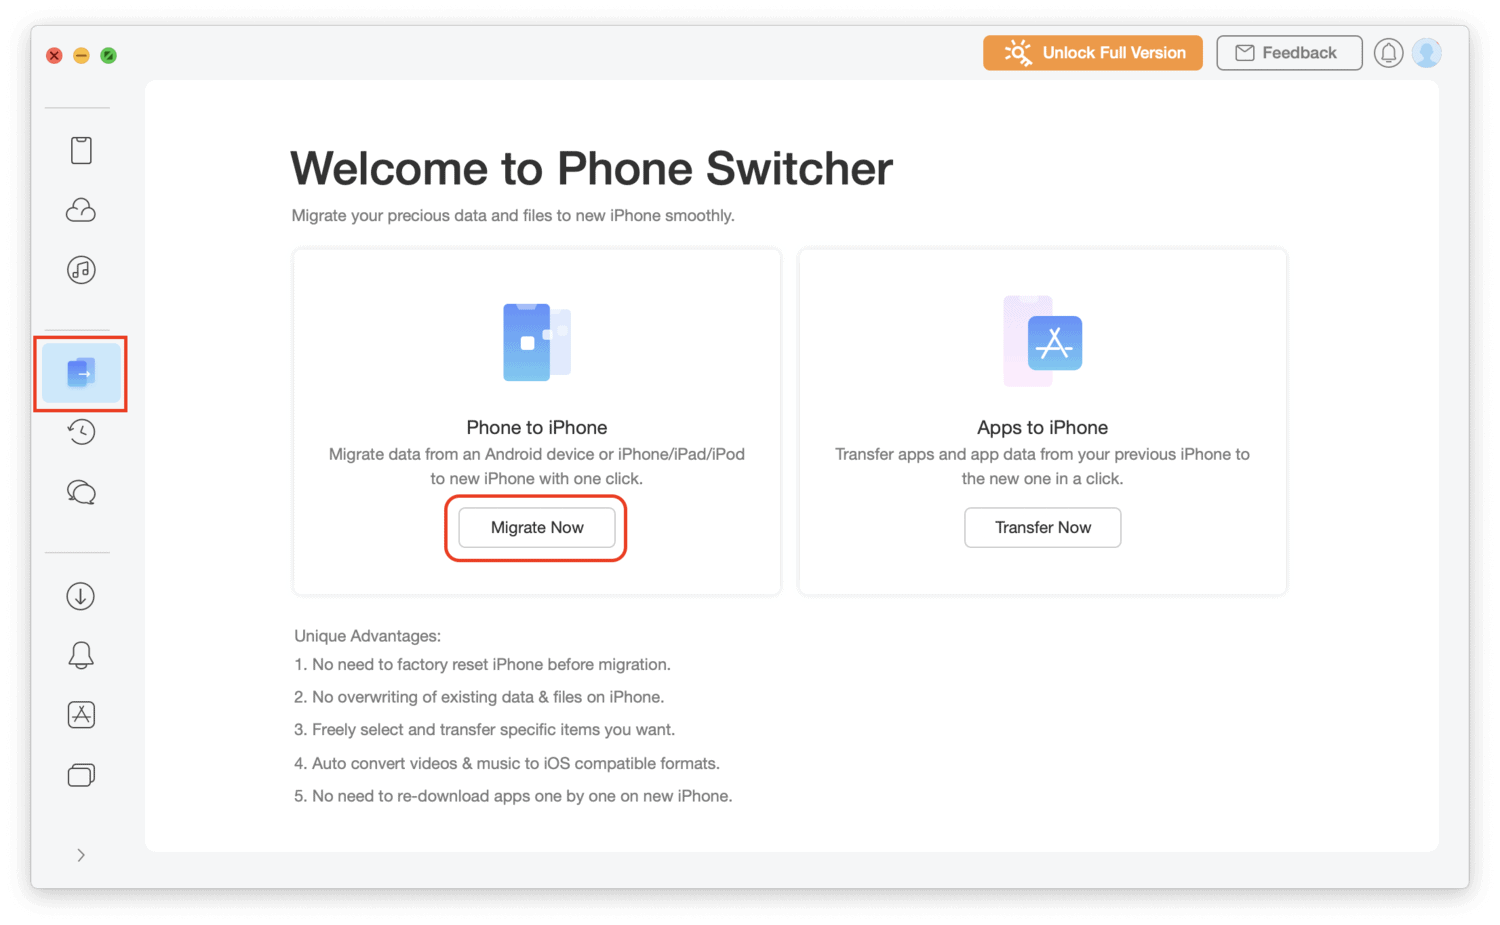
- Choose Phone Switcher from the left, and select the iPhone to iPhone option.
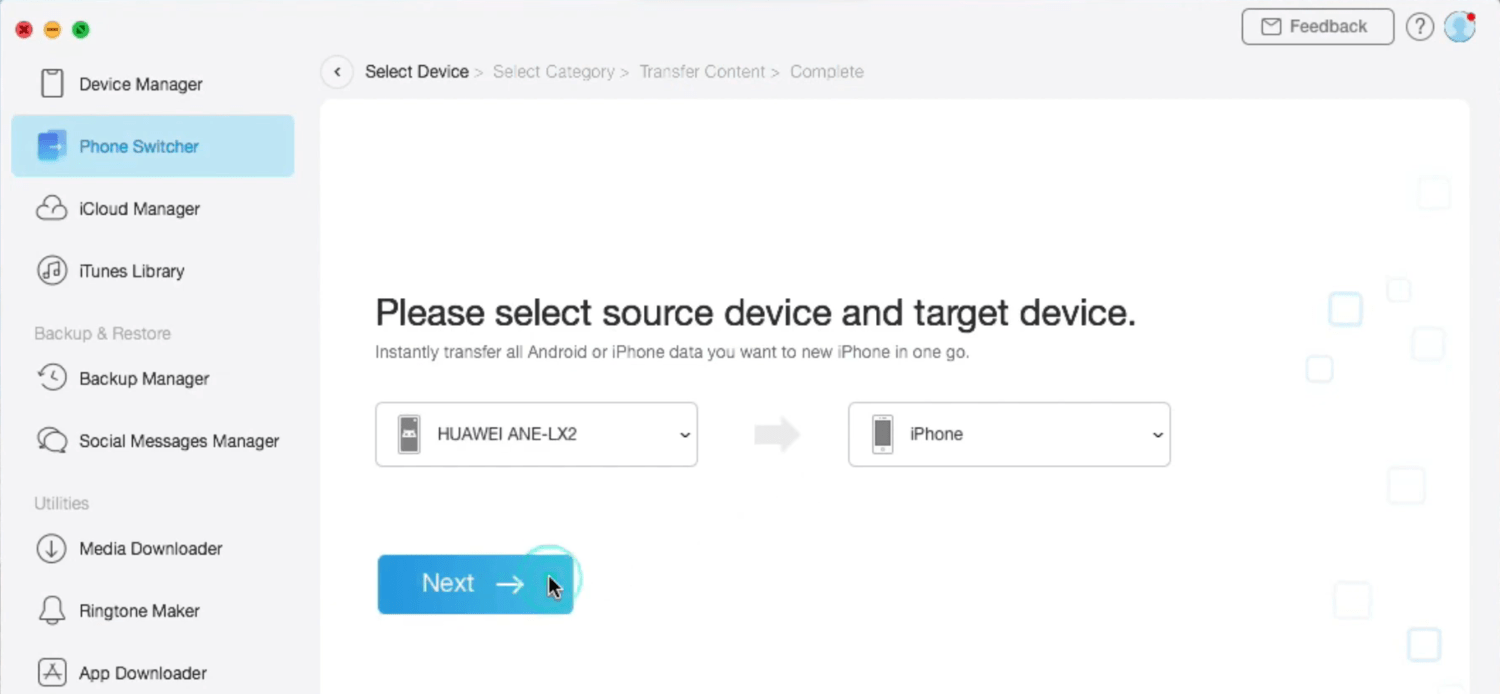
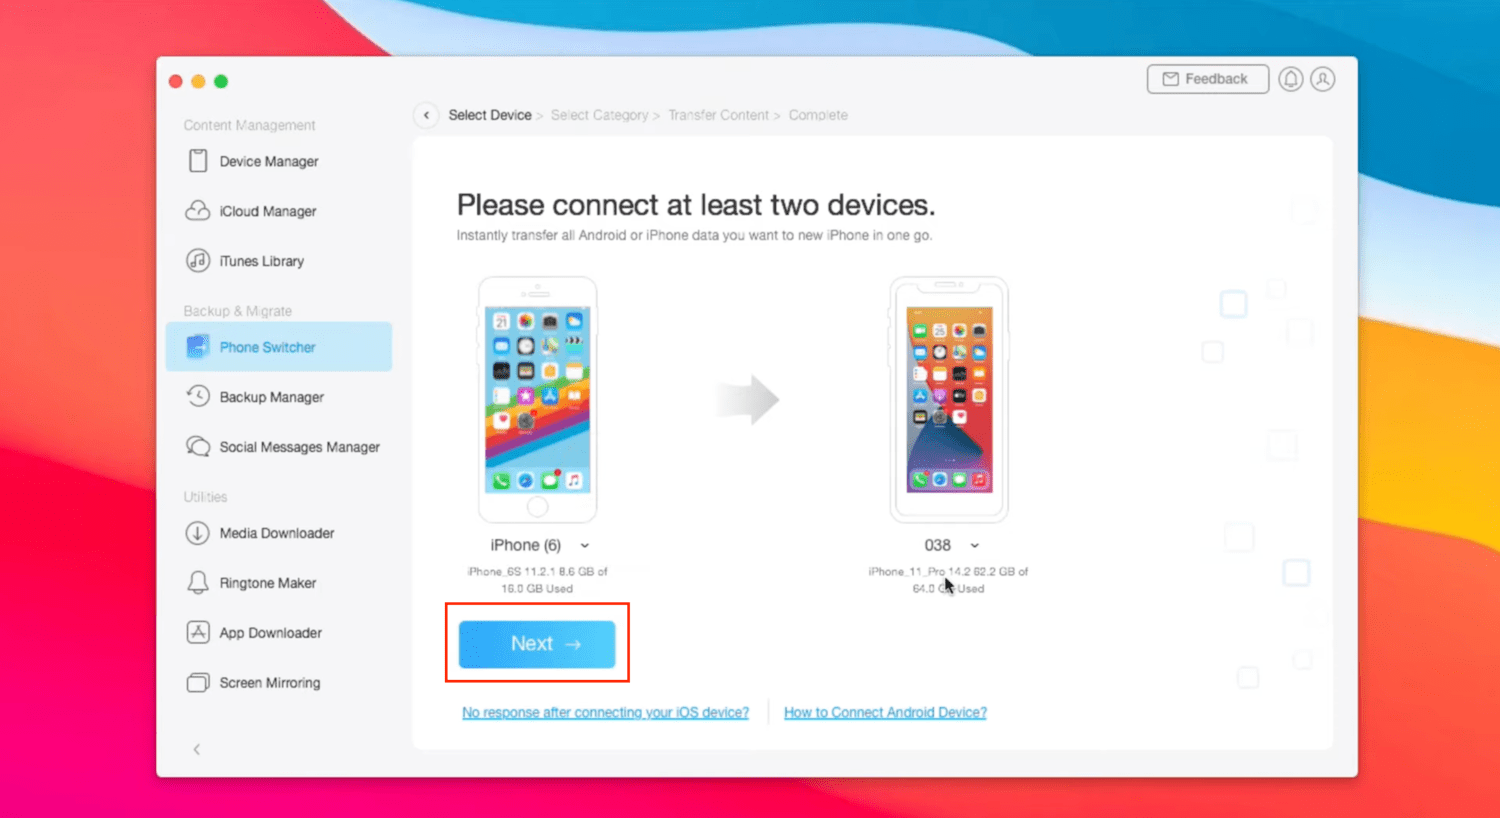
- Select Source (your Android phone) and Target (your iPhone), and hit the Next button.
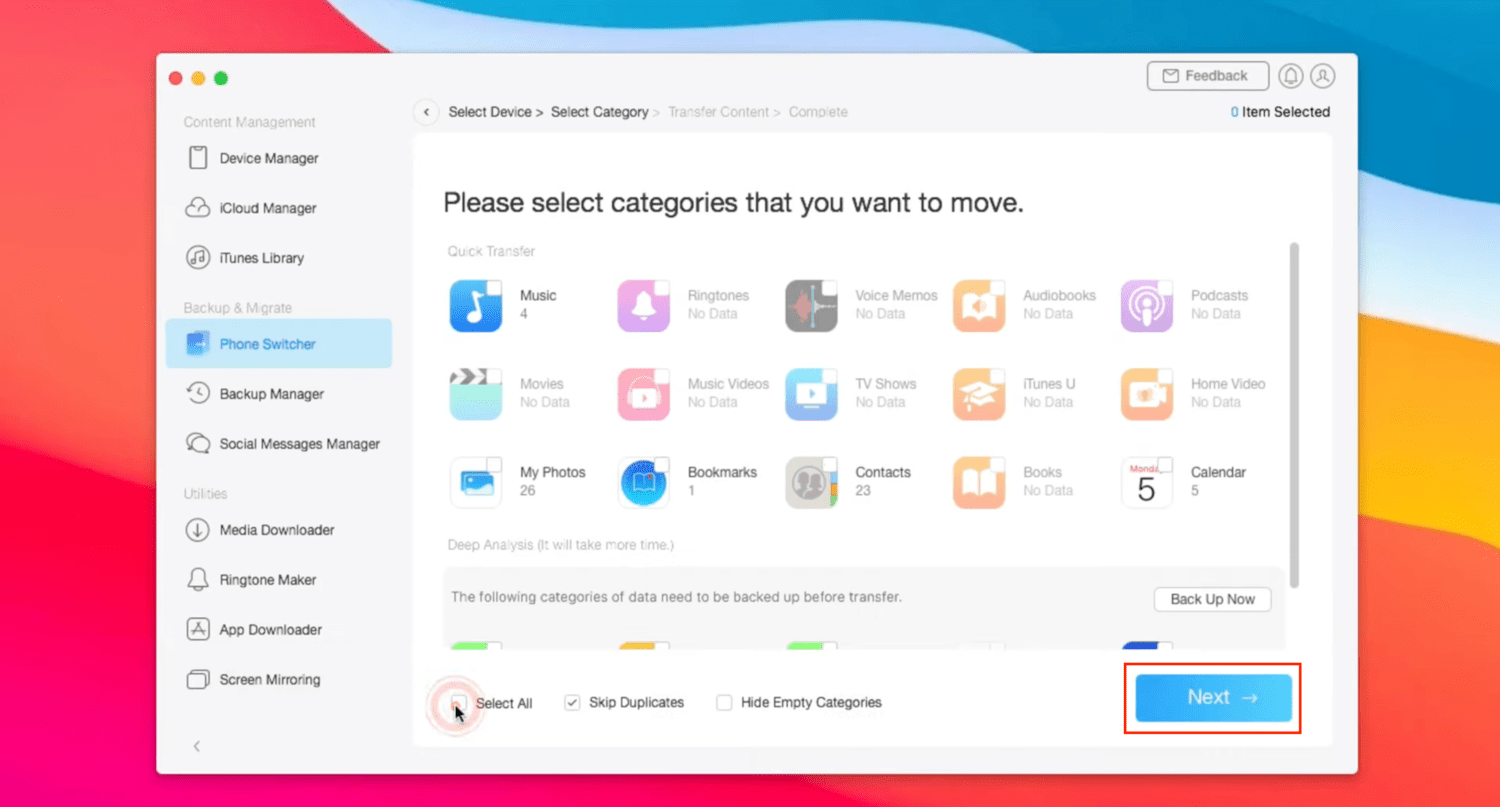
- Select the data you need to transfer and hit Next again. The data will start transferring now. It may take some time for the data to transfer, so be patient.

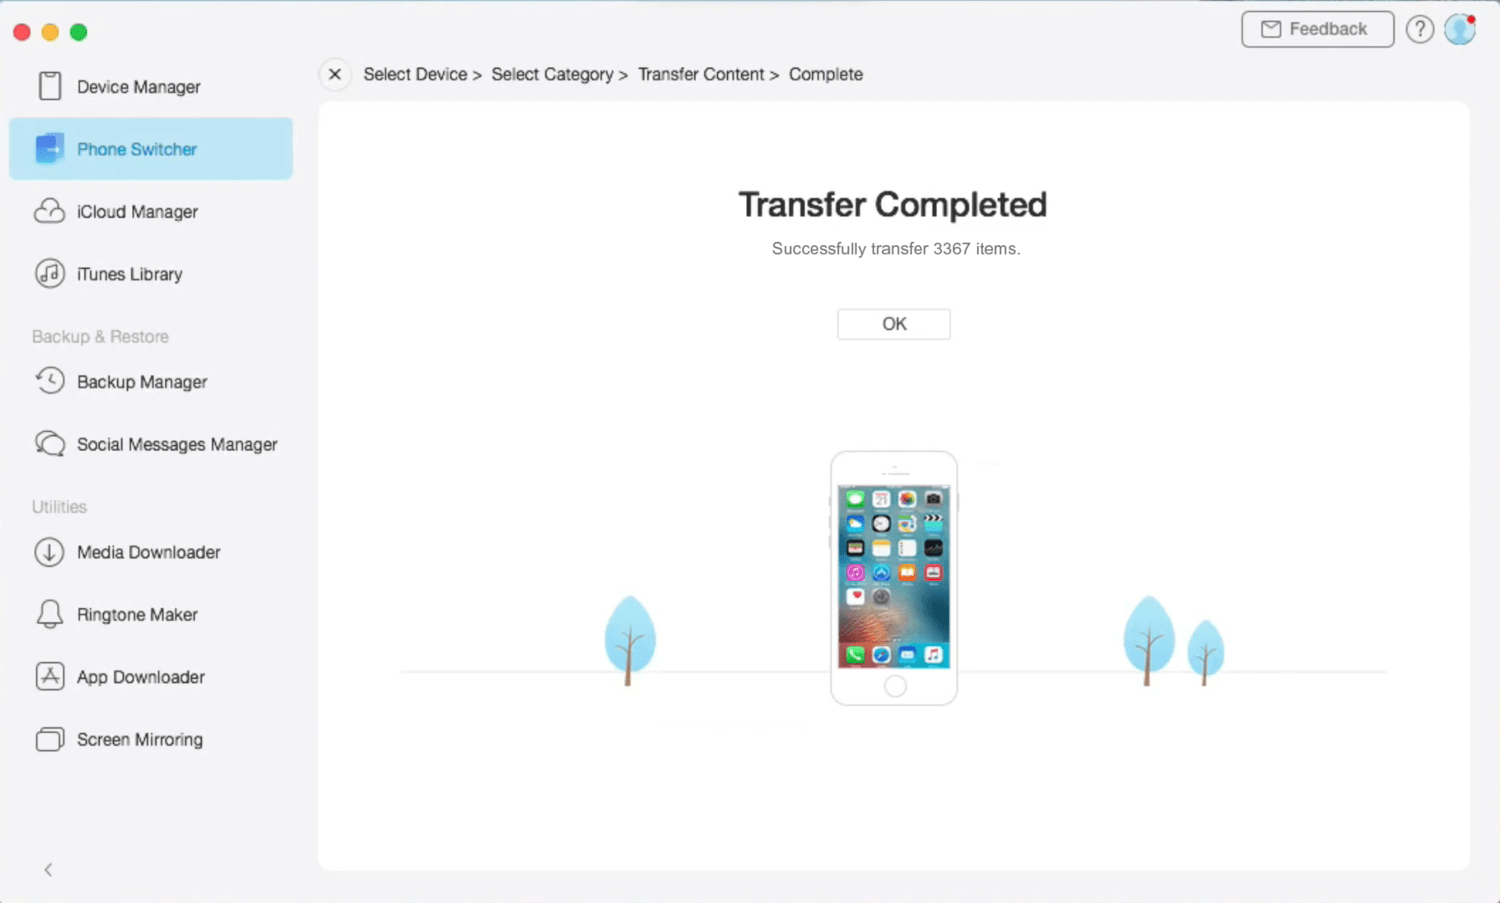
- Once over, you’ll see the Done screen on the software. Click OK below that and it’s done.
Also Read: How to Always Launch Google Chrome in Incognito Mode
Transfer Data from Old iPhone to New iPhone
If you’re an iPhone user already and want to migrate your data to a newer iPhone, then it’s easy to perform. There are two ways to transfer your data from an old iPhone to a new iPhone.
1. Using Apple Quick Start
Apple introduced a solution to migrate data from an existing iPhone to a new iPhone. This way, users might not need to take a backup manually and then transfer the files. It’s an efficient way to set up an iPhone if you manage to have an iPad or iPhone around you.
This process will bring all the data from your old iPhone to the newer iPhone wirelessly. Apple Quick Start is efficient in migration and transfers almost every file and data from your previous iPhone. Here’s how you can set up your iPhone using the Quick Start feature from Apple.
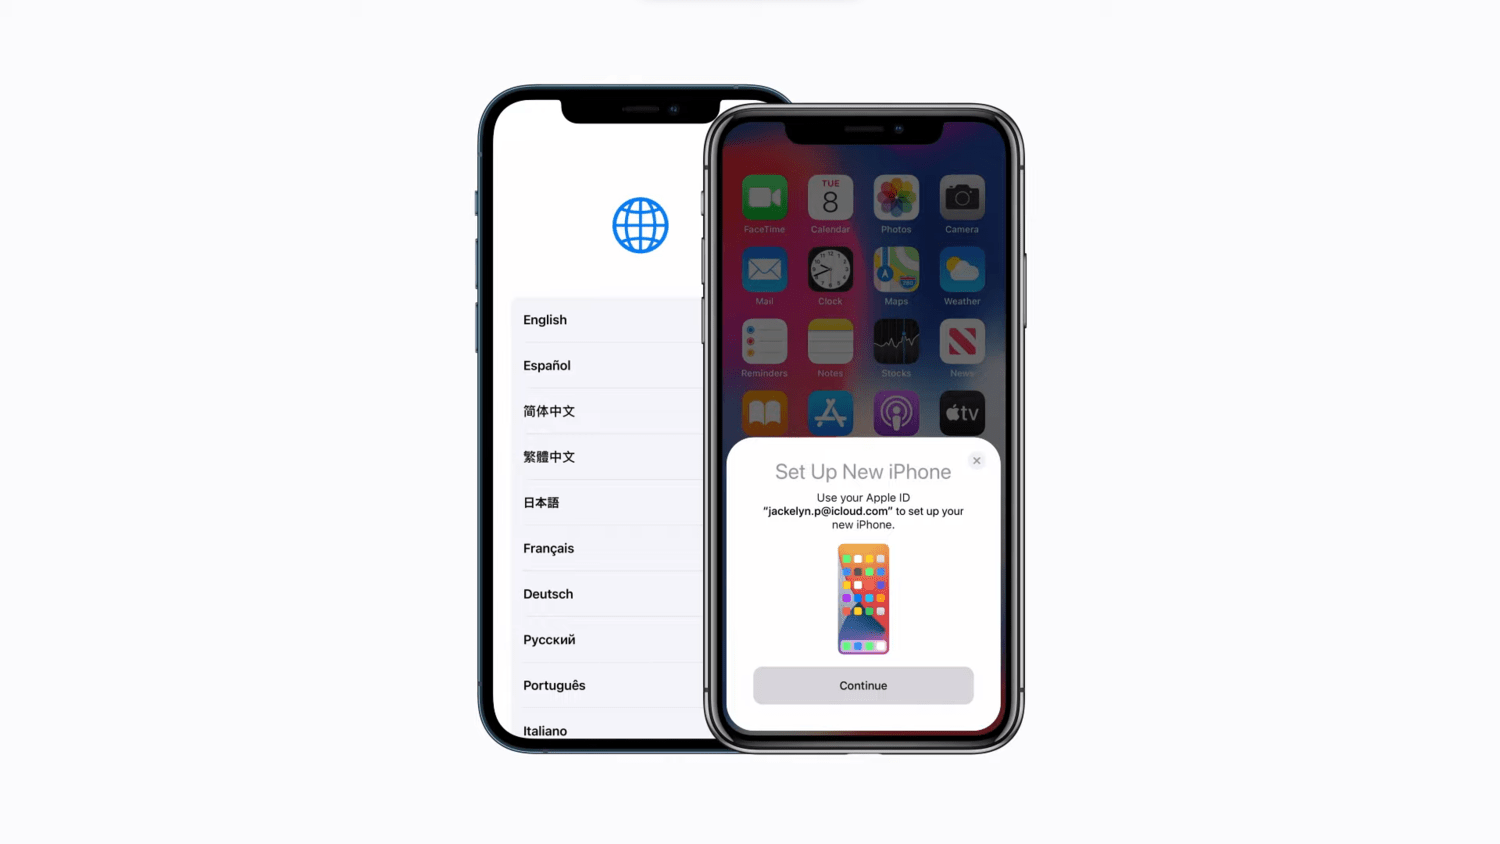
- Turn on your new iPhone and bring your previous iPhone closer to your new iPhone.
- Plug and connect the chargers of both the iPhones.
- Wait for the “Setup your new iPhone” pop-up screen on your previous iPhone, and tap Continue. If you don’t see it, turn on Bluetooth on your previous iPhone, and you should see it.
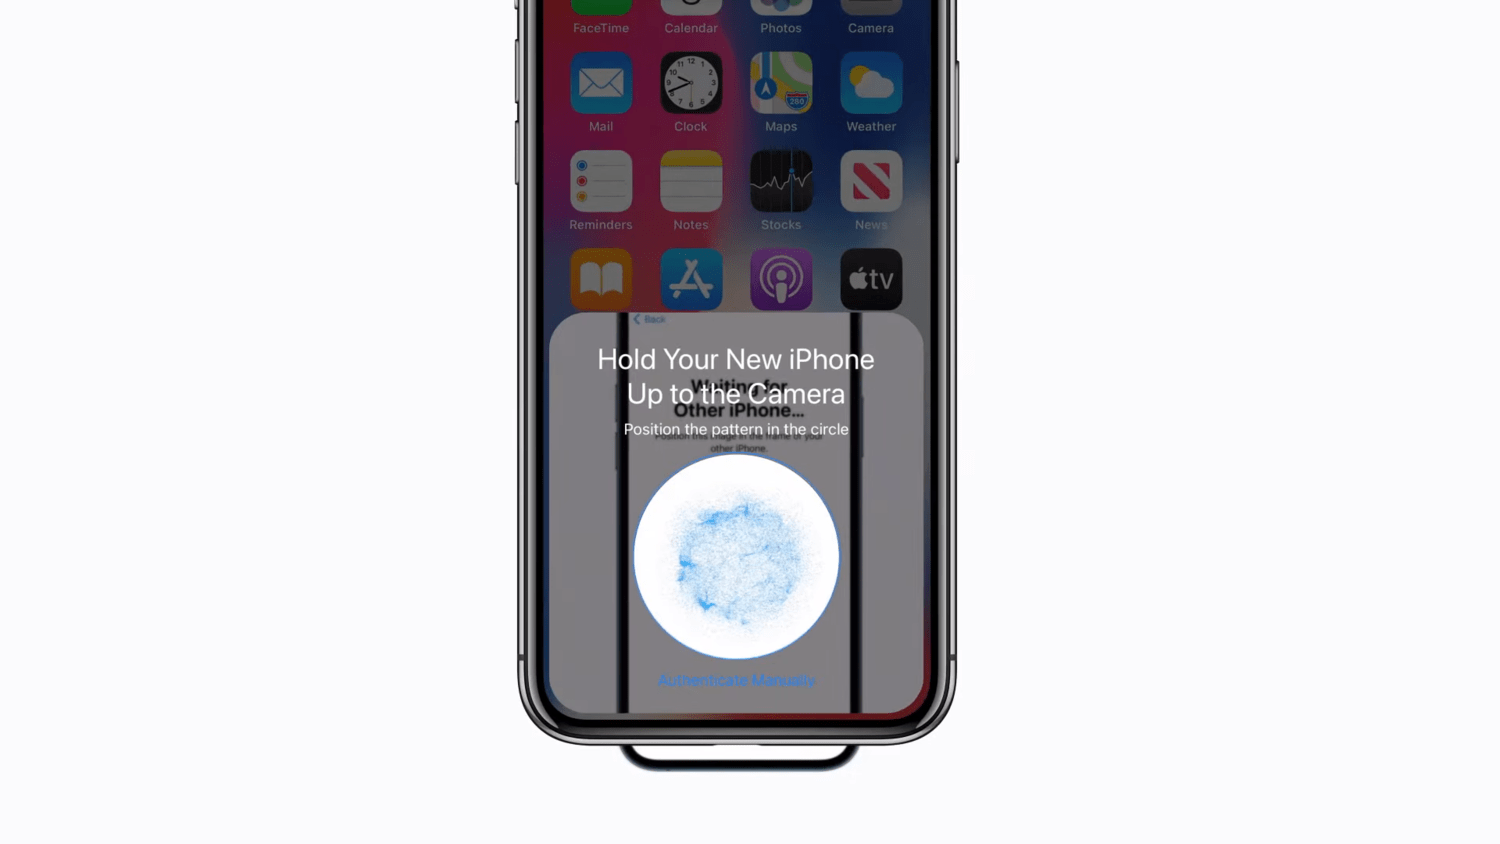
- An animation will appear on your new iPhone. Similarly, your new iPhone will open up the rear camera. Scan the animation on your new iPhone with your old iPhone.
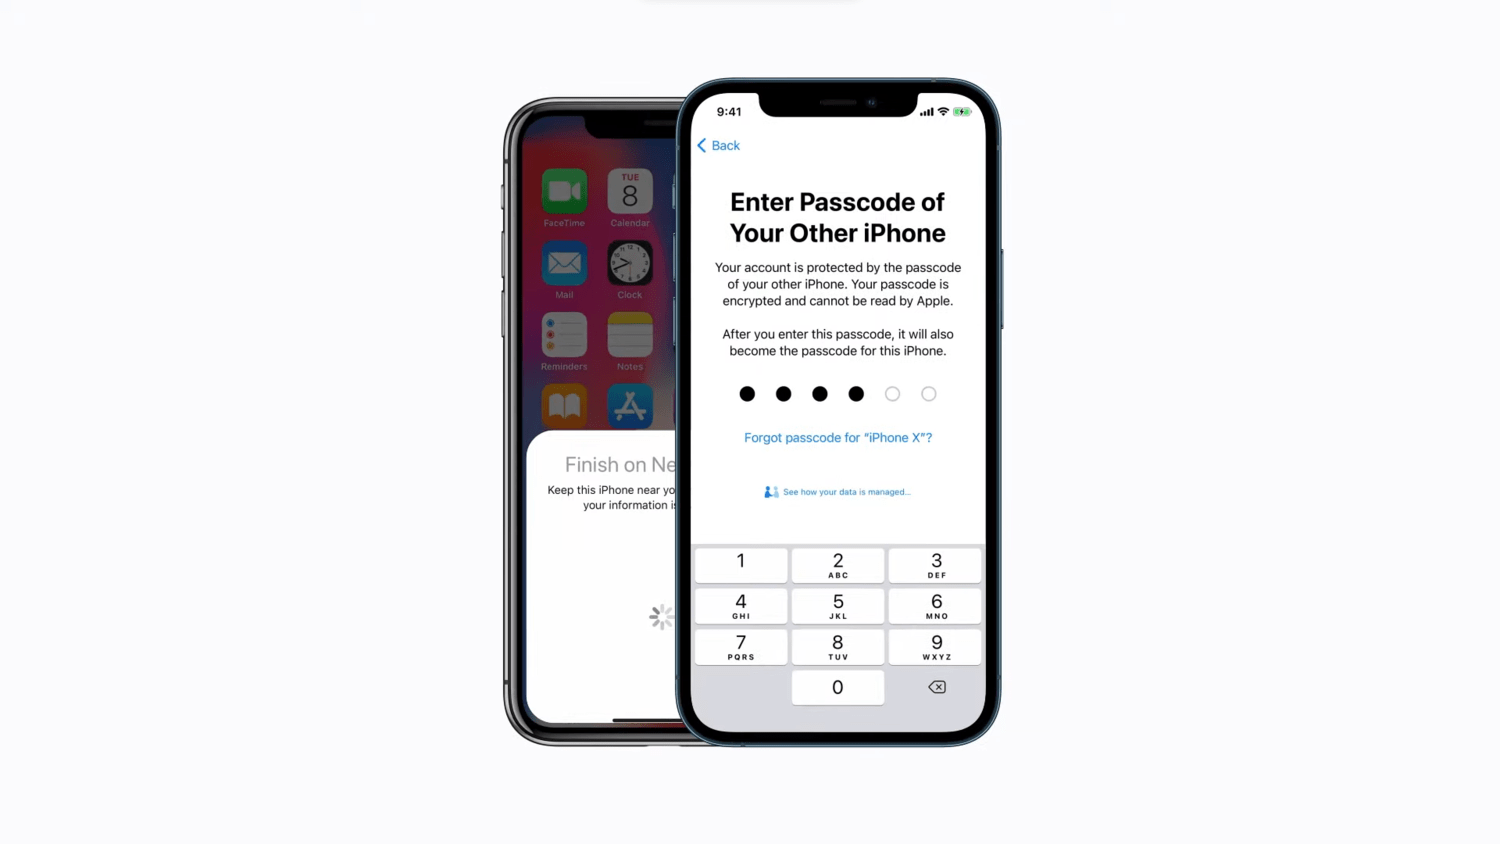
- Enter the old iPhone’s passcode on the new iPhone. Follow the on-screen instructions to set up Face ID or Touch ID. You can also choose the Set up Later option to skip it.
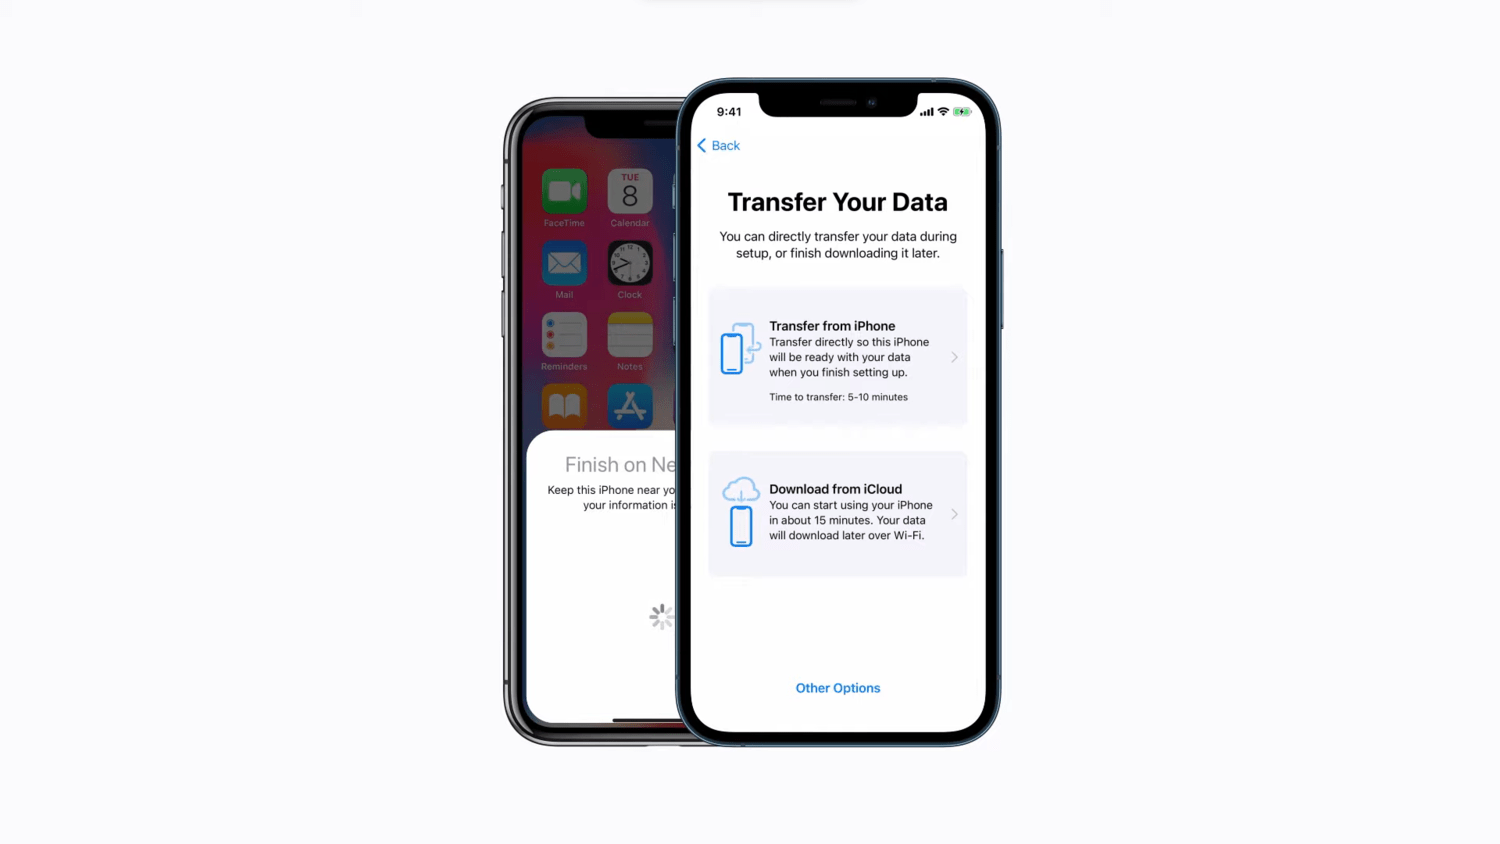
- For the final step, tap on Transfer from iPhone to start transferring your data.
Apple Quick Start Problems
While it’s a good feature from Apple, it has its consequences. There are some things that you’ll miss out on using the Quick Start from Apple when transferring data from the old iPhone to the new iPhone. Here are some of the problems that you might face using Apple’s Quick Start feature.
- Able to transfer only select content from the iPhone.
- Only works if the newer iPhone isn’t set up completely. If already set up, the iPhone needs to be reset and should start the setup again.
- You won’t be able to transfer non-purchased music. Only purchased music is transferrable.
Quick Start is a great way to set up your new iPhone. However, it isn’t much efficient. Given that Quick Start has its pros and cons, you can use the AnyTrans app as an alternative to overcome the issues from Quick Start.
2. Using AnyTrans
iMobie’s AnyTrans is the perfect solution to transfer data from an iPhone to iPhone. Since it overcomes all the problems you might face with Quick Start from Apple, this is the best solution to transfer data from one iPhone to another.
You can choose to transfer content selectively or all of it with one click—no need to reset your iPhone to get it working. As a result, you can choose when to transfer, and also, it won’t erase any existing content. Moreover, the duplicated content is skipped automatically. In addition to that, it merges the WhatsApp chats and media with the respective contacts and combines duplicate contact cards into one.
Using AnyTrans, you can move all your data from your previous iPhone to the newer one without worrying about the setup. Here’s how you can transfer data from an old iPhone to a new iPhone using AnyTrans.
- Download and launch AnyTrans on your PC or Mac. Make sure you’ve two USB cables since you’ll need to connect both iPhones at once.
- Connect your old iPhone and new iPhone via USB cables.
- Choose the Phone Switcher from the left pane, and choose the Phone to iPhone option.
- Select Source (old iPhone) and Target (new iPhone), and hit the Next button. Make sure they’re in the right order so you don’t do the opposite i.e., transferrign new iPhone data to the old iPhone.
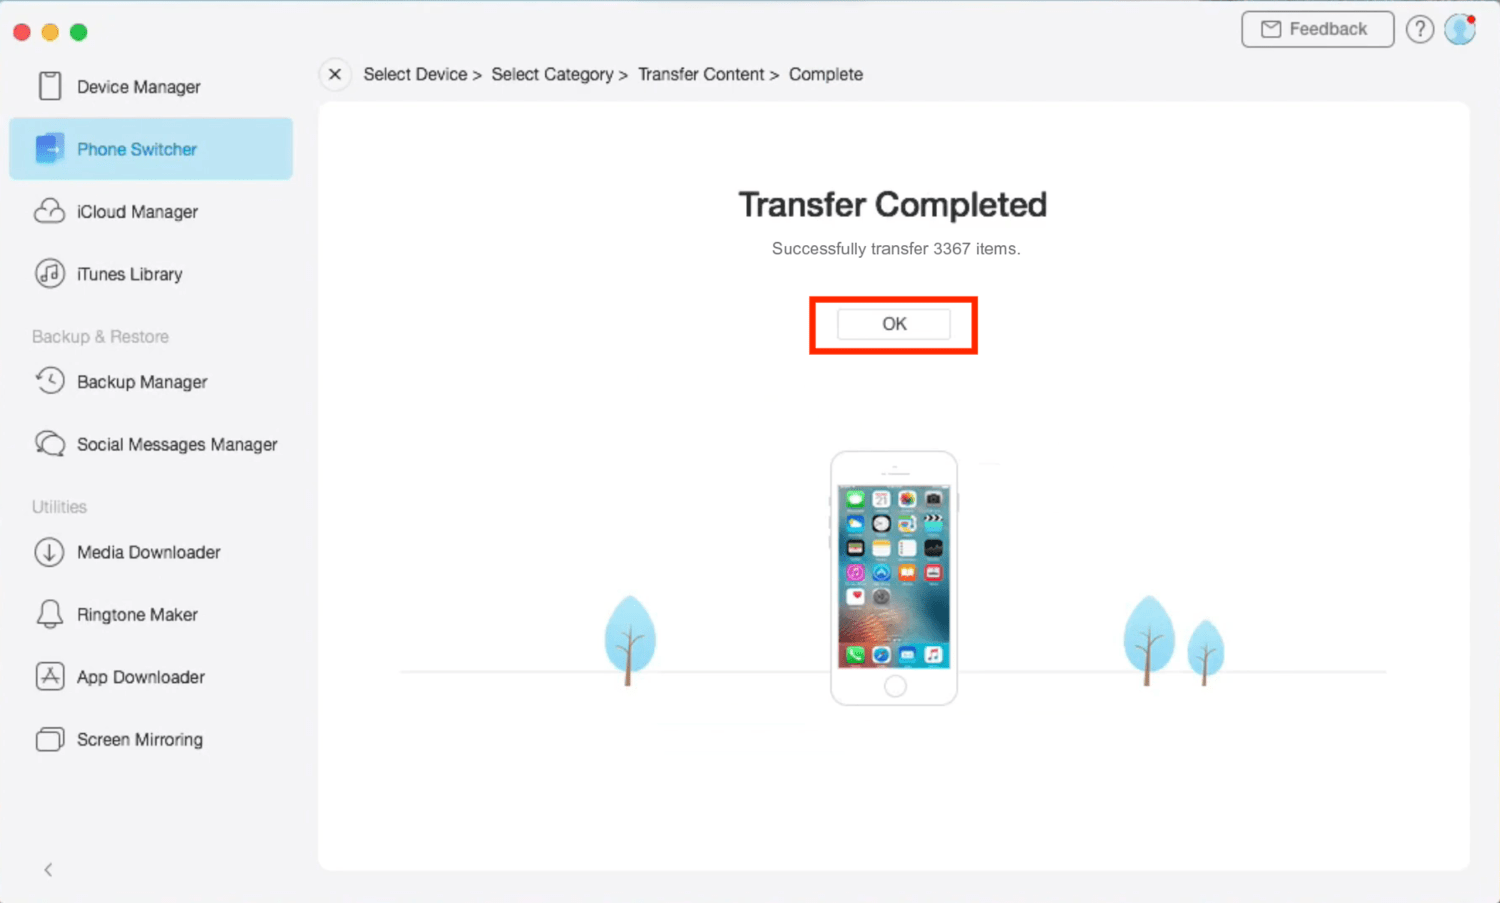
- Select the data in categories that you need to transfer and hit Next option. The data will begin transferring now. It might take some time for the data to transfer.
- Once done, you’ll see the Transfer Completed screen on the software. Click OK below that and the process is done.
Also Read: One AirPod Not Working? Here are 10 Things to Do If Your Right or Left AirPod is Not Working
Conclusion
We hope you understood how to transfer data from any phone to the iPhone 13. iPhone 13 is a great device in its own class, and if you’re planning to switch from an Android or iPhone, this guide will be handy for you. You can use any of these methods to migrate data between two phones.
However, if you ask us, we would recommend the AnyTrans method for both cases—Android to iPhone and iPhone to iPhone. In case, if you have any queries or suggestions regarding this guide, you can leave them in the comments below.