Do you have files on your USB but are now replaced with shortcut files? Or worse, your files are all gone but when you check your USB capacity it says it’s not empty. Where could it have gone to?
You know very well that your resident antivirus (Windows Defender) is updated almost every day but still you can’t find all your files inside your USB— that my friend spells “trouble”.
If you don’t know anything about command prompt or regedit then you are screwed.
Nah, I’m just messing with you. That’s not the case now because I am here to help you.
See some people sometimes end up screwing their Windows system once they start fiddling the registry and ultimately leaves the whole computer stuck on boot. Sometimes, it is just the blinking cursor that will be greeting you. No more Windows intro animation. Oh, the horror!
There is a very easy way to fix your problem and it doesn’t involve popping your brains out. No need for command lines to type and no involved coding, I promise.
Homeys brace yourselves for these step by step instructions as you will find how easy this is. You will start wondering why some geek did not tell you about this before.
The Things You Need To Do…
First and foremost you will need to download a software called “7zip”. Go on! Download it. It is just 1MB so you won’t need a very strong internet connection. Even your mobile phone data connection can handle it.

Above picture is the logo. Got it?
Now if you have 7zip already installed on your computer then you are ready.
Next step is to make the hidden files suddenly appear.
If you have a Windows 7 operating system on your machine here is how you do it:
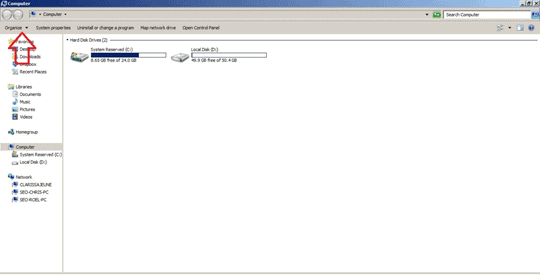
- First, Open the My Computer.
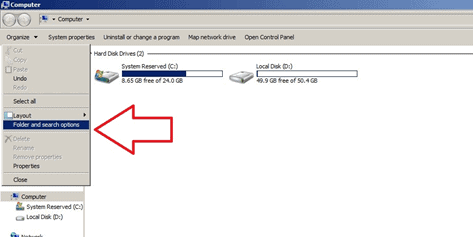
- Click “Organize”.
- Click “Folder and Search Option”
- Click “View”.
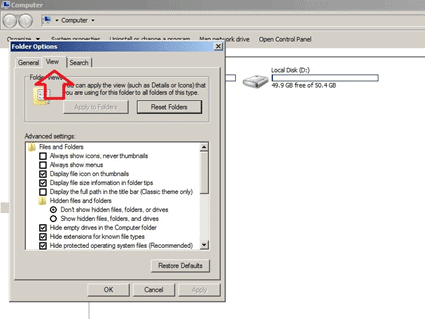
- Now tick the “Show hidden files, folders, and drives.
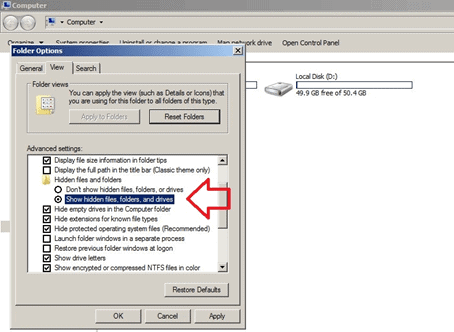
- Uncheck “Hide protected operating system files (Recommended)”
- Click Apply and then OK.
You will notice that if you go to Local Disk C, which is where your windows files are installed, some folders and unfamiliar files have been added. Those are not the virus. So keep your calm. We’ll get there.
Disabling the “Autorun”
Now, I will remind you that you have to have the “Autorun” function on your Windows disabled. If you still have not or just don’t know what I am talking about go to your “Control Panel”.
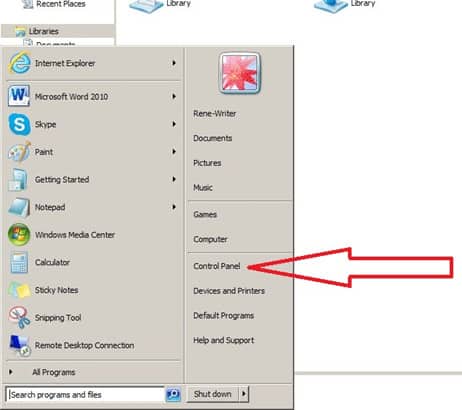
Yes, click it and find the “Autoplay” on the list. Enter Autoplay and scroll to the bottom and click “Reset all defaults”. Scroll up and uncheck “Use Autoplay for all media and devices”. Scroll down again and click “Save”. It will throw you out back to the Control Panel list and then you just close its window.
Finally, the Cleansing of Your USB…
Next is the trickiest part so pay close attention. Read carefully word for word what I am about to tell you.
You can now insert your infected USB containing your valuable files but please, do not open it yet. Let it sit there for a while.
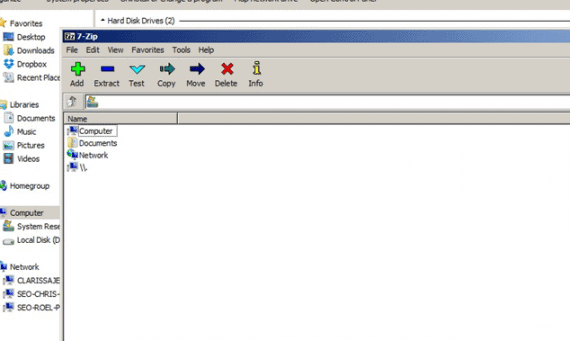
Open the installed 7zip from your list of installed programs. Once it is opened it will show you the list of your installed drives and networks.
Click Computer then find the letter corresponded to your drive.
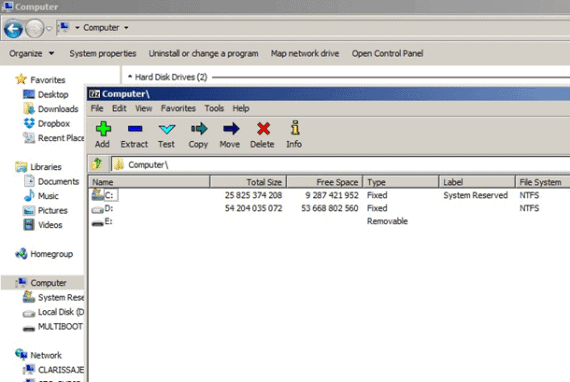
Usually, it is the one with the “Removable” type. But if you have multiple USB devices attached to your machine you just have to go to My Computer and double check. Just remember to NOT open it yet.
Back to 7zip, if you have found the corresponded drive letter of your infected USB, click on it to see the content. Since it is your USB, I expect you to know what files you have saved in it; the names and formats: Surely, you do.
Remember this: There are two types of malware infection with USB. One is the replicating virus or the worm type. You will find that your files have been replaced by shortcuts with the same name. And the other one is Trojan types that deletes or hides your files and system information.
Once you are inside your infected USB, recognize all your files and start deleting files that are not supposed to be there especially the ones with a *.vbs format. Most likely, those are the culprit behind the demise of your USB stick. So there you go. Your USB is clean for now.
Lastly, since your files are most likely set to “Hidden” by the virus, you will need to download and install “File Attribute Reset Tool”. It is just 2MB and easy to use. Once installed just drag your hidden files to its user interface and choose reset and voila! Your files are back to normal.
Wow, if we disable the auto run we are solving the 50% of the virus installations on the windows machines. This is the best way if we don’t have antivirus installed, especially needed, when we format the windows computer and recovering the files.