Personally, I always had a strong corner to get my hands on a Macintosh or iMac device. But I had to adjust to Windows only. But with virtual box utilities, everyone can enjoy the playfield of iMac. You can easily install macOS on Windows 10 with aid of Virtual box and take explore all features like virtual assistant Siri, minimalistic and unique UI of macOS and what not. So if you are also looking for an easy guide to install macOS on windows 10, we have some steps lined up for you.
Important Checklist To Install macOS on Windows 10
But before we proceed you must check if your system meets the necessary software and hardware utilities. Mark down the things mentioned below and with the links provided install the software wherever necessary.
- 64-Bit Architecture computer
- Minimum 4 GB of RAM.
- Minimum 30GB of free space.
- A dual-core processor or above

How To Install macOS on Windows in Virtual Box
Now when you have the desired hardware and software, you can proceed with the steps mentioned below. Just make sure the read the entire guide first before you proceed to install macOS on Windows 10.
Step 1: Groundwork Preparations
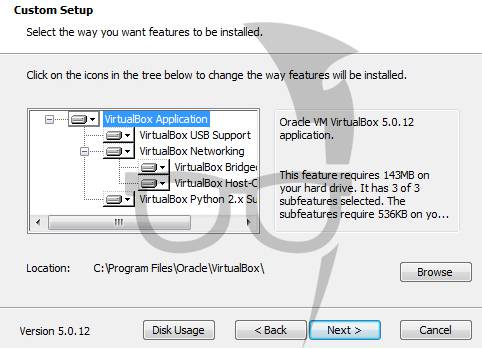
Download and extract the macOS Sierra image file (5 GB) with any file extractor tools like Winrar or Winzip. Next, download the latest version of Virtual Box and install it on your Windows 10 machine. Installing virtual box is very easy, you just have to select the installation directory and keep clicking Next and then Finish. Once you have done this, you can proceed further to install macOS on Windows 10.
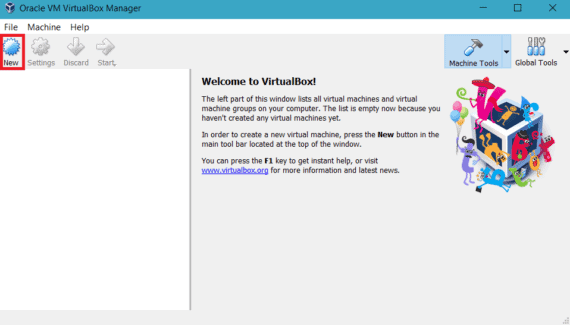
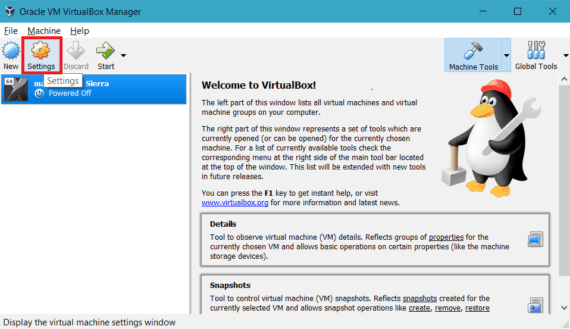
Step 2: Creating New Virtual Machine
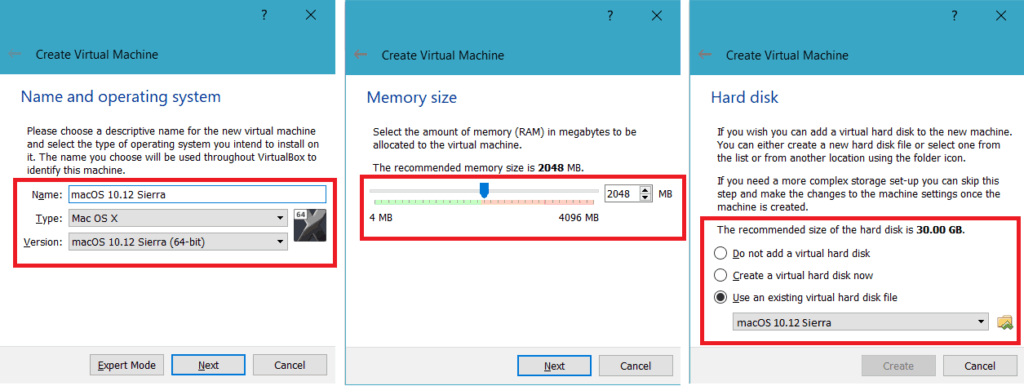
Open the Virtual Box you have installed just now. Click on New button at the top left corner of the screen. Now add the following parameters to the required fields.
Type: Mac OS X
Version: Mac OS X 10.11 El Capitan (64 bit) or 10.12 Sierra
Virtual Disk Name: macOS 10.12 Sierra.vmdk
Memory: 2048MB minimum
Lastly, browse and select the extracted macOS Sierra Image File at Hard Disk box.
Also Read:7 Ways To Fix Windows 10 Taskbar Not Working Issue
Step 3: Modifications In Virtual Machine
Once the basic Virtual Machine setup is done, you need to do certain modifications. Click on Settings and then General tab on the left side. Put everything default there.
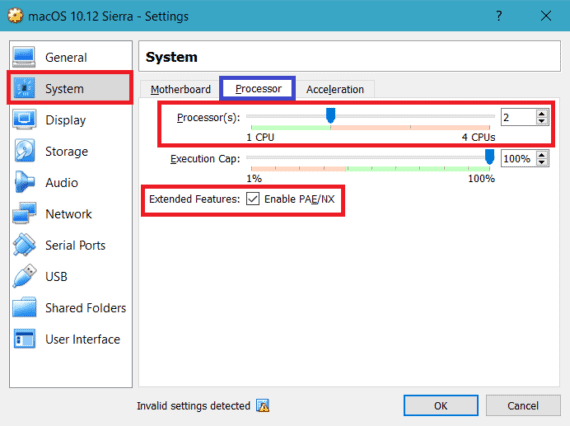
After that, click on System tab which is below the General tab.
Under Processor option, select 2 CPU and also check the box which says “Enable PAE/NX”
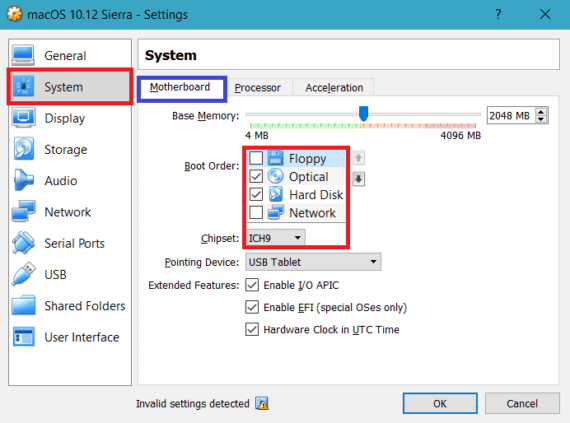
Under Motherboard option, enable EFI, and disable FLOPPY.
Next, select Chipset as IHC9.
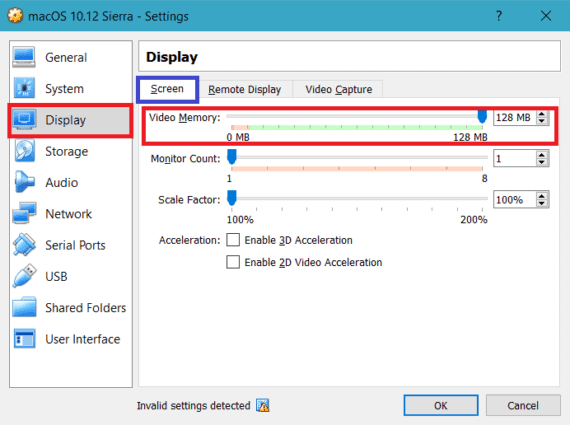
In Display tab, under Screen option, select Video Memory to 128MB.
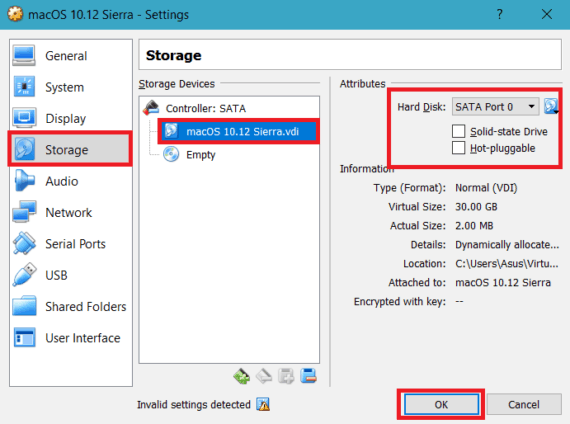
Finally, under Storage, choose your “macOS 10.12 Sierra.vmdk” and make sure that under Attributes tab you set Hard Disk to SATA Port 0.
Once everything is done, click OK and Close your Virtual Box window.
Step 4: Installing macOS on Windows in Virtual Box
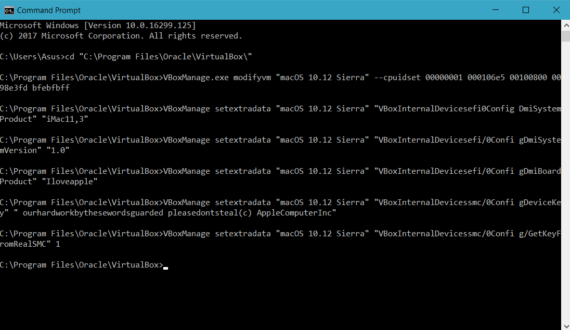
Copy the below code and replace the word “Name of your Virtual Machine” with your Virtual Machine Name which can be found in General Settings, then under Basic. Also make sure the path mentioned at Line #1 is correctly pointing to your Virtual Machine installation direcroty.
Now, click on Start Menu and search for “Command Prompt“. Right click on it and select “Run as Administrator“. After opening the command prompt, paste the edited code at the command prompt and hit Enter. Leave your system for a while until entire installation process is completed.
Step 5: Starting macOS Sierra on Windows 10
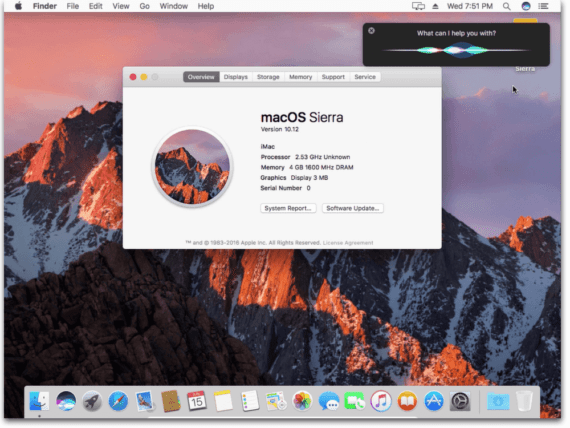
Open your Virtual Box then click on Start or Run the macOS Sierra VM and run your newly installed macOS Sierra on Windows 10 in Virtual Box. For a while, you may see a black screen with some random code instructions being running on it. Don’t worry about it, your Virtual Box is making final optimizations.
From here, you can easily continue with standard introduction part of Sierra. Follow basic on-screen introductions to finish the setup to install macOS on Windows 10.
Also Read:How To Fix Err_Connection_Timed_Out Error in Google Chrome
Final Words about macOS Sierra on Windows 10
I have tried to explain the entire process to install macOS on Windows 10 in Virtual Box in a very easy fashion. Still, if you find any difficulty, do let us know in the comments section below. There exists a way to install macOS on Windows 10 without Virtual box, but you need a separate hard drive and some more considerations and a lot of tedious tasks before you can actually access macOS Sierra. So it is always a good choice to act smartly and access the shortcut way. This is the place where the virtual box will come to aid to install macOS on Windows 10.
Hi,
Can you provide an updated version of Image File?
https://support.apple.com/en-us/102662
There is a choice of mac system downloads there, just click “Web browser”.
Hello,
the downloadlink for sierra is broken.
could you upload a new one?
Thanks.
Patrick