If you have an old Windows laptop or PC lying around, the best way to bring it back to life is using a lightweight operating system, unlike Windows. Recently, Google announced a new way to breathe life to your old PC and MacBooks with Chrome OS Flex.
There were several ways to install Chrome OS previously, but the tables have turned now; Google is now supporting third-party hardware with Chrome OS Flex.
Here’s a definitive guide on how to install Chrome OS Flex on your Windows PC.
What Exactly is Chrome OS Flex?
Neverware was a company that was developing CloudReady, a Chrome OS fork that supported third-party hardware. A couple of years ago, Google acquired Neverware and took over the CloudReady project, and released Chrome OS Flex.
It’s basically Chrome OS with Google Assistant support, along with other Google services. However, there’s one caveat — Chrome OS Flex doesn’t come with Google Play Store on board.
Chrome OS Flex is available for enterprise and education users at no cost. Albeit, there are no restrictions for regular users who want to install it on their Windows or Mac PCs. The hardware requirements for Chrome OS Flex are minimal yet offers fast performance.
Installation Requirements
- USB Pen drive with 8 GB or more storage.
- Windows PC with Intel or AMD 32-bit or 64-bit processors.
- 4 GB RAM or more.
- 16 GB or more internal storage.
How to Install Chrome OS Flex on Windows PC (2026)
Once you’re ready with the prerequisites, you can proceed to install Chrome OS Flex on your Windows laptop:
Step 1: Flash Chrome OS Flex on Pen Drive
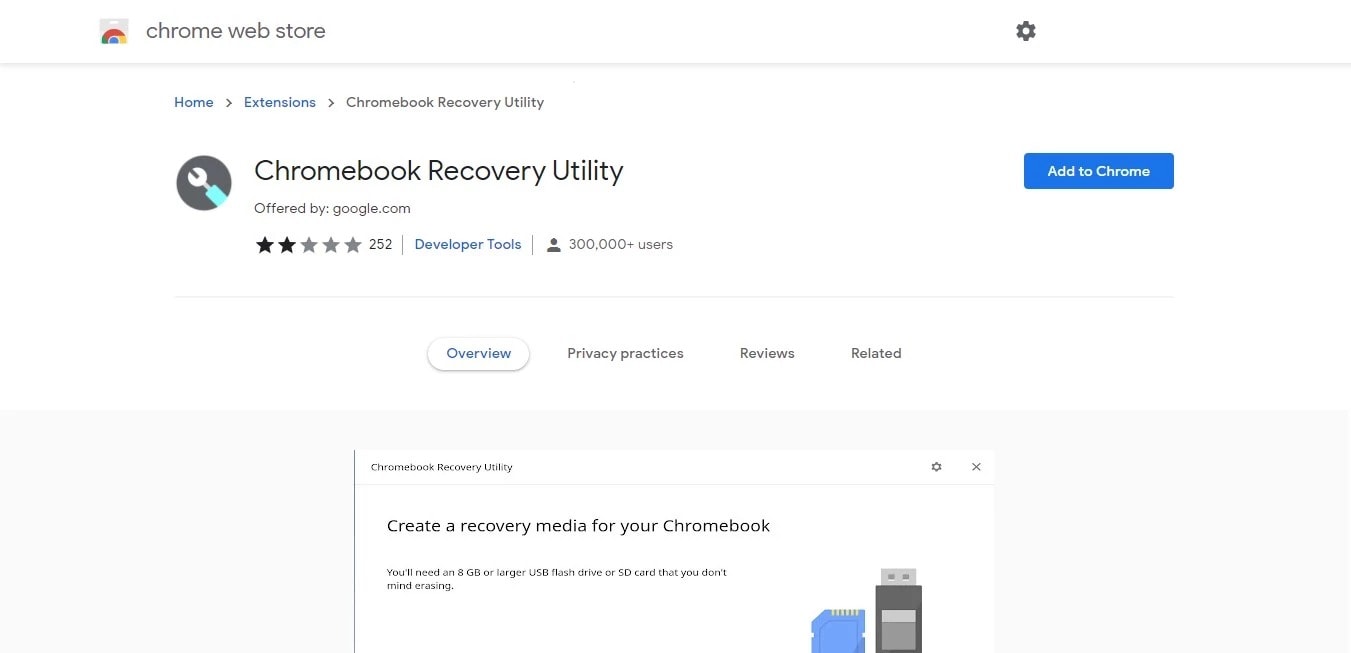
- Install Chromebook Recovery Utility extension from the Chrome Web Store.
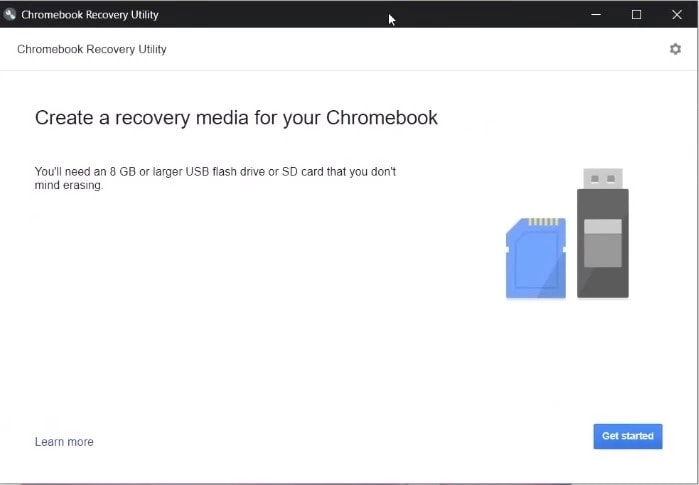
- Plug your Pen Drive into your PC, and open the Chromebook Recovery Utility.
- Click on the Get Started button.
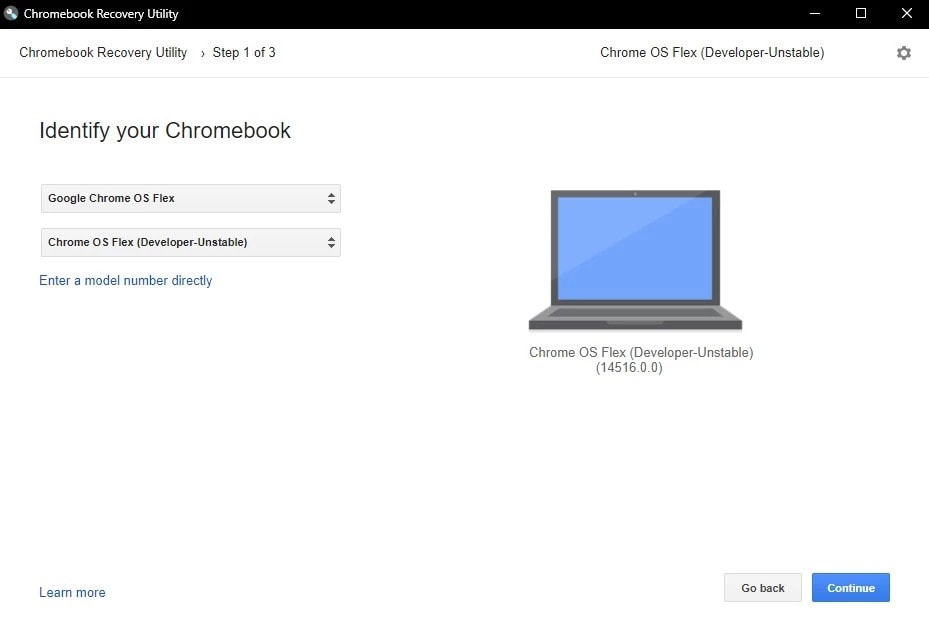
- Hit “Select a model from a list”. From the “Select a manufacturer” drop-down menu, choose Google Chrome OS Flex.
- From the next drop-down menu, select Chrome OS Flex (Developer-Unstable) or the latest version from the list.
- Hit Continue once done.
- Select the USB Drive from the list and click Continue.
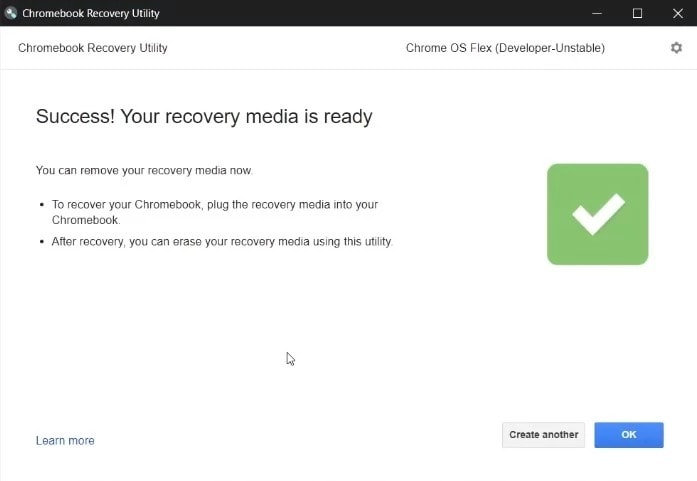
- Hit Create Now, and the Chromebook Recovery Utility will start flashing Chrome OS Flex to the USB drive. The process might take some time, depending on your internet speed and the PC specifications.
Step 2: Install Chrome OS Flex on Windows PC or Laptop

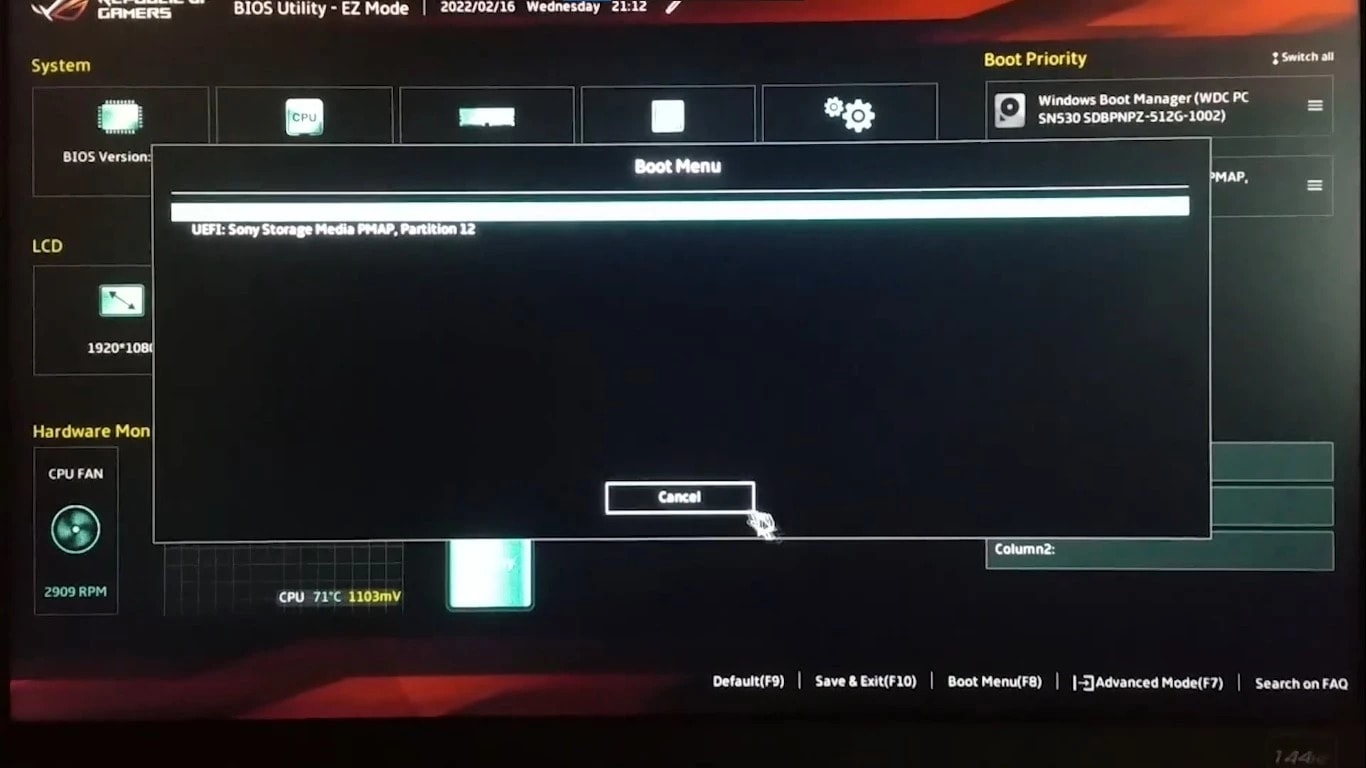
Once the Chrome OS Flex completes flashing, restart your PC and press the Boot key. In case you don’t know the boot key for your computer, here’s a list of the boot keys for each manufacturer. If you’re installing this on a custom PC build, you might have to look for the boot key online.
| Manufacturer | Boot Key |
|---|---|
| Acer | F2 |
| Apple | Hold Option key |
| Asus | Del |
| Dell | F12 |
| Gateway | F1 |
| HP | F9 |
| Intel | F2 |
| Lenovo | F12 |
| Toshiba | F2 or F12 |
| Other | Try Esc key, Any of F1-F12 keys, or Enter key |
- Select your USB Drive from the boot selection.
- The USB will boot into Chrome OS Flex, and you’ll see the Welcome screen stating “Welcome to CloudReady 2.0”.
- Click “Get Started”, and then “Install CloudReady 2.0” if you want to install Chrome OS Flex full-fledged; else, you can select the “Try it first” option to experience Chrome OS Flex features and its performance.
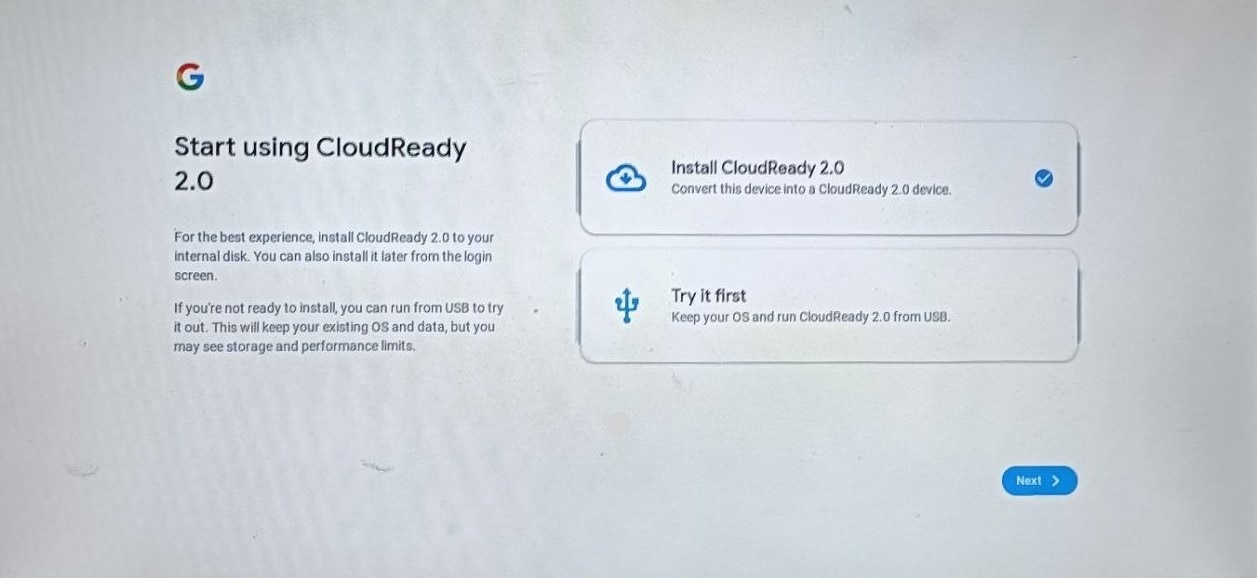
We recommend trying it first on your machine to make sure the keyboard, mouse/trackpad, Bluetooth, WiFi, and other essential things work just fine. If you like the experience, you can sign out and select “Install Cloud Ready” at the bottom. - Follow the onscreen instructions to finish the installation of Chrome OS Flex on your PC. This will format your entire hard drive. So it is suggested to back up your harddisk before installing the Chrome OS Flex.
Common Issues with Chrome OS Flex Installation
When installing Chrome OS Flex, you might face a few issues. Here are a few common issues you may encounter when performing this process.
- SanDisk USB Drives may not work for flashing Chrome OS Flex. Many users on Reddit have reported the same issue. There are still chances of installing it through a SanDisk pen drive, given that some users were successful in installing it.
- Chrome Recovery Utility Tool doesn’t install on Microsoft Edge and other Chromium-based browsers. Albeit, there were no issues with the Google Chrome browser. So we would suggest installing it through Google Chrome.
Frequently Asked Questions
Yes, once the installation of ChromeOS Flex is completed, you can remove the USB drive from your computer. Since the installation will be done on your internal hard drive, the next time it boots from your internal hard disk, not from your USB drive.
Yes, while flashing Chrome OS Flex on your USB pen drive, it will be formatted and all data in it will be erased. Is it suggested to backup important files on your pen drive before converting it to a bootable drive.
Yes, if you go ahead and click the “Install ColudReady 2.0”, your entire internal hard drive will be wiped out. Make sure you backup everything on your disk before installing the ChromeOS Flex.
Click on the “Try it first” button to test ChromeOS Flex on your device. It will not erase your internal disk.
Since your internal hard drive will be formatted while installing the ChromeOS Flex, Windows is no longer available to use. If you wish to use Windows OS again, you need to wipe out your hard drive once again and install Windows as a fresh one.
It is currently not possible to dual boot Windows and Chrome OS Flex. People already tried the same but ended up formatting the entire internal drive including Windows OS.
Watch this video to learn what happens when you dual boot ChromeOS Flex with Windows.
You can just format it using the Chromebook Recovery Utility tool to use it again normally on any device or OS.
No, currently it is not possible to install Chrome OS Flex on an individual partition.
Conclusion
CloudReady 2.0 a.k.a. Chrome OS Flex isn’t a full-fledged replacement for Windows or any other operating system yet, for that matter. However, if you have an old PC or laptop, that doesn’t support the latest operating systems; Chrome OS Flex brings life to them.
Moreover, Chrome OS Flex doesn’t come with Play Store as you see on the Chrome OS. But you can expect it to come in the future versions of Flex OS. Apart from that, this OS supports Linux environment, which can be worthy for developers.
If you have any questions or suggestions regarding this process, you can leave them in the comments below, and we’ll try to answer them.