If you’re an Android Lover and would like to customize your Moto G by installing custom Cyanogen Mod 12, then this is for you. We have the step-by-step complete guide to install CM12 on Moto G X1033. Moto G is the best budget phone you could buy to use all new Android Lollipop. Cyanogen is the brand of custom ROMs where the source code of Android is being modified with some magical codes to make wonders. Although your handset has the latest 5.0.2 update, you are restricted from using some features. To enjoy the essence of your device to the fullest, you should definitely try to install Cyanogen Mod 12 on Moto G X1033. It has so many tweaks and themes that will never make you feel bored.
Since CM 12 has only been in development for a month it lacks a lot of personalisation options at the moment. But like in CM11 we can expect good customization’s in the future build versions. However, the ROM still contains many appreciable handy features that can satisfy the power users. When it comes to privacy, CM12 offers many options that gives users to control their private stuff. In its current state, CM12 lacks a number of advanced features like lock screen customization’s that CM11 users had grown accustomed to. However, it is only a matter of time before the CyanogenMod team ports forward their code, improves it for handsets running on Lollipop. As of now, since this is a nightly build we have some minor bugs in CM12.
How To Install CM12 On Moto G X1033 and X1032
If you’re a hardcore fan of CyanogenMod then you should surely try this on your Falcon (Moto G). There are many links available on the internet to flash Cyanogen 12 on Moto G. Since all the links do not support the dual sim version(xt1033), I picked the right one for you . Be careful while choosing the right one, because there are 3-4 Moto G editions. This should work for both xt1032 and xt1033 but not the CDMA variant. Just follow the instructions line to line and you can successfully install CM12 with no issues.
Note: We don’t share any pain of Soft/Hard bricks. And this will void your warranty.
Before Installing Cyanogen 12 on Moto G X1033 and X1022, you must have performed following 3 things on your mobile already.
- Unlock Bootloader
- Root the device
- Install Custom Recovery
Only proceed to further steps, if your device is ready with above mentioned things. If not, check the detailed guide below.
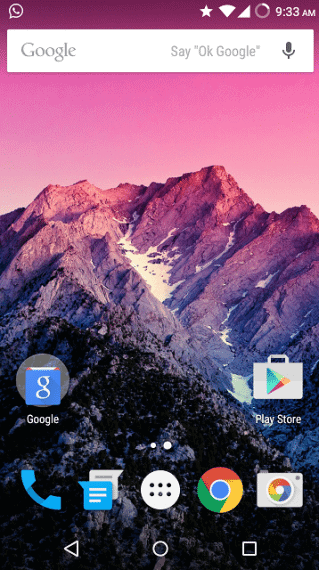
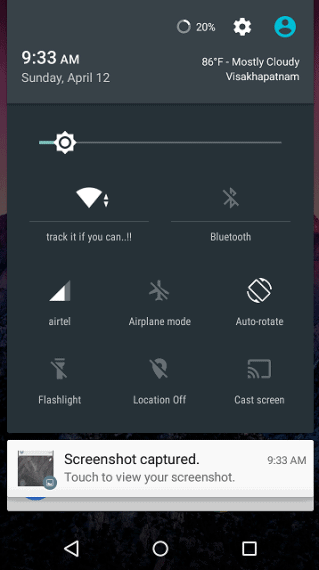
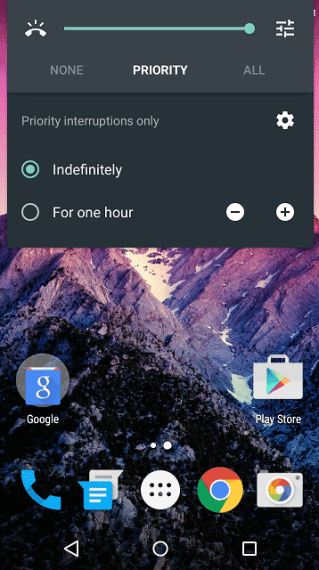
Before moving any further, we’re adding a few screenshots from our personal handset for you have a look at how it adds color to your handset.
Unlocking Bootloader and Flashing recovery.img:
Download ADB drivers and Download Recovery. Place them in same folder.
- Install Motorola device drivers from here.
- Switch off the device and reboot into Fastboot mode by pressing Volume down and power buttons simultaneously (at the same time).
- Now connect your Moto G with your computer using USB cable. Make sure USB debugging is turned on.
- On your computer, go to the Fastboot folder and open a command prompt window with that path.
- Now type the below command.
>fastboot oem get_unlock_data
- Up next, go to the page and register on Motorola’s official web page.
- Read what’s on Motorola’s official page, check on the Agree option and click on “Next”.
- Now, on the cmd window you will have something like this displayed:
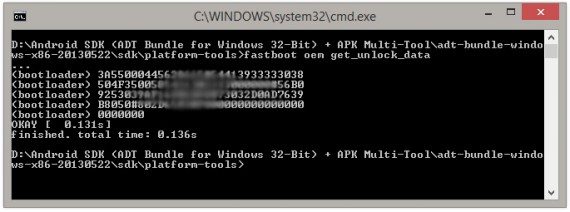
Copy it.
- Remove the word “bootloader” and paste the code on the Motorola web site and check if your device can be unlocked…
- Click the “Request unlock key” button and select “I agree” after selecting “Can my device be unlocked?”
- A unique code will be sent to your email by Motorola.
- Enter this 20 character code after typing the following command in the CMD
>fastboot oem unlock [CODE]
- Congo! You successful unlocked the bootloader of Motorola Moto G.
- Copy the recovery.img file into adb tools folder you downloaded earlier. Then again reboot the device into fastboot mode and type the following command in CMD:
>fastboot flash recovery recovery.img
- This time when you press power + volume up keys, you should see custom recovery on the Moto G.
Flashing Custom Recovery and SuperUser
- Copy the .zip file downloaded from here and place it in the internal memory.
- Go to custom recovery and click on “Install from SD card” and flash the zip file.
- You’re a Super User now.
Installing CyanogenMod 12 on Moto G 2013 (X1033 and X1032)
Download the required files ROM here and Google apps from here.
Before starting the real process, make sure you take a backup of all your essential data from your phone, like contacts, conversation backups, files and other important stuff. The process will remove all the data in the internal memory.
Step 1:
Place the files in the Phone memory as you will be needing it for the process of installing CyanogenMod 12.
Step 2:
Reboot to custom recovery you flashed before. Press volume up + power while restarting to enter into the custom recovery mode.
Step 3:
You can see options like “Wipe data & factory reset”, and in Advanced there will be “Wipe cache partition” and “Wipe Dalvik cache”. Select each option one by one and hit “YES” in the next screen for every option. This will wipe all your apps, contacts, accounts and other data.
Step 4:
Now, goto the phone memory through “Install update from SD card” and search for the ROM file you placed in the before steps. Select that file and confirm by hitting “YES” in the next screen.
Step 5:
Then go back to the main Menu->Phone Memory again and select the GoogleApps.zip to install Google frameworks and Play store.
Step 6:
Once you see the message “Installed Successfully”-Reboot and You should see your device booting into CyanogenMod 12 with latest Lollipop 5.1
Source Code: https://github.com/CyanogenMod
ROM details
Cyanogen Version : 12 Beta
Kernel : Linux 3.4.x
Android Version: 5.1.x
Valid for: Moto G xt1033/xt1032
What’s working Good
– Working smooth on Dual sim.
– Good RAM usage.
– Camera
– Audio/Video
– Radio
– WiFi
What’s not working
– CDMA connectivity. Rest all seems fine.
Known Bugs
– Netflix bug issue.
– Disable root in developer options. Instead you need to flash it separately.
– Wifi hotspot not working
– VoIP calls not working
– Little mess in Memory management.
For starters, Cyanogen Mod’s Trebuchet launcher can now toggle between the normal page layout in the application drawer and a new vertical layout, which incorporates a ‘quick scrubber’ to help you find your app much more quickly. To tinker with the new setting, long-press on the Trebuchet launcher and slide the panel up to get more information.
Cyanogen Mod comments that CM 12 is nearing its proper release, scheduled to go live sometime this month. After CM 12 has been fully released, modders can look forward to the non-nightly release of CM 12.1. There are a few more details in this announcement, so if you’re interested in learning more, I’d urge you to head to the source link below for more information. Keep in touch with us, we’ll be updating the link with the latest version every time.
About Author:
Michael John a Web Designer/Developer and a Blogger from Mumbai, India. He Writes at Justclickin about useful updates on Softwares, Games, Gadgets, Web Development, Web Tips and Tricks.
Hi , the link for rom download , doesn’t work
Download link for CM12 Moto G is updated. Thanks for letting us know