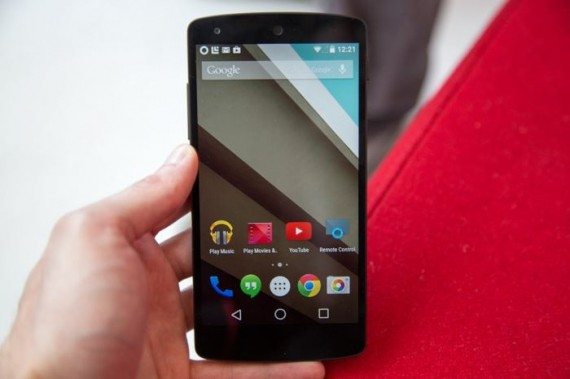
Last month Google announced its next iteration of Android OS Android L at Google I/O 2014. Google made sure it released the developer version as soon as possible and it certainly did so. The developer preview version of the Android L is available to the developer devices right from the announcement. If you would also want to try it out on your Nexus devices, it’s entirely possible with a Nexus 5 or a Nexus 7 device. All you have to do is follow a few steps which would take you to the point with ease and help you install Android L on Nexus 5 and Nexus 7. Being a Beta version, the Android L developers preview will have a lot of bugs and little errors which can cause you inconvenience and sometimes hardware failures on your device. Please be advised that Google too warns you about this before proceeding any further. Yet if you still feel install Android L on Nexus 5 and Nexus 7, let’s have a look at the procedure.

How to install Android L on Nexus 5 and Nexus 7 devices
Please Note, Neither Geek Dashboard Nor Developers are responsible in case of any damage to your smartphone. Try this beta version of Android L on your Nexus devices at your own risk.
Download Android Debug Bridge (ADB) and Fastboot tools
The process should be started by installing two tools named Android Debug Bridge and Fastboot. These tools can be easily downloaded from the XDA Forum and are used to instruct and give commands to your Android device through your computer. Download those two mentioned tools from below link and install both of them on your computer.
Download ADB and Fastboot tools
Download Android L image
The next step is to download an appropriate Android L image version for your required device. You can download the required files from the below given links.
- Nexus 5 – Download here
- Nexus 7 – Download here
The downloaded file will be in a format of .tgz and you need to extract it using WinRAR extractor. Extract the files to a single folder so the installation process will be easier. Also copy the ADB and Fastboot tools to the same folder.
Enabling USB debugging
The USB debugging mode enables the connection between the PC and your Android device, this is generally essential in loading and changing certain software’s. Enable USB debugging by following the below steps.
- Go to Settings on your Tablet or Smartphone.
- Click on About, and then click on the “build number” seven times to open the developer options.
- Now click on the back button and you will enter the developer options tab.
- Now Enable USB debugging.
Download Required Windows drivers
After enabling the USB Debugging option, connect your device to the PC. This will enable Windows to start looking for necessary drivers required to connect the Android device. To ensure you have all the necessary drivers please download it them from the below link.
- Windows drivers – Download here
After installing the drivers the Windows PC can easily recognize your Nexus device.
- Go to control panel and click on the Devices and Printers.
- Check for your device in the list. It is listed as “Android Composite ADB interface”.
- Now check your device and there must be message asking “Allow USB Debugging?”
- Click on Allow and your device will be ready to go.
Enable Fastboot mode
Now keep your Android device still connected to your PC and switch it off. The device must be kept in Fastboot mode for the further process. This can be worked out in two methods.
Method 1
Press Volume up + Volume down and the power button at once to move your device into the Fastboot.
Method 2
- Open the downloaded folder from the first step and double click on “py_cmd” to open the command prompt.
- In the command prompt type “adb reboot-bootloader”.
- This command will restart your Android device in Fastboot.
- Unlock Bootloader
Generally Nexus devices are locked at their boot loader level, this will not allow us to install any other versions of Android on the device. So we first need to unlock the boot loader in order to smoothly continue with the process. Below are the steps on how to unlock the bootloader.
- On your Nexus device type “fastbook oem unlock”.
- The device will ask for confirmation to continue to unlock the boot loader.
- Confirm it by using the volume keys and select the option by pressing the power button
This process will erase your Nexus device memory completely and prepare it for the new Android L installation.
Installing Android L on Nexus Devices
With all the major process done in the above steps only the installation of Android L is left out for us to do.
- Open the command prompt by double clicking the “py_cmd” file.
- In command prompt type “flash-all” command in it.
- Click on Enter and the installation process will start automatically.
- This process may take some time to finish, Once installation is completed, you’re ready to use the latest flavor of the Android on your Nexus device.
Warnings
- Please maintain 50% or more battery in your device before starting the process.
- This process may void your device warranty. So please make sure you are ready.
- Follow the steps properly any wrong step may brick your device.
So, this is about the process of installing Android L on Nexus 5 and Nexus 7. As this is the developers preview, it may have some glitches, over all enjoy the latest version of Android.

Leave a Reply