Cinematic effects make any video more engaging, beautiful looking and captivating. A video shot without proper editing and effects is nothing compared to a video that has gone through post-processing. Filters, effects, sound management are just a few measures you can take to make sure that your video stands apart from the rest. If you are a YouTuber, or an amateur filmmaker or just a hobbyist making and uploading videos, then you need to understand how significant it is to add cinematic effect and a movie like appeal to your video. If done right, it will turn a simple video into a blockbuster hit.
Adding Cinematic Effect to Normal Videos
To make your videos stand apart and to add cinematic effect to videos, we’ll be using Filmora Video Editor. Read on to know how to give a cinematic touch to your video
Why Filmora Video Editor?
Filmora is one of the powerful video editing tools with a user interface that can be mastered even by amateurs. So if this is your first time editing a video, this is the best software available for both beginners and professionals alike. It features tons of filters and effects to add to your video. It features transitions, speed control, audio editing, and many other tools that cater to both advanced users as well as beginners.
Some of its advanced features include color tuning, picture in picture mode, scene detach, stabilization, green screen editing and much more. You can use Filmora for free or you could buy it to get tech support and remove its watermark for a lifetime license that costs just $59.99. It is lighter on the pocket than other traditional video editors in the market.
Filmora Video Editor supports Mac, Windows 7/Windows 8/Windows 10 (64 bit) and requires an i3 or a better processor, 2 GB of minimum RAM, and a free disk space of at least 2 GB.
Filmora setup
Before adding cinematic effects to a video, you need to first download and install Filmora on your PC or laptop. Installation process is quite simple and here are the steps for the same:
- First, you need to download Filmora video editor for your operating system.
- Double-click the installer file and follow the on-screen instructions to finish the installation process.
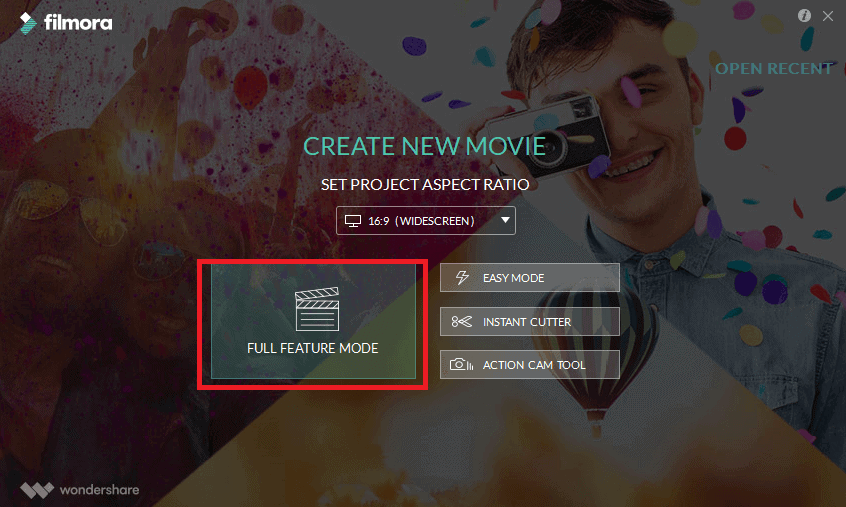
- Open Filmora and choose Full Feature Mode.
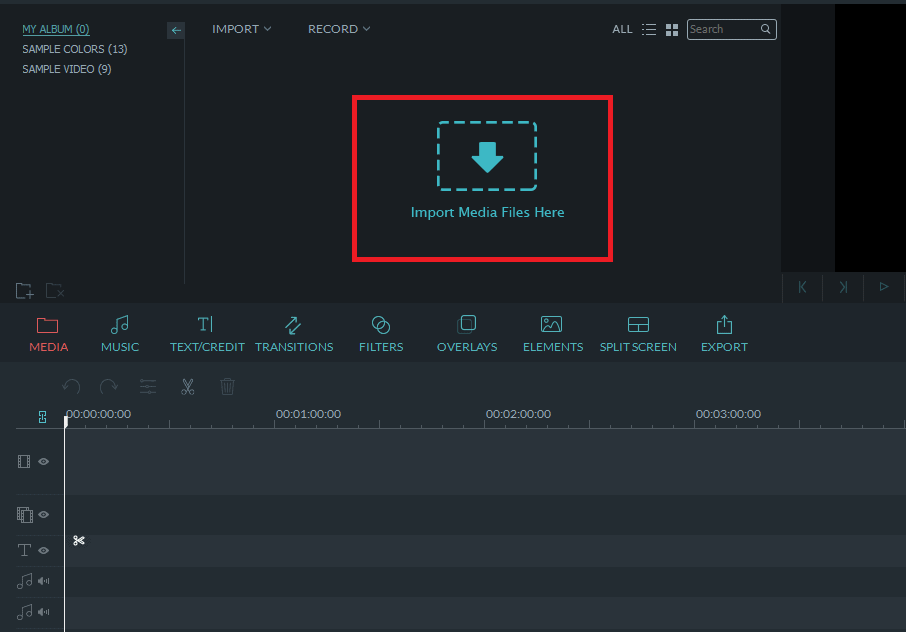
- Click on the “Import Media Files Here” area and select the video that you want to work on. For demonstration, we are using this video from Pexels.
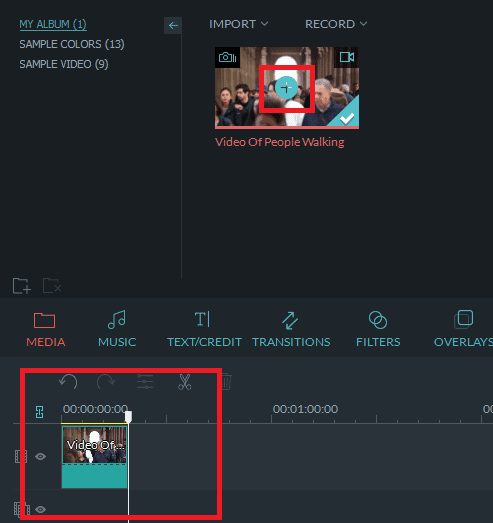
- After importing your video, click on the plus icon to add it to the timeline.
Giving a cinematic touch to your video
Since each video is captured differently, you need to first understand what is the video actually about and where you need to add special effects to make it cinematic. Here are the most important changes you should make to your video for a rich looking and professional output. Video editing is a creative job and there is no fixed format for editing. Being a video editor you need to analyse the key frames in the video and try the below mentioned video editing features to bring cinematic look.
1. Crop, Trim, and Split
The first thing that you need to do is crop and trim your video to remove unnecessary frames. This is the most important and fundamental step when editing a video. Remove all frames that are not required in the final edit. Split your video into multiple parts if you want to add different overlays and effects to them or to have a transition between the parts. You can do this by right clicking on the part of the video in video track. Now you will have options to Split, Crop, Zoom and more

2. Aspect Ratio
Ever noticed two black bars on the top and bottom every time you watch a movie? The first thing we’ll do is add this effect in your video to give it a more defined look. To add this effect click on Overlay above the track window and you’ll be greeted with a large number of different Overlays that you can try adding to your video. Search for Cinema 21:9 and apply that to your video.

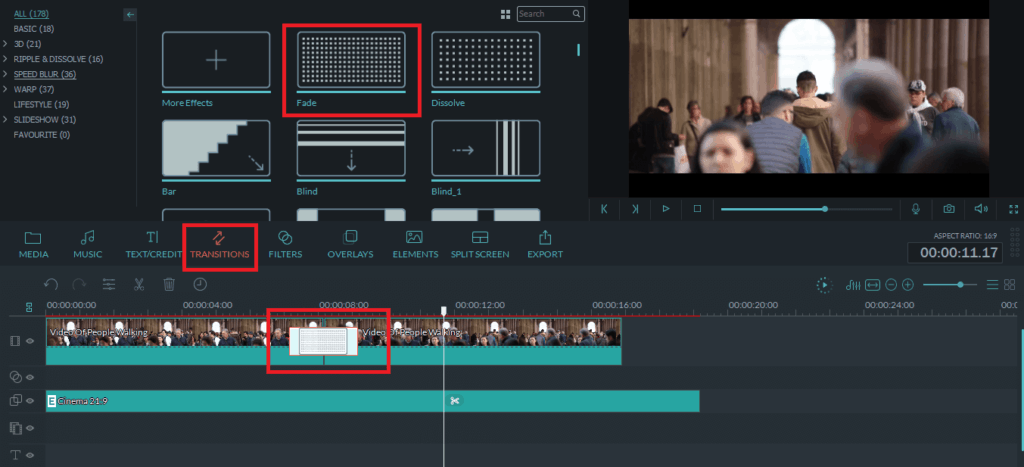
3. Transitions
When you split the videos to remove unwanted frames, it looks very odd when you play the final version. You will notice, the video jumps to different frames all of a sudden. We need to have a transition between the frames for a smoother moment of frames. To add a transition, move the timeline cursor at the point where you want to add the effect. Click on the Transition tab and choose one from available transitions. You can experiment around and use the animation that fits you the best.
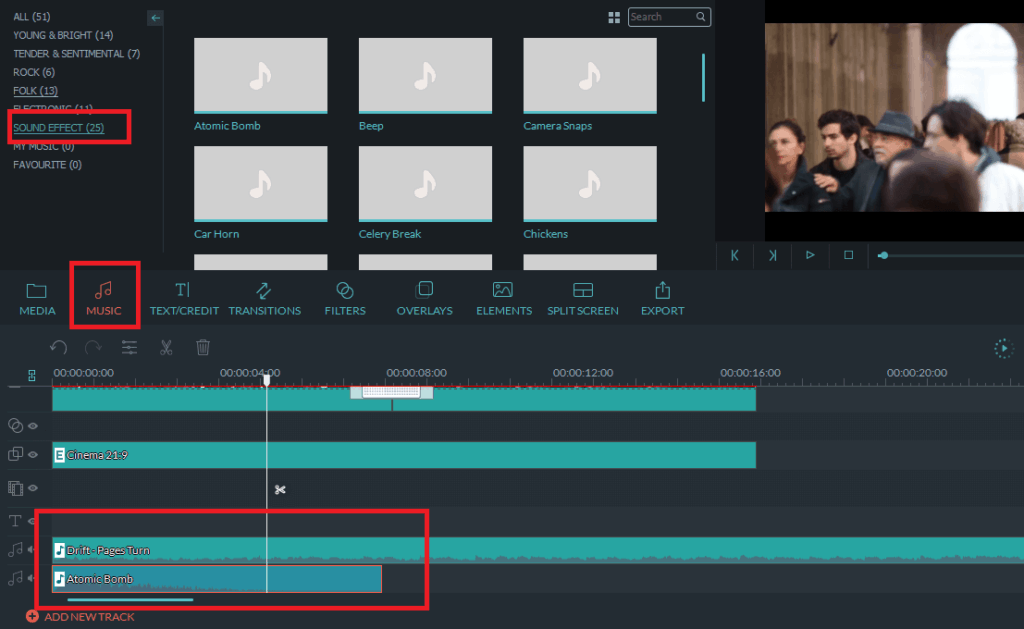
4. Add Music and Sound effects
A good video needs a good music. Filmora by default has plenty of background music for all kind of videos but not all of them are free for commercial use. Alternatively, you can download and import royalty fee music from other websites like YouTube Music Library (Sign In Required). Adding sound effects is quite necessary so that the viewer is highly engaged in the video. You can add music by clicking on the Music tab.
On the bottom left corner, you can also find many interesting sound effects like a door bell, foot steps, braking glass etc. Select the appropriate effect and add it to your video. Make sure to put different sound effects and background music in different audio layers to avoid confusion and also for easy editing.
5. Slow motion
Your video is not complete without adding a slow-motion effect at reveling most important part of the videos. Separate the most important part of the video as a frame and double click on it to open video editing options. Just lower down the speed value according to your preference and click OK.

6. 3D Lut
This might be one of the most useful features provided by Filmora. 3D Lut will give your video a cinematic touch in the right way with its ready to use presets. It includes famous movie titles and you can even change the text your preference. To use 3D Lut, click on Advanced Tuning Option right above the video track. Click on 3D Lut and choose a preset from the drop-down menu that suits your needs.
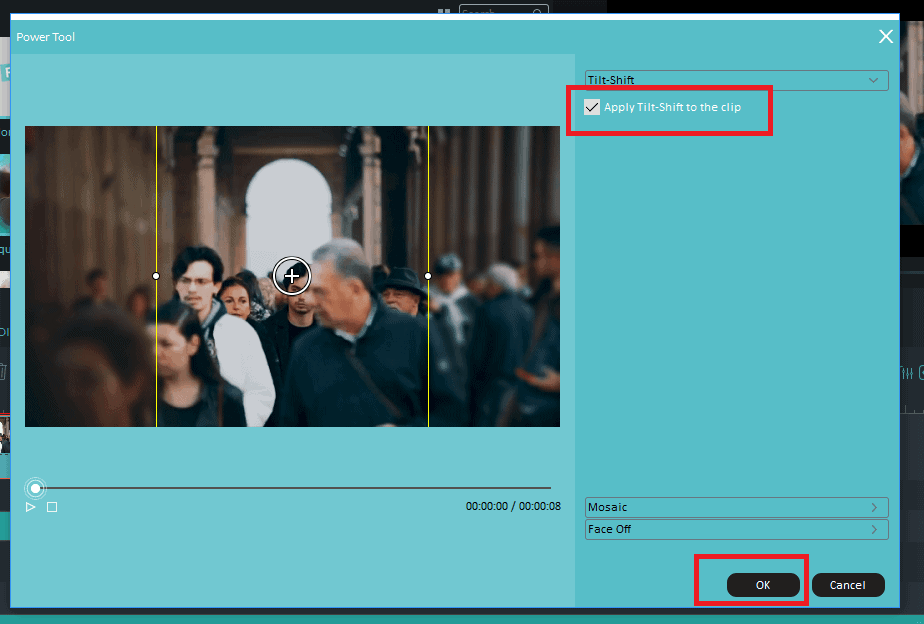
7. Tilt Shift
Tilt-shift is a useful feature which mimics an expensive camera. You don’t need to shoot your video with a high-end expensive camera. Tilth Shift will add cinematic effect where you can set the focus of your video. Everything outside the focus will be blurred. To apply Tilt Shift, right click on the video and click on Power Tool or press CTRL+P to open it directly. Check the box, “Apply Tilt-shift to the clip.” and adjust the focus using the slider on the left side.
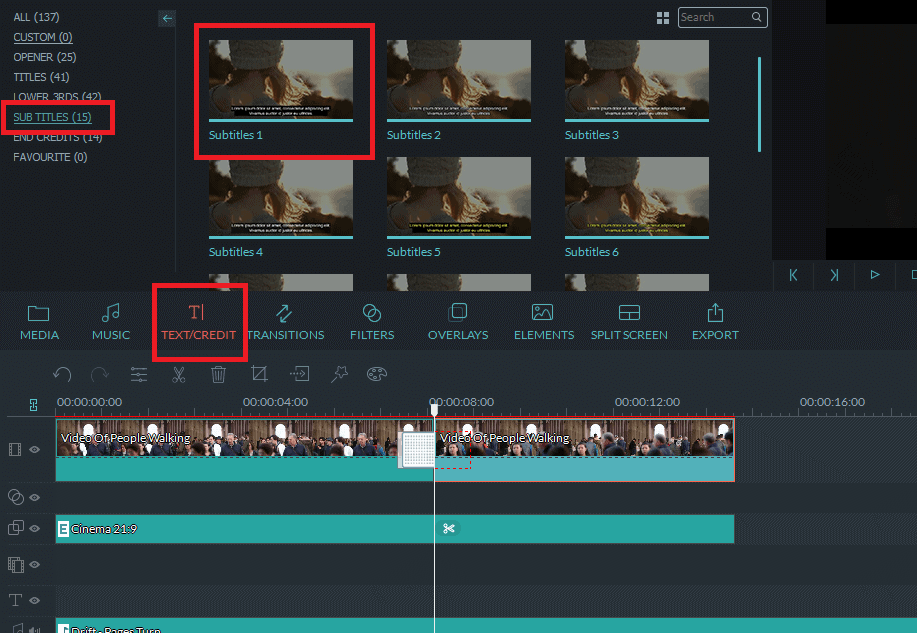
8. Adding Subtitles
Your viewers might speak a different language and how can you we miss the subtitles part? There may be conversations in your video. If yes, then it’s better to add subtitles rather than let the audience get confused trying to follow the conversation. Subtitles also give a much more professional look to your video and show that you have actually made the effort. To add subtitles click on Text/Credit above the track window and then select Subtitles and choose from the wide variety of presets already available on Filmora.
9. Export Options
After adding the final touches to give a cinematic feel to your video, it’s time to export it. Choose the highest resolution possible, preferably 1280×720 (HD) and 1920×1080 (FHD) and select MP4 as the output as it is the most widely used format. Though it is not recommended, Filmora also supports direct upload to YouTube and Vimeo. But it is always better to first export the file in MP4 format and then upload them to video sharing websites manually.

Conclusion
Filmora video editor provides a large array of different features. You might get overwhelmed at first, but the best way to get the best out of Filmora is to experiment. Yes, play with different color options, 3D Luts, transition effects as well as overlays to get the right feel and add cinematic effect to your videos.
Hello Team!,
Which Theme are you using on geekdashboard.
Please Don’t mind but these theme is amazing i really liked it.
can you give me the download link or buying link if these theme is available in market.
Glad you like our theme. It is custom developed and unfortunately is it not available to buy or download.