Clearing Autofill history on Google Chrome can give you instant relief especially if you have sensitive details like passwords and credit cards.
Google Chrome’s auto-fill feature lets you automatically enter saved passwords and credit card details into web forms. This can be really handy to save your time and effort to remember them every time you need to enter.
But sometimes Google Chrome’s Autofill feature might run into issues and fill details incorrectly or show you outdated entries. Also, the biggest problem with Google Chrome autofill is anybody can view or fill in the data if they have access to your device. To avoid this, you can easily clear Google Chrome Autofill data. In this guide, we’ll be sharing detailed steps that will help you clear the Google Chrome Autofill history on your smartphone and PC.
Learn How to Delete Your Google Chrome Auto Fill History on Desktop
Follow the steps below to clear Autofill form data from your desktop:
- Open Google Chrome on your computer.
- Click on the 3-dotted menu and select Settings.
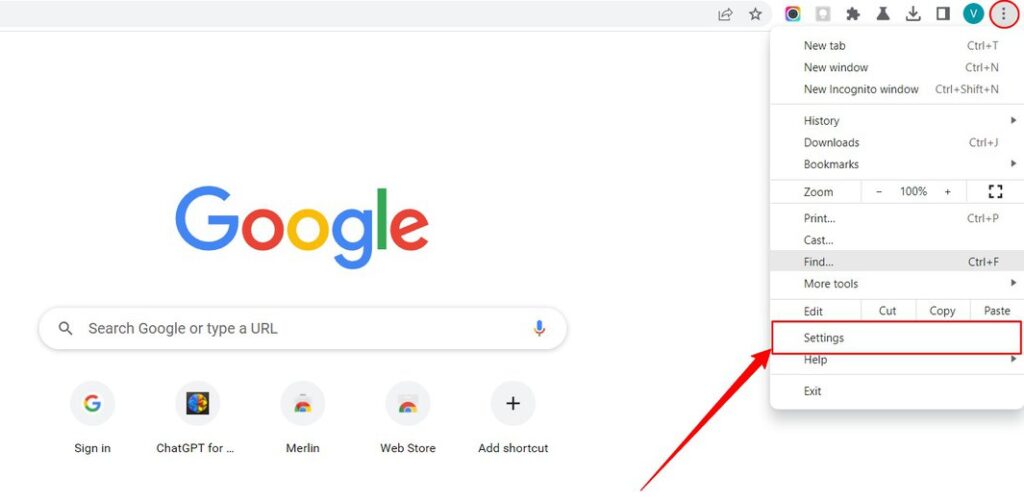
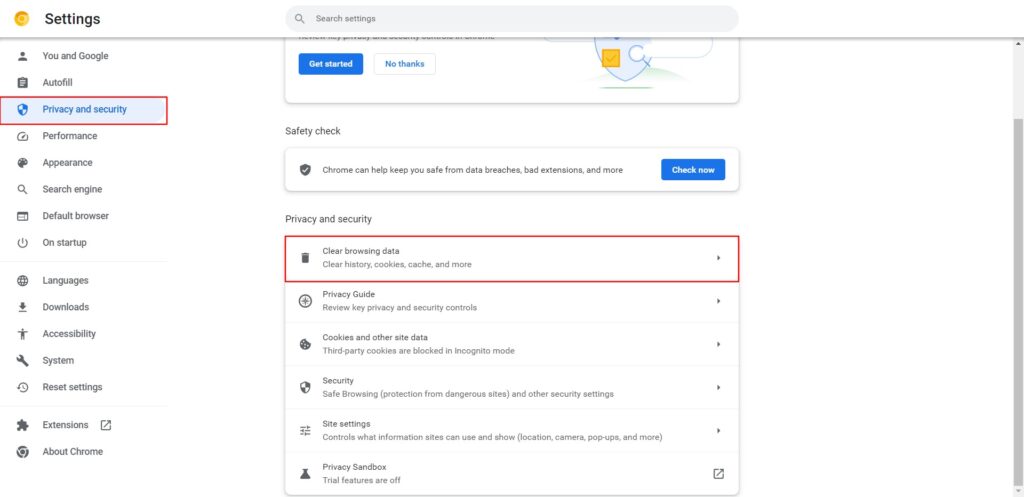
- Click on Privacy and security and select Clear browsing data.
- Now go to Advanced, and select the time range from the drop-down menu. If you wish to delete the entire Autofill form data, select All Time.
- Uncheck everything except Autofill form data and click on the Clear data button.

Doing this will clear the Autofill form data immediately and Google Chrome will stop filling the forms for you automatically. This will delete the Autofill data across all your devices linked to your email address.
Steps for Clearing Google Chrome Auto Fill History on Smartphones and Tables
The steps to delete Autofill form data are almost the same in Google Chrome’a Android and iOS mobile applications. However, there might be minor differences in the user interface and icon placements. We’re using the Android version to explain the process of clearing Autofill form data on mobiles. The steps are very similar for iOS and iPadOS devices too.
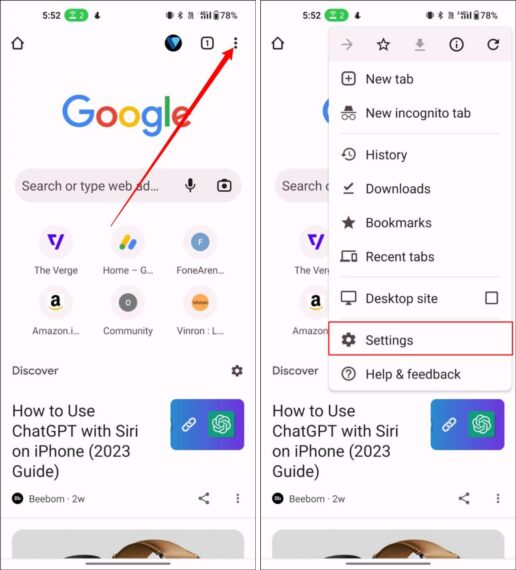
- Open Google Chrome on your smartphone or tablet.
- Tap on the three-dot menu on the top right and select Settings
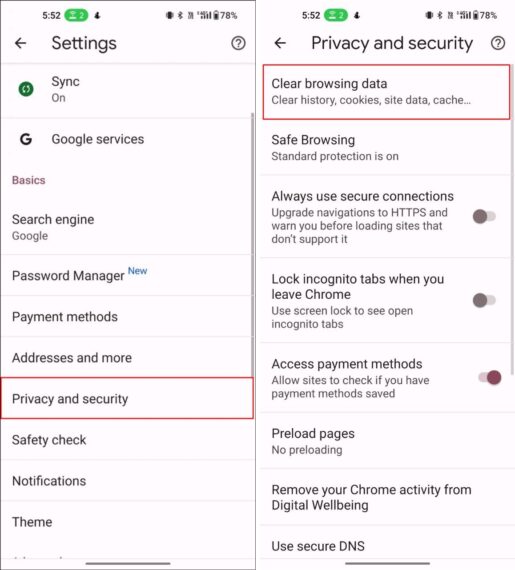
- Tap on Privacy and security.
- Select Clear browsing data.
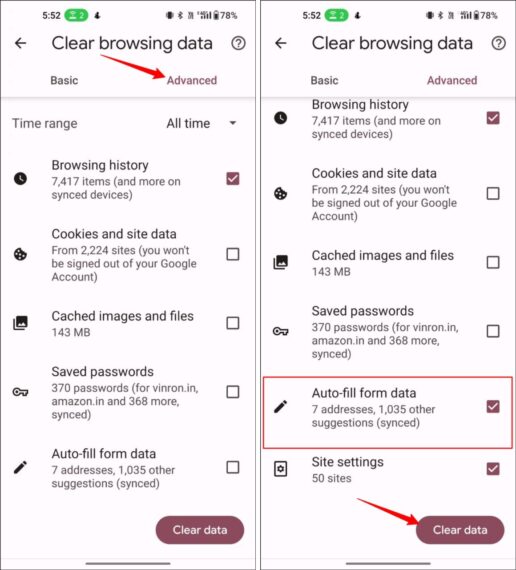
- Now go to Advanced Tab and select Auto-fill form data. You can also choose the time range at your convenience. Finally, click on Clear data.
By following the steps above you can wipe out the entire Autofill form data in just a single click. Using the Autofill Settings on your Google Chrome, you can also manage individual Autofill entries like passwords, payments, addresses, etc.
To access and manage individual autofill settings,
- Open Google Chrome.
- Click on the three-dot menu in the top right corner and select Settings
- Now from the sidebar options, select Auto-fill.
Here you can see Password Manager, Payment methods, Addresses and more. You can manage individual autofill entries, and clear them individually. It can be handy if you want to clear only specific Autofill details.
How to Manage Passwords Autofill Settings
The Autofill password feature on Google Chrome is a useful tool that allows you to store and automatically fill in the login information for websites. When you enter a username and password on a website, Chrome will prompt you to save the login information. If you choose to save the information, Chrome will store it in its password manager and offer to autofill it for you the next time you visit that website.
If someone gains access to your computer or your Google account, they will have access to all of your saved passwords. You can simply manage passwords by going to autofill settings on Google Chrome. You can edit individual passwords, and delete and manage them easily.
Manage Autofill Passwords on Google Chrome:
- Open Google Chrome on your computer.
- Click on the three dots menu and select Settings.
- From the sidebar options, select Autofill.
- Now tap on Password Manager to manage individual passwords.

How to Manage Payments Autofill Settings
The autofill payment feature on Google Chrome is another useful tool that allows you to save and automatically fill in payment information for online purchases. When you enter payment information, such as credit card details, on a website, Chrome will prompt you to save the information. If you choose to save it, Chrome will securely store it in its payment manager and offer to autofill it for you the next time you make an online purchase.
You can manage Autofill Payments in the Autofill settings of the browser. Here you can edit individual payment methods or delete them entirely.
Manage Autofill payments on Google Chrome:
- Open Google Chrome on your computer.
- Open Menu and click on Settings.
- Now select Autofill.
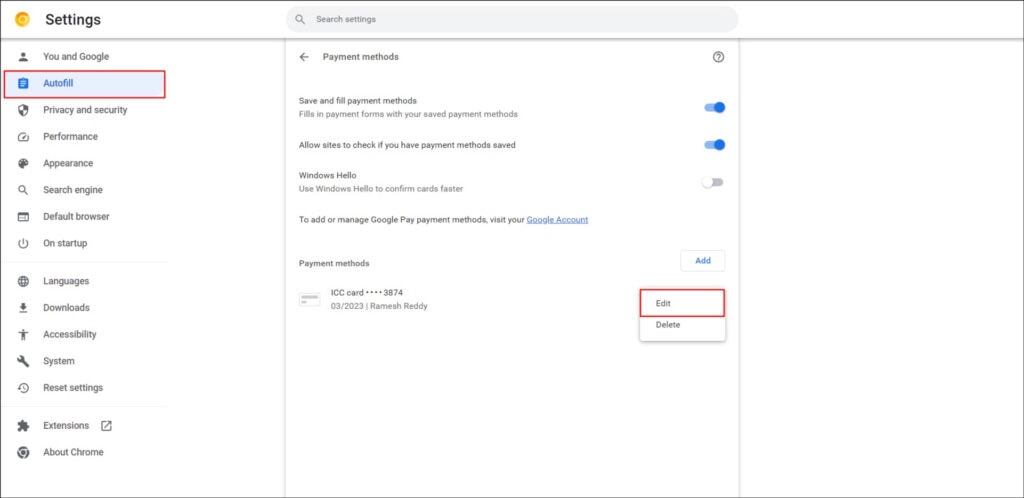
- Tap on Payments Methods to manage payment autofill settings.
How to Manage Address Autofill Settings
Saving address information is another feature offered by Chrome autofill. Compared to passwords and payments, auto-filling addresses are more convenient and less of a threat to security. Still, if you want to clear autofill addresses and edit outdated addresses you can simply follow the steps below:
To manage autofill Addresses on Google Chrome:
- Open Google Chrome on your computer.
- Click on the three dots menu and select Settings.
- From the sidebar, select Autofill
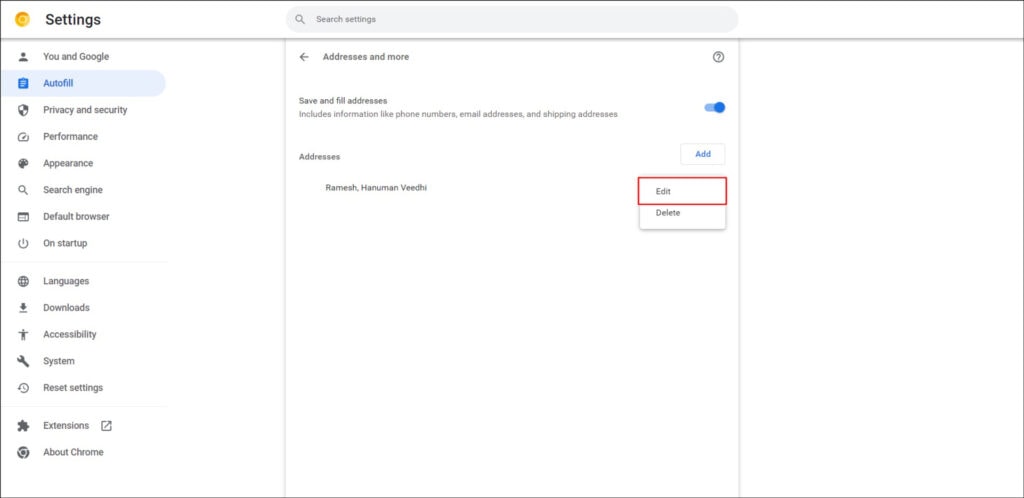
- Now tap on Address and more to manage Address autofill settings.
Deleting Autofill Entries Made Easy with Trash Icon
In the latest version of Google Chrome, the company started offering the ability to remove autofill entries right from the suggestions screen. The feature is currently available for the canary Chrome version in beta. Once it is rolled out, you can simply click a trash can icon next to any item in the autofill popup that you want to delete, then it will promptly be removed from your history.

Get Rid of Unwanted Suggestions By Clearing Google Chrome’s Auto Fill History
This is how you can clear Google Chrome Autofill history on both Desktop and mobile apps. You can also manage and clear individual Autofill entries in Credit Cards, Addresses, and Passwords. Clearing Autofill data can improve data security and also helps you remove outdated information from Google Chrome Autofill suggestions.
You can also set biometric security to Autofill credit card details. It adds extra security to Autofill payment settings on Google Chrome. To enable biometric security to Autofill data, visit Google Chrome > Settings > Payment methods > Screen lock.
Since the Autofill form data is linked to your Google account, clearing it in one device will automatically delete them on all your devices. If you wish to delete Autofill data only on a single device, then you might need to export all your user profile data locally and unlink your Google account from Chrome.