Microsoft Word is popular among many users, and it’s used for many purposes. Whether it be essay writing for your school, report in your office, and many other things. But not saving your document and losing your data could be the worst nightmare that you can face. However, there are several ways to recover unsaved Word documents on macOS as well.
Users face this problem commonly on a Windows PC, and we’ve covered a guide that tells you how to recover unsaved Word documents on Windows. This guide will show you the various methods to retrieve an unsaved Word document on macOS.
How to Recover Unsaved Word Files on macOS (2026)
There might be several reasons for you to recover a deleted, missing or unsaved Word document. Whatever the reason may be, we’ve got multiple ways to restore an unsaved Word document on MacBooks and iMac.
Also, for Microsoft Word to work on a Mac, you’ll need an Office 365v subscription or a licensed Microsoft Office key from an online or retail store.
1. Recover Word Document with AutoRecovery
Microsoft Word comes with the AutoRecovery feature on any operating system. It can help you recover lost files on your Mac if you forgot to save your Word document or when your MacBook runs out of battery unexpectedly. When you install Office applications on your Mac, it enables this feature by default.
As a default setting, the AutoRecover option saves the file at intervals of 10 minutes; you can also change it. When you manually save a file, Office removes the previous AutoRecover files. However, if you didn’t manage to save your document and want to recover it, you can use the AutoRecover feature to recover your document. Here’s how you can do it.
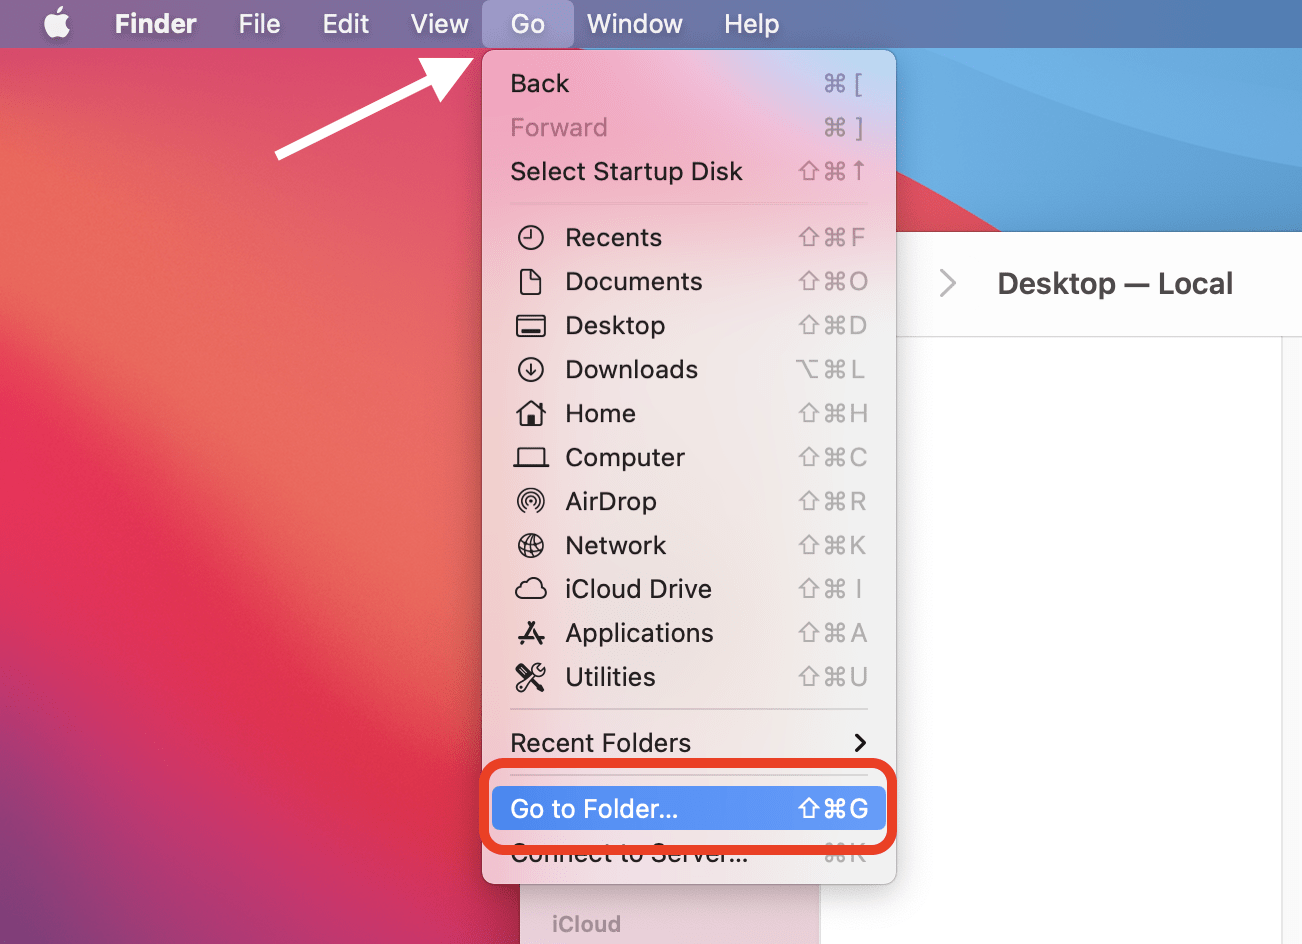
- With Microsoft Word opened on your Mac, open Finder on your Mac.
- On the menu bar, select Go, and then Go to folder. Alternatively, you can also use the Command + Shift + G keyboard shortcut while in the Finder.
- Type the following path and replace <username> with your username on your Mac.
/Users/<username>/Library/Containers/com.microsoft.Word/Data/Library/Preferences
For instance, if my username is “sajidshaik,” the path will be /Users/sajidshaik/Library/Containers/com.microsoft.Word/Data/Library/Preferences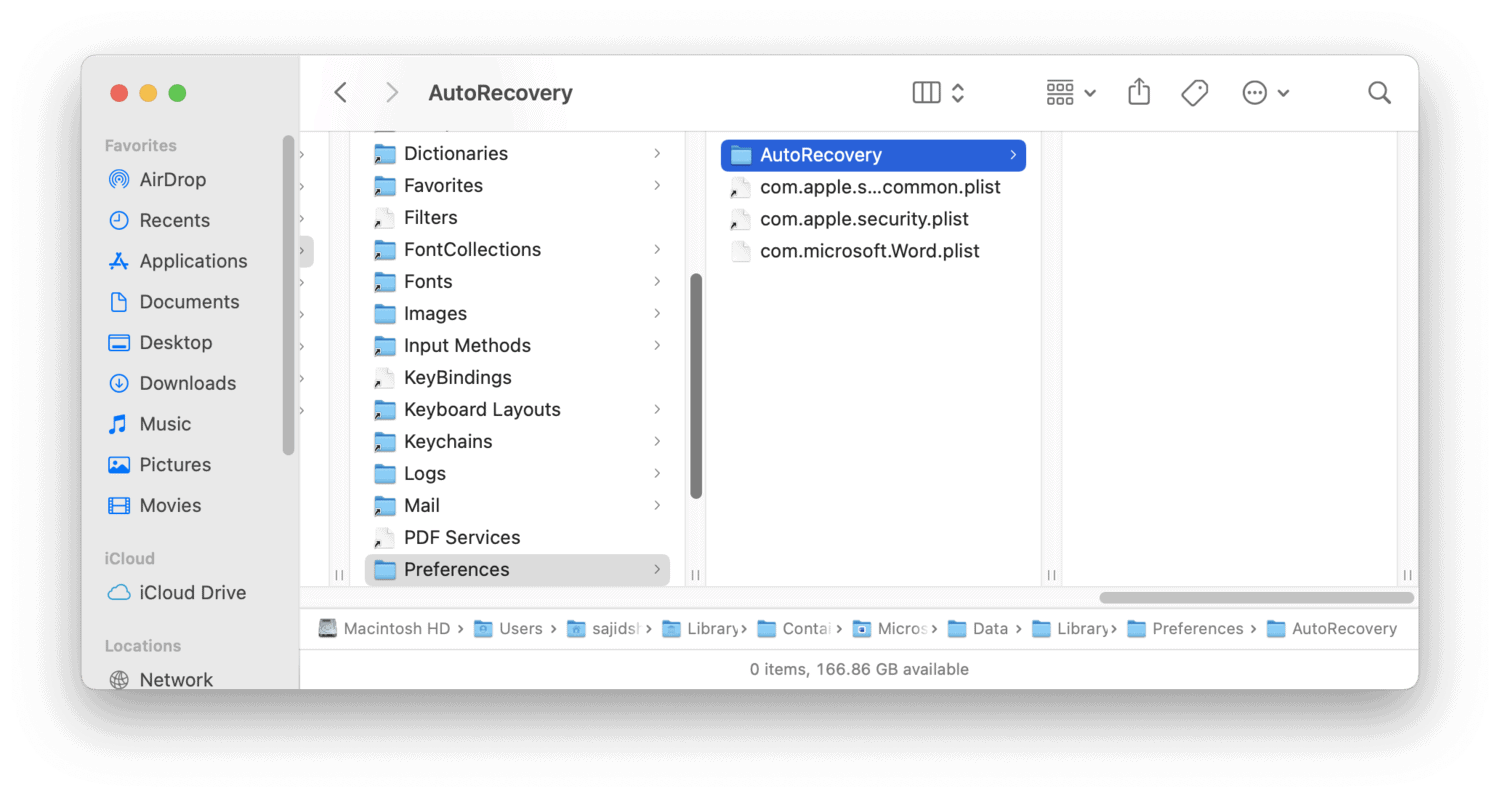
- Find the AutoRecover file, and open it with Microsoft Word.
- Select the File option from menu, and click the Save As option to restore the saved version of the document.
Microsoft Word will restore your lost document, and you’ll be able to edit your unsaved Word document again. Albeit, there’s no guarantee that Word will restore the entire file since it depends on the last saved moment of your Word document.
2. Recover Unsaved Word Document using Temporary Folder on macOS
Your Mac contains a temporary folder within the operating system if you deleted the file accidentally. If you look for your Word document in the contents of the temporary folder, you may find your deleted word file there. To check the contents of your Temporary folder on macOS, follow the steps below.
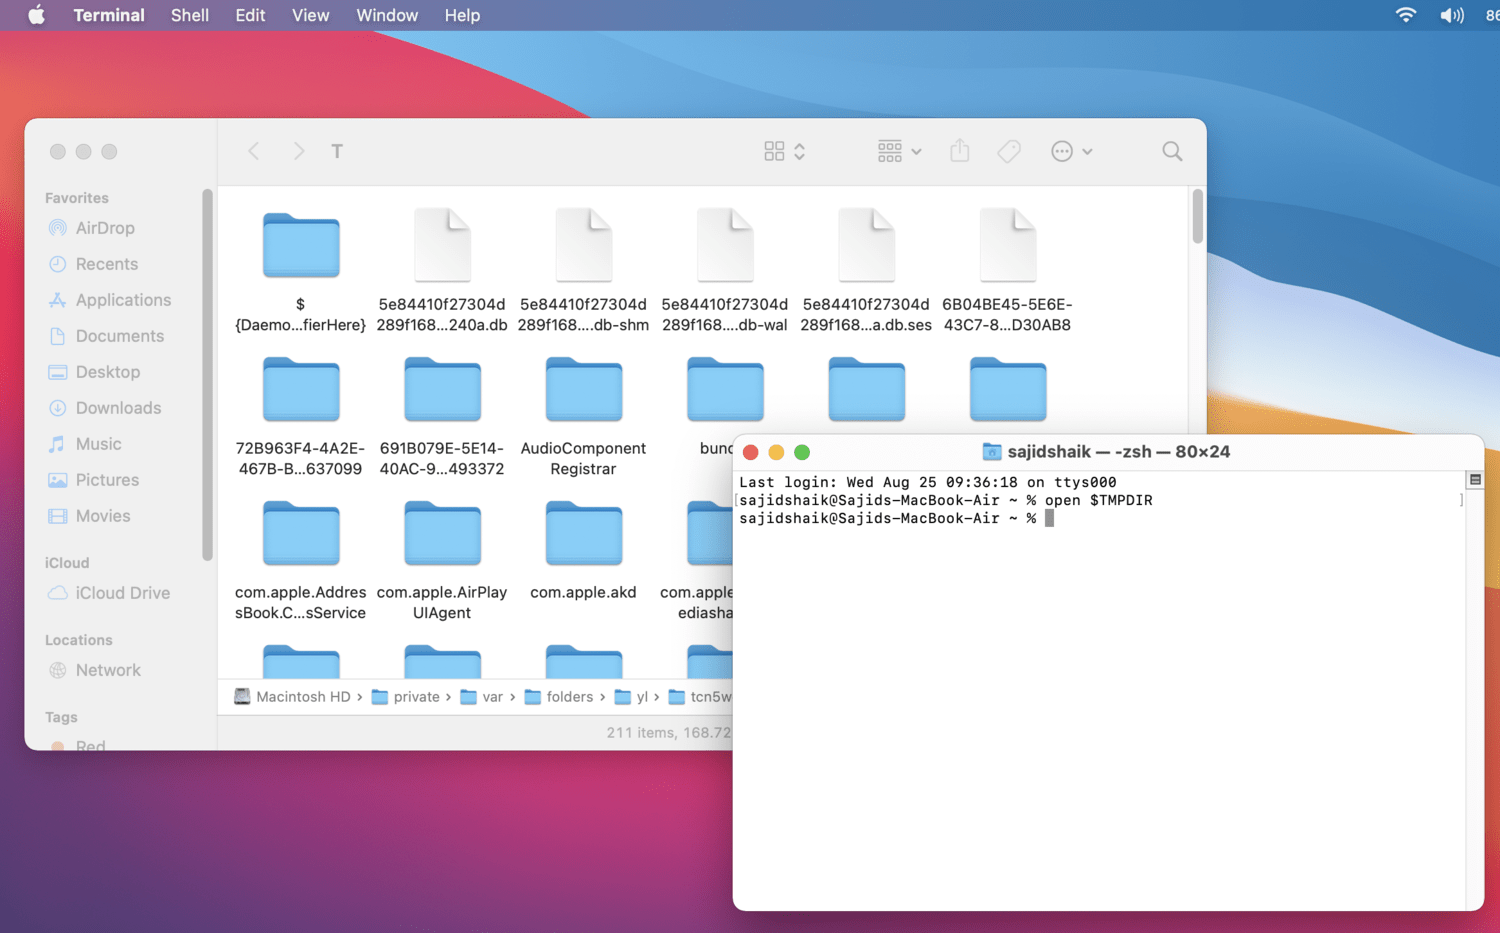
- Open the Terminal app on your Mac.
- Type the following command in the Terminal app, and press the Enter key.
open $TMPDIR - From the opened Finder window, look for your deleted file. You can also use the search option to look for the lost document’s file name.
- If found, copy the file to your Desktop or any desired folder.
There are also other Temporary Folders on macOS that you should check. Use the Finder’s Go to location feature and type the following locations to look for the files.
/tmp~/Library/Caches/TemporaryItems
If you don’t find it under macOS’s temporary folder, the above-mentioned temporary folders may also contain your deleted file.
3. Restore Previous Version of the Word Document
If you have the document opened and accidentally deleted the text or information, you should get back to a previous version to restore the Word document. Here’s how you can do it in Word.
- With the Word document opened, click on File in the menu bar.
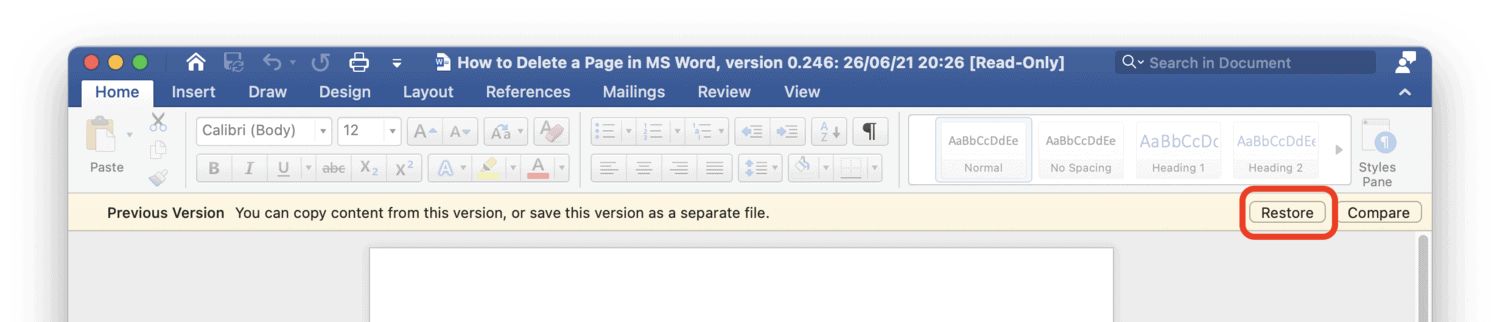
- Select Browse Version History from the sub-menu. This will open a panel that includes all the previously saved versions.
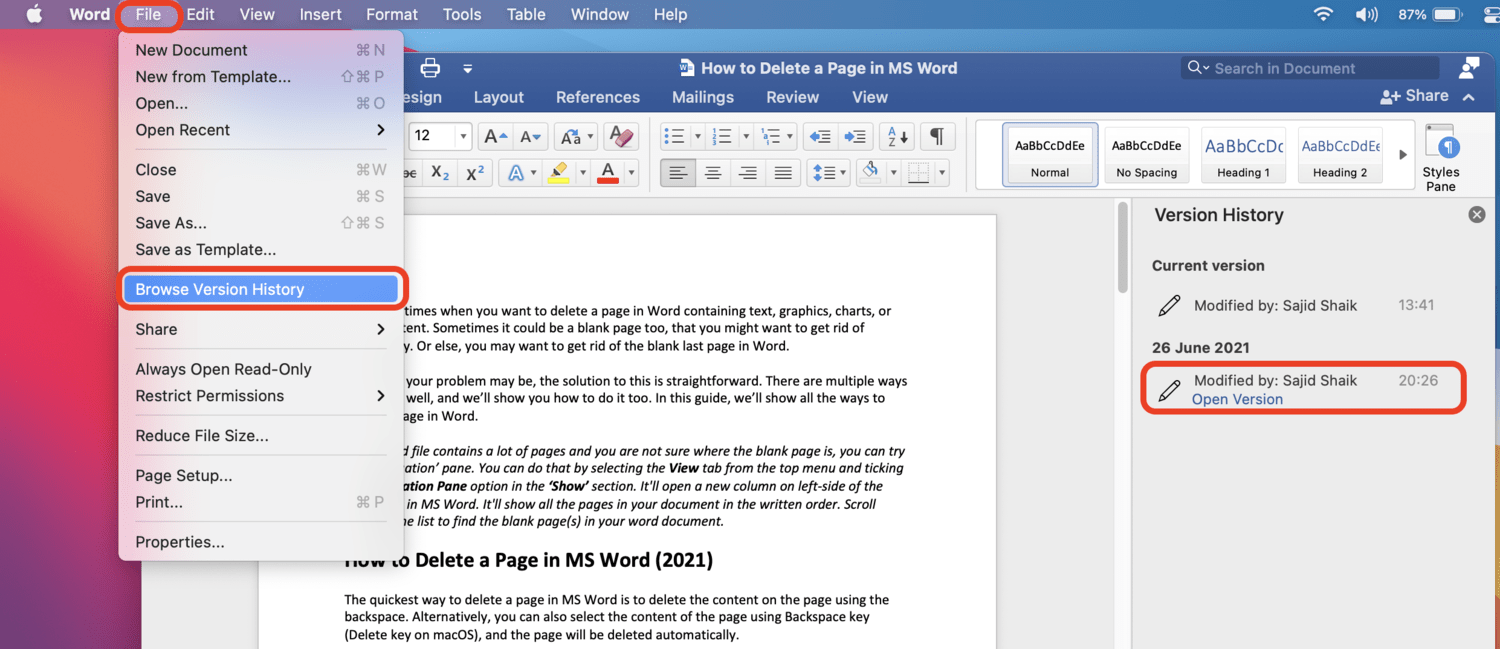
- Select the version that you wish to recover and click on the Restore option to restore the previous version.
If your Word application crashes or your Mac turns off due to a power outage or low battery, then the AutoRecovery option will work for you.
All you need to do is open the Word application again, and the document will automatically open with a previously saved version.
4. Recover Unsaved Word Documents using Time Machine Backup
Starting in 2008, every Mac comes with a backup tool — Time Machine, which creates incremental backups of your files once set up. To recover the lost Word file from a Time Machine backup, follow these steps:
- Connect the backup disk to your Mac where Time machien backup is stored.
- Open the folder that has deleted files.
- On the menu bar, select the Time Machine icon and choose the Enter Time Machine option.
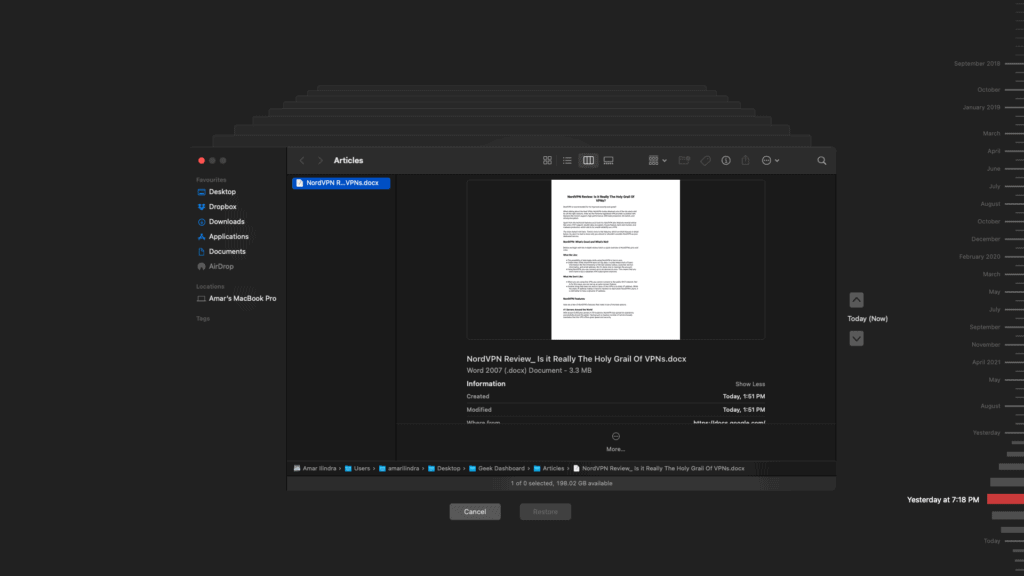
- Go back in time and Locate the file that you want to recover using the timeline on the right edge of your display.
- Select the file and click Restore to bring back the deleted file.
Time Machine could be your best option, but if you haven’t set it up before, you’re out of luck and should use the last option.
Also Read: How to Access and Restore Time Machine Backup Files on Windows
5. Recovering Deleted Word Documents from Trash on Mac
There are minute chances that you might have accidentally deleted the Word document on your Mac. Like every other operating system, macOS doesn’t delete files permanently as soon as you delete them. Unless you choose to empty the trash, you will find your files or documents in the Trash.
If that’s the case, here’s how to recover deleted Word documents from Trash on your Mac.
- Click on the Trash icon on your Dock to open Trash.

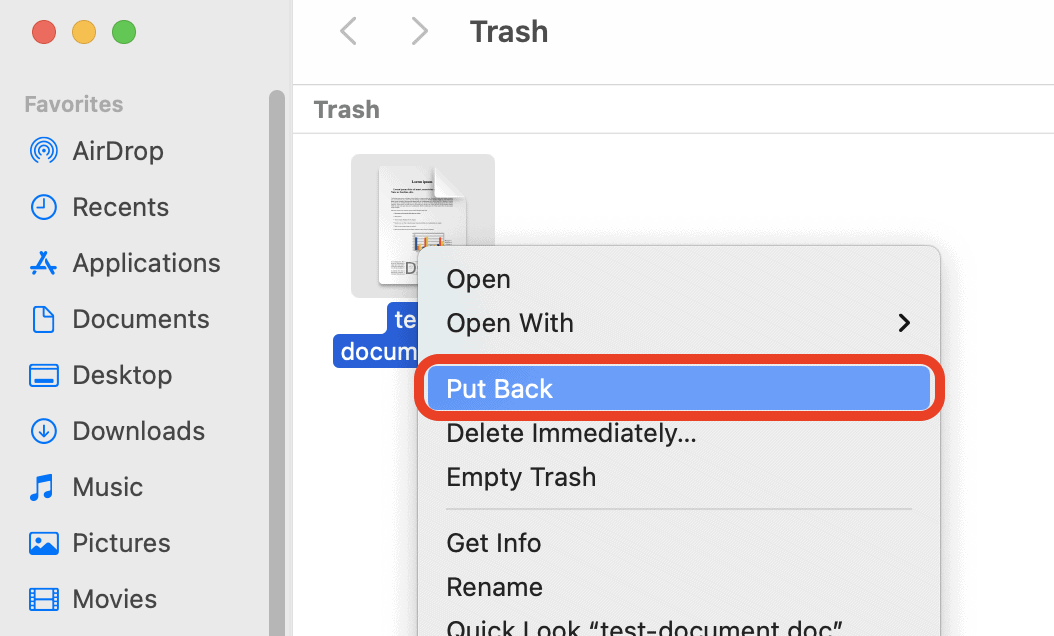
- Find and right-click on the deleted file.
- From the list of options, click on Put Back.
Doing this will put back the deleted Word document in its original location. You can check the location where you saved your Word document before deleting it.
Warning: The options “Put Back”, “Delete Immediately…” and “Empty Trash” are very close to each other. Make sure you didn’t choose the wrong option accidentally.
6. Using Data Recovery Software to Recover Unsaved Word Document
There are a plethora of Data Recovery Software(s) on the internet. Most of them would recover your data as much as possible without getting it corrupted.
One such Data Recovery Software is iSkysoft Data Recovery. When it comes to Mac, it’s one of the best data recovery programs you can get. But you shouldn’t expect to recover your files without data loss.
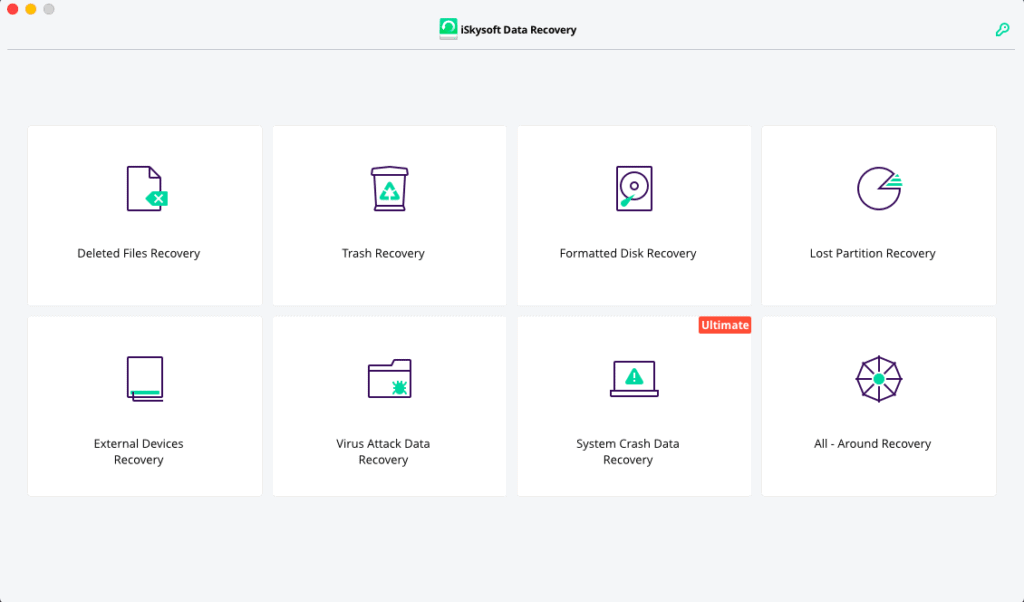
Since the files go through temporary extensions and many different processes, the data can likely corrupt if the size of the file is big. It’s best not to keep your hopes high up.
Don’t let it happen again
We hope you were able to recover your lost Word document using these methods. But you can practice a few steps to protect your files against accidental losses.
- Turn on AutoRecovery in Word
- Take Time Machine Backups from time to time (we use this hard disk for Time Machine backups).
- Always pause and think before emptying the Trash on Mac.
- Use Data Protection tools.
Regular data backups are essential in the digital world. Especially when writing a Word document, you should save the files at continuous intervals to avoid data loss. Using the AutoSave function in MS Word can aid you in this process. If any of these methods worked for you to recover unsaved word documents or you have any queries or suggestions, let us know in the comments below.