With the launch of Mac OS X El Capitan, Apple introduced SIP (System Integrity Protection) as a security feature. This feature prevents you and other programs from making changes to the root-level files keeping them safe from unnecessary modifications.
In the initial days of SIP, many programs broke since they changed the system files of macOS. As a result, many developers would disable the SIP to make their apps work without hiccups.
Over the years, developers found their way around SIP to let their app(s) function keeping the Mac secure with SIP.
However, if you’re a developer or someone who needs to disable SIP, here’s a definitive guide.
How to Turn off SIP (System Integrity Protection) in macOS
Disabling a security feature on Mac isn’t child’s play, and we assume the reader to have a good idea about computing. In addition, we think you have a good reason to disable SIP (or “rootless”) on your Mac. With that said, here is how you can turn off SIP on Mac.
- Click the Apple icon on the top-left corner of your Mac.
- Select Restart from the available options.

- Once selected, hold down Command + R on your keyboard to boot into Recovery Mode.
- Click Utilities and then select Terminal. A Terminal window will open up.
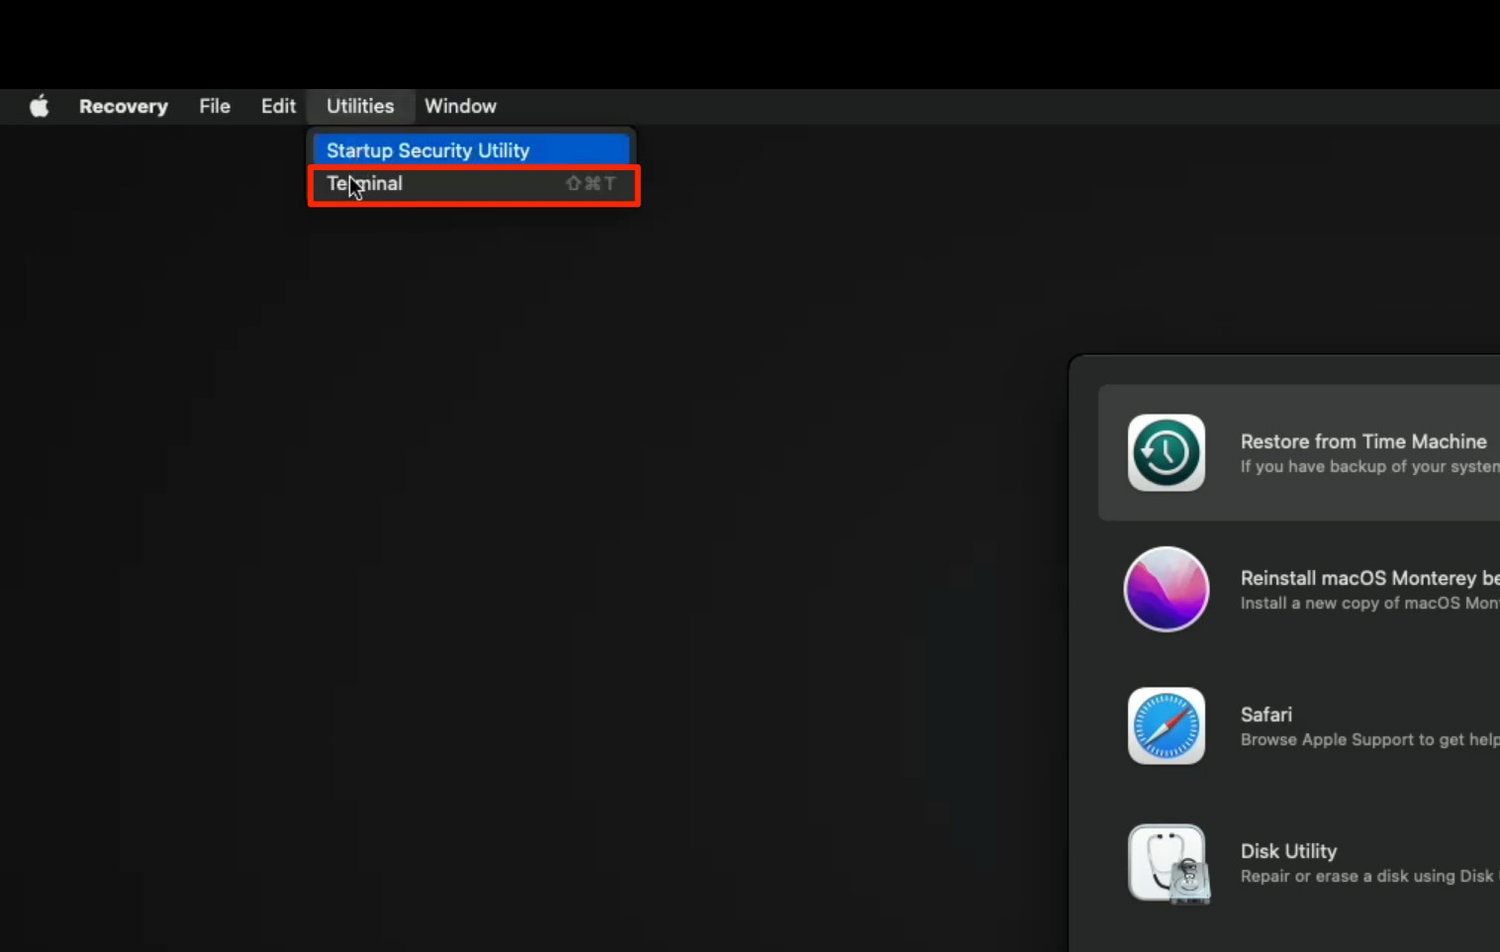
- Type the following command and press the Enter or Return key on your keyboard.
csrutil disable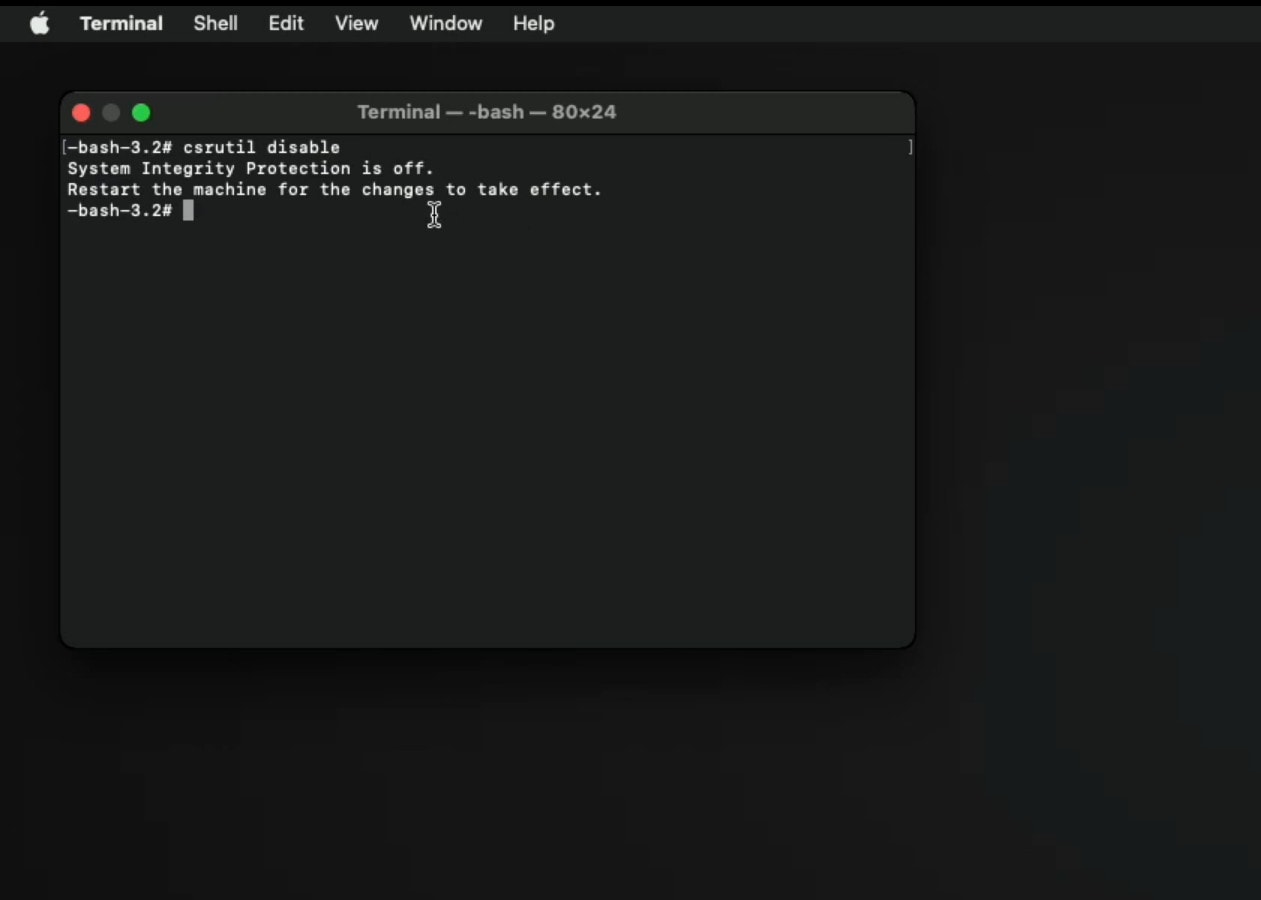
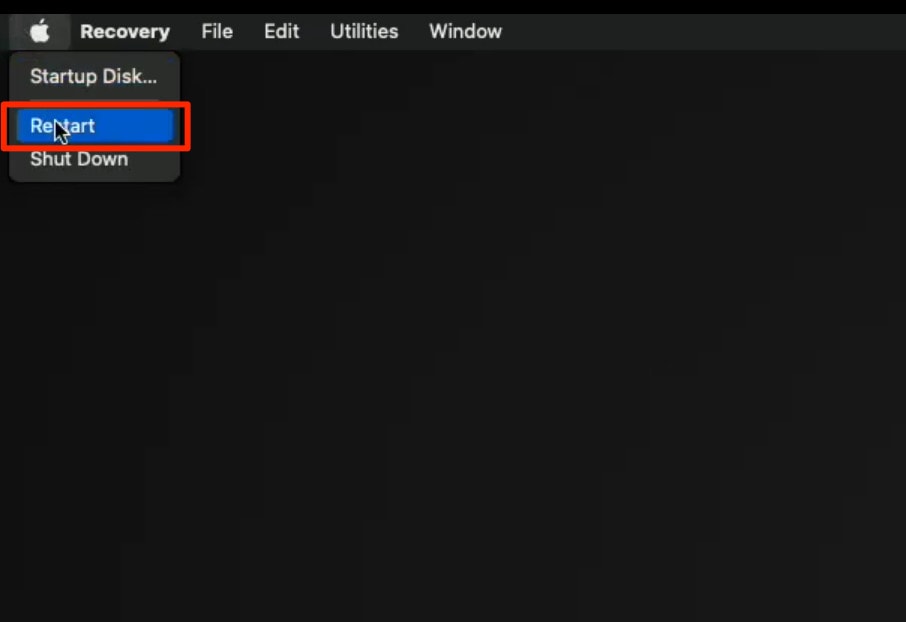
- Click on the Apple icon in the menu bar.
- Select Restart from the provided options.
How to Check if System Integrity Protection (SIP) is Disabled or not
Given that you’ve turned off SIP on your Mac, it’s best not to take any chances and double-check if SIP isn’t turned on. Follow the steps to check whether SIP is disabled or not.
- Open Terminal from your Dock or “Other” folder in the Launchpad.
- Once opened, type the following command.
csrutil status - Hit the Enter or Return key on your keyboard.
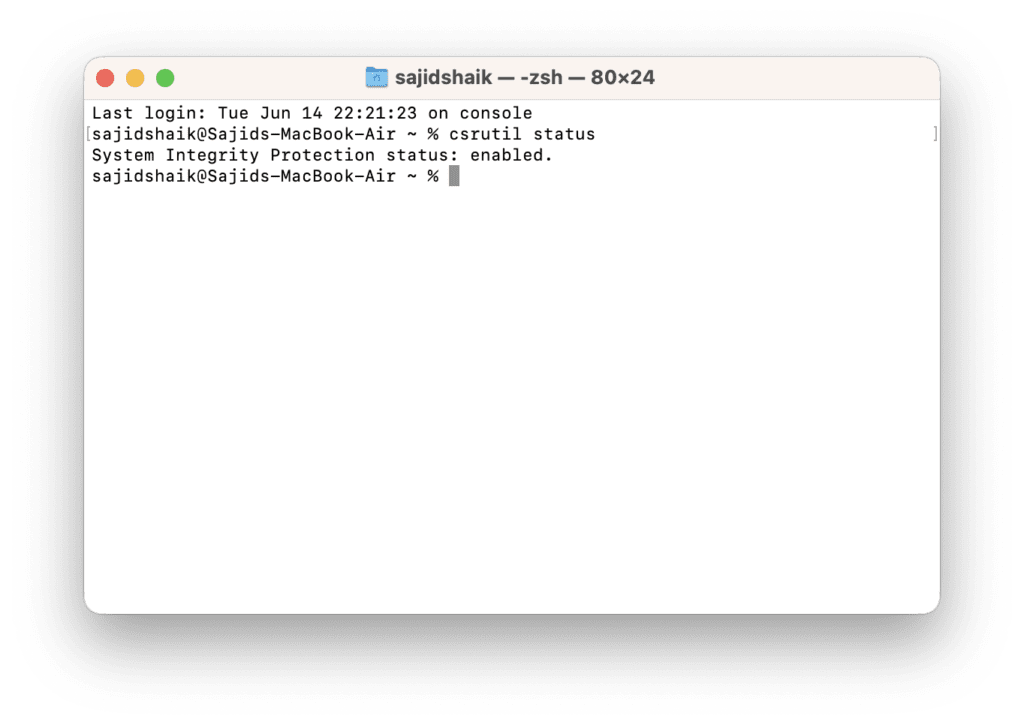
You’ll see a message that says “System Integrity Protection status: enabled” or “System Integrity Protection status: disabled” based on the current status. If it is disabled, you’re good to go.
Advantages and Disadvantages of Disabling SIP on Mac
There aren’t many disadvantages to keeping SIP enabled on your Mac; it is suitable for many. A user with general computing knowledge wouldn’t go tinkering around root-level files and folders. SIP adds a significant layer of security for those who have a single user account on their Mac with admin rights. Hackers find it easier to trick users into getting access to their systems to make the necessary changes in their operating systems.
There are many protected directories like /system, /bin. /sbin, and many others when you keep SIP turned on your Mac. In addition, some pre-installed Apple apps in the “Applications” directory are also protected.
However, SIP can be troublesome if you’re a power Mac user or a developer. It doesn’t allow you to install any software on your system or will enable you to work outside the /home directory, even with the “sudo” command line or logged in as a “root” user.
How to Turn on SIP (System Integrity Protection) in macOS
Remember that it is necessary to enable back SIP once done with your tasks. Here’s how to turn it back on a Mac.
- Tap on the Apple icon on the menu bar of your Mac.
- Select Restart from the options in the dropdown menu.
- Once selected, hold down Command + R on your keyboard to boot into Recovery Mode.
- Click on Utilities and then choose Terminal. A Terminal window will pop up.
- Type the following command and press the Enter or Return key on your keyboard.
csrutil enable - Click on the Apple icon in the menu bar.
- Select Restart from the provided options.
Once restarted, SIP (System Integrity Protection) will get enabled again on your computer, and you wouldn’t need to worry about your Mac’s security.
Also Read: How to Unlock Your iPhone and Mac With Apple Watch
Conclusion
We hope you got how to disable and enable System Integrity Protection (SIP) on your Mac computer. Enabling or disabling SIP on your Mac comes with its advantages and disadvantages. It’s best to keep SIP enabled on your Mac for security reasons to prevent hackers from accessing your root files.
If you’ve any queries regarding this issue, you can leave them in the comments below, and we’ll try to answer them as soon as possible.