Do you use iMessage to remain connected with family and friends? In that case, the pop-up message “iMessage needs to be enabled to send this message” appearance is troublesome. It leads to irritation and panic when you fail to fix the problem. Normally, this problem occurs after the device is updated.
Some users reported that without updating their device, they get this ‘iMessage needs to be enabled to send this message error”. Well, whatever the case, we are here to deal with it and bring you the proper solutions to fix this problem.
How to Fix “iMessage needs to be enabled to send this message” Problem?
There are various ways you can handle solving iMessage that need to be enabled to send this message issue. Take a look at these solutions to start using iMessage again.
1. Force Quit Messages App
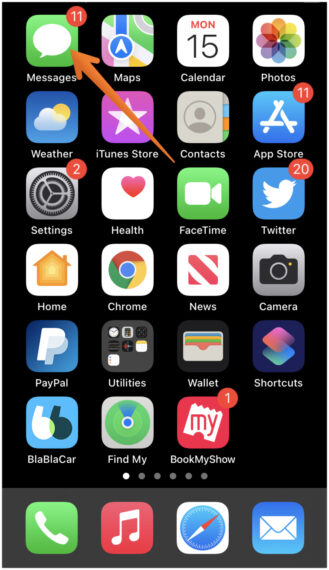
One of the easy ways to resolve the iMessage needs to be enabled to send this message problem is to force quit the Messages app.
For this solution, you will need to go to the App Switcher. Take a look at the steps that you need to follow to force quit the iMessage app:
- If your iPhone has a home button, you must double-press on it. But, if your device has Face ID, you must swipe up and then hold.
- You will see all the apps currently open after doing the above step. To force quit, you need to drag the iMessage card up. This will force-quit the app instantly.
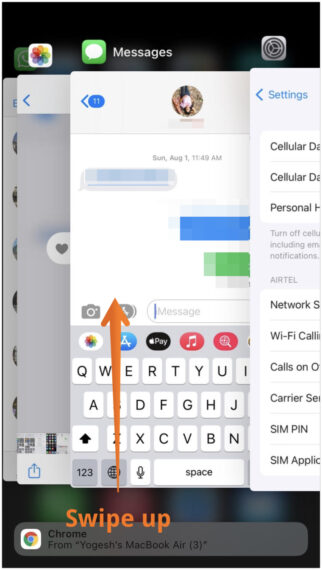
- After a few seconds, open the iMessage again and see if you can send messages or not.
2. Check if the iMessage is Enabled
Wondering how to fix iMessage needs to be enabled to send this message? In that case, you can take a look at the steps listed below and ensure that the iMessage feature is enabled or not.
- Go to the Settings app on your iPhone. Here, you need to tap on Messages.
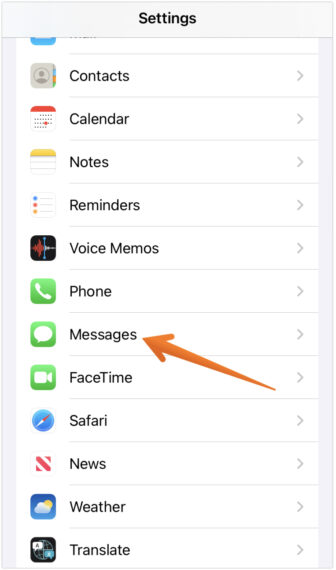
- Now, make sure that the iMessage toggle is turned on.

Check out if there is a message saying that iMessage waiting for activation. If it is, that means that the iMessage is disabled. But ensuring these steps will activate the iMessage app.
3. Turn Off and On iMessage from Settings
One of the simplest solutions for iMessage that needs to be enabled to send this message error is to check out whether iMessage is activated or not. We checked in the above step, and now we need to turn it off and activate it once again. To do that, you must take a look at the steps outlined here:
- Follow the steps from the above method to check if the iMessage is activated. If yes, follow the steps below.
- Turn off the toggle beside iMessage.
- Restart the device
- Again, go to the Settings app and click on Messages from here.
- Now, turn on the iMessage toggle to enable it once again.
4. Enable and Disable the Airplane Mode
You can try enabling and disabling the Airplane mode to solve this problem. For this, follow these steps:
- Swipe down the screen of the iPhone from the top-left side. This will lead to the opening of the Control Center. If there is a home button, you can swipe up to open the Control Center.
- Here, you will see the Airplane icon. Tap on it.
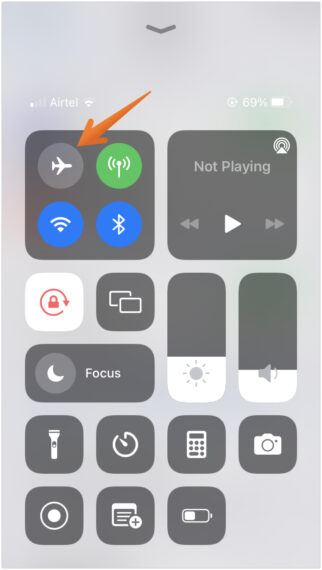
- When it turns orange, it means that Airplane mode is enabled.
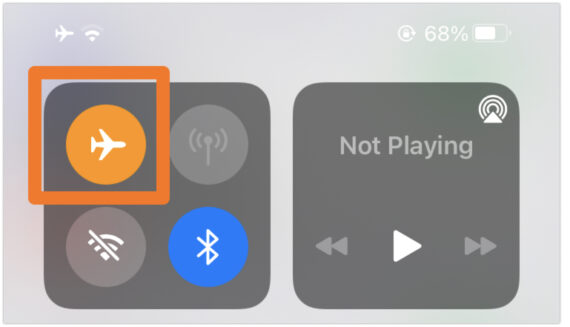
- After a few seconds, tap on the Airplane icon again to deactivate it. You will notice now the color of the icon turns grey now.
5. Check the Status of the iMessage Server
There are instances where the cause of this problem might be due to Apple’s iMessage server. To make sure that there is no fault from your side, you can go to the System Status section. To do so, follow the below steps:
- Open the browser on your iPhone or system. Click on this link which will take you to Apple’s System Status section.
- Once the page is open, check if there is a green dot beside iMessage. That means that everything is normal.
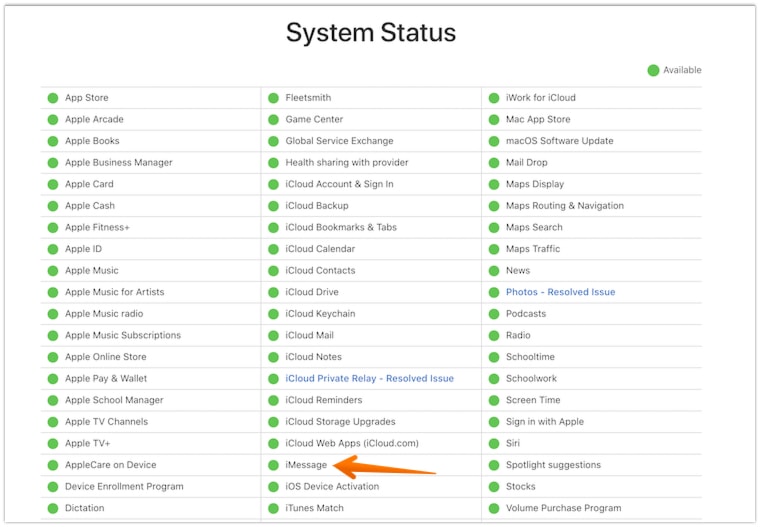
But, if you see a red or yellow dot, that means that the iMessage server is down. During this time, Apple will be working to fix the issues. Keep in mind that it might take some time to get back to normal.
6. Check Receive/Send Settings on iMessage
To solve iMessage needs to be enabled to send this message error, you can also take a look at the receive/send settings of Messages. For that, follow these below steps and check how you can it:
- Go to the Settings app. Select Messages.
- Now, scroll down and tap on Send & Receive which you will find just below the iMessage Toggle.
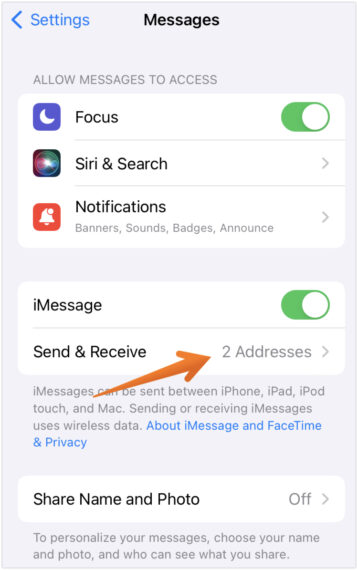
- Here, you need to make sure that you have the Apple ID email address listed under the section – “You Can Receive iMessage to and Reply From”.
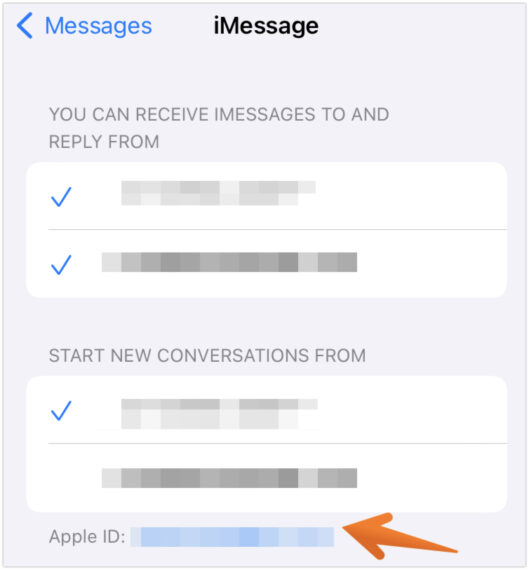
Apple ID is used by iMessage to receive as well as send iMessages. That is why you must have it here in addition to the phone number. This generally people tend to miss, enabling that will help you solve iMessage needs to be enabled to send this message issue.
7. Delete Stuck Messages
Another one of our solutions for iMessage that needs to be enabled to send this message problem is failed messages. That is why deleting them from the device might help in resolving the issue. Follow the below steps that will help you delete failed messages on the iMessage app:
- Go to the Messages app on your iPhone.
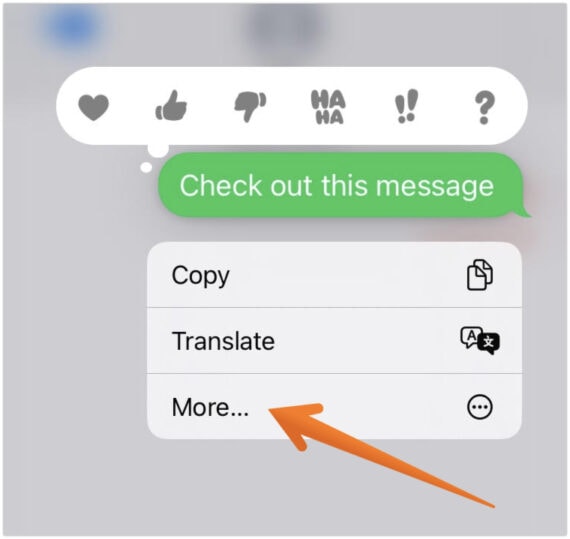
- Open conversation. Here, you need to long press the failed message. You will see a drop-down menu, click on More.
- Clicking on More will let you delete the message by clicking the Delete icon on the bottom left-hand corner of the screen.
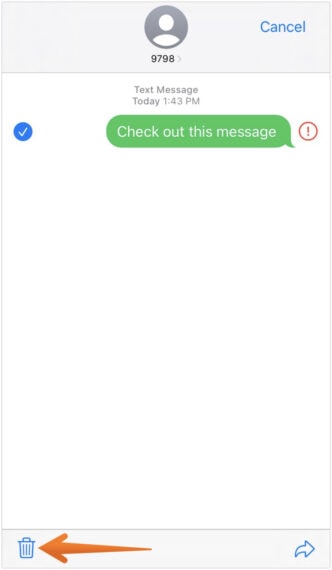
After this, you can try sending messages and see if it’s working. If it doesn’t, you can try to remove the entire conversation.
Are you unable to send a message to a specific individual? In that case, it could also be due to the incorrect iMessage settings of the recipient. Make sure you have the right phone number or Apple ID of the recipient to make iMessage work properly.
8. Relogin with Apple ID
Another way that you can resolve this error is by signing out of your Apple ID and then signing in. Follow these steps to check how you can log out of Apple ID.
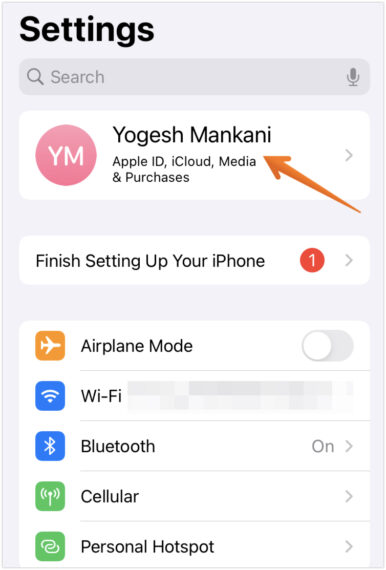
- Go to the Settings app on your iPhone. Tap on your name card at the top of the screen.
- Scroll down below and select Sign Out.
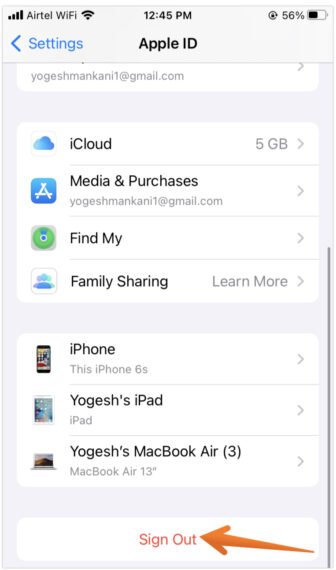
- Now, restart the device.
- Go to Settings app again and then choose Sign in at the top of the screen.
- After signing in, open iMessage and see if the issue is resolved or not.
9. Update to the Latest iOS version
Sometimes, pending iOS updates can lead to the iMessage needs to be enabled to send this message problem. For that, you need to make sure that you download and install the latest update. The update might fix the issue. Follow the steps to check if any update is pending:
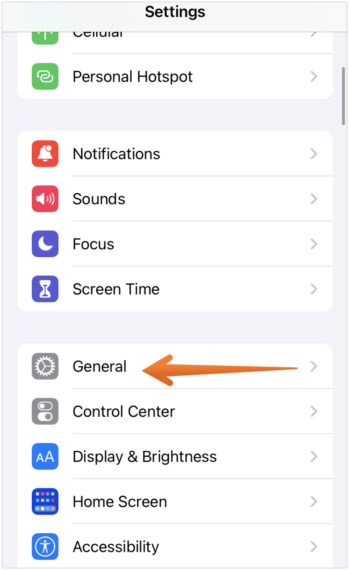
- Go to the Settings app on your iPhone. Tap on General from here.
- Click on Software Update.
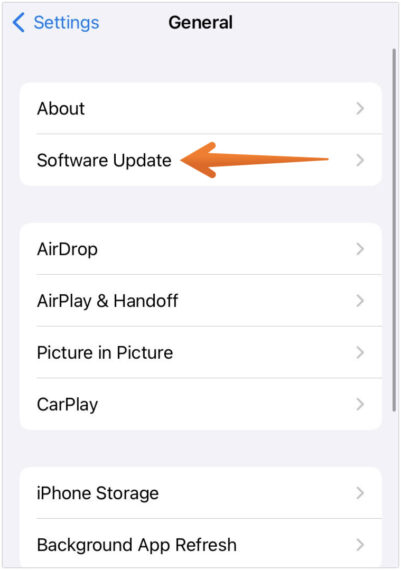
- Check if there are any updates available. If yes, click on Download and Install to proceed further.
Once the software is updated to the latest version, open iMessage app, and chances that the issue will be resolved.
10. Reset Network Settings
Another way to fix iMessage needs to be enabled to send this message is by resetting the network settings. Keep in mind that doing so will not delete any personal data. However, it will change all the network settings to default. Here are the steps that you can try:
- Open Settings App on your iPhone. Select General.
- Scroll down and press Transfer or Reset iPhone.
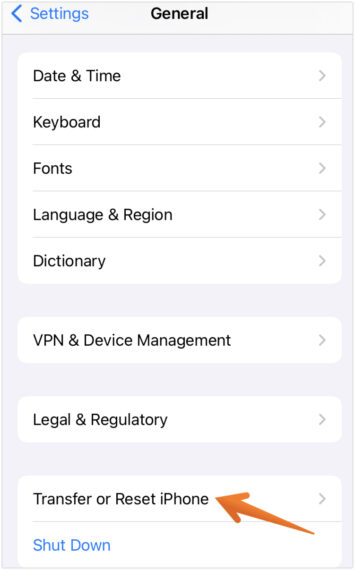
- From here, click on the Reset button.
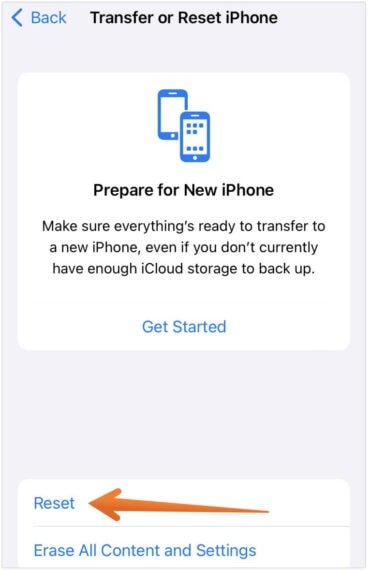
- Now, click on Reset Network Settings.
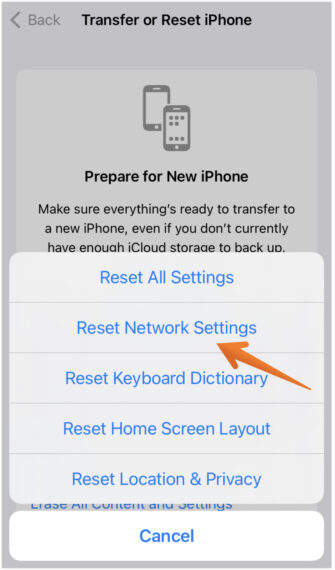
If this doesn’t work, you can try selecting Reset All Settings.
11. Switch to SMS
You can also try switching from iMessage to SMS to make sure that iMessage needs to be enabled so send this message doesn’t pop up. Here are the steps –
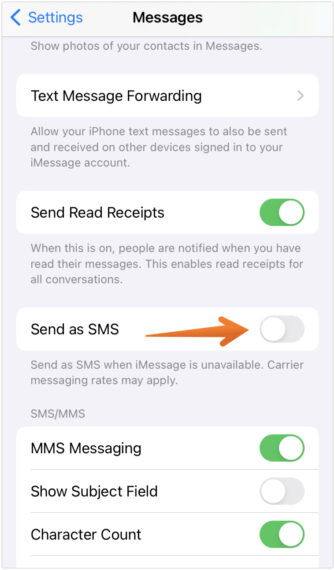
- Go to the Settings app. Select Messages from here.
- Here, you need to check if both the Send as SMS and iMessage toggles are turned on. Note that selecting Send as SMS will apply carrier charges too.
- Now, go back to the Settings app. Press on Wi-Fi and turn off Wi-Fi from here.
- Go to the Messgaes app. Now, send a message to any contact.
- When you see the message going out in blue (as an iMessage), long press on it. A drop down will appear, click on Send as Text message.

- When you select Send as Text Message, the message will go out as a green one (as an SMS).
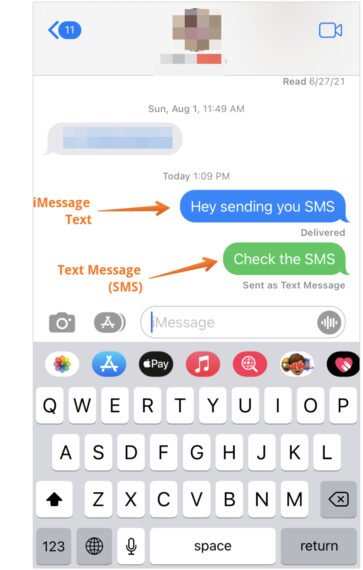
With these steps, you can change the message thread to the SMS version. This will help you to send messages if doing all the above steps is not able to resolve iMessage that needs to be enabled to send this message problem.
12. Contact Apple Support by Sending an SMS
The last solution for this iMessage that needs to be enabled to send this message issue is to get in touch with Apple Support. In that case, you can send an SMS instead of an iMessage to get help from professionals.
Conclusion
These are some of the solutions that you can use to fix the iMessage that needs to be enabled to send this message issue. However, if the problem is not solved, you need to get in touch with a professional. Also, if you are not able to follow any above solutions or have any confusion, connect with us and we will try to solve it as soon as we can.