A driver is a software program that communicates with your computer’s hardware and controls the way it functions. Every single piece of internal or external hardware in your computer requires a driver to operate correctly.
It’s important that you keep your drivers updated because outdated software can affect your computer’s operating abilities. What’s more, if you don’t update drivers, it may be difficult for you to use newly installed devices on your PC because they won’t communicate effectively with old software.
If you want to have a quick, safe, and easy method to update your drivers, you may consider specific software tools that are designed just for this purpose. These tools will identify what kind of hardware is attached to your PC, its current driver version, and whether the drivers are outdated or corrupted.
Speaking of such solutions, Outbyte Driver Updater is one of the most reliable programs when it comes to updating drivers. With its help, users can save a considerable amount of time by letting the software search for the latest driver versions available and automatically install them on their systems. Below we will be looking at the steps you should take if you want to update your drivers with Outbyte Driver Updater.
Steps to Take When Updating Your Drivers with Outbyte
With Driver Updater you don’t need to have advanced technical knowledge as the software does all the work for you. Here’s how you can set up and use Outbyte Driver Updater on your PC.
Step 1. Download & Install the program
Visit the Outbyte.com website to find the download file so you can install the software onto your computer. After the download is over, you can launch the program and pick your options such as:
- Creating a desktop shortcut
- Launching the program as soon you’re logged onto your PC
- Sending out anonymous info to improve Outbyte’s services
Once you’ve ticked the boxes of the options you want, select the location of where you’d like Outbyte to be stored on your PC and then click the Install button. Installation usually takes less than 2 minutes to complete. When you click the Finish tab, the program will automatically open.
Step 2: Launch & Scan
After the installation, the program launches and starts scanning your computer. The scan result gives you information on the following:
- Devices found in your system grouped into different categories
- Whether your drivers are outdated and for how long they’ve been outdated
You can click on any device from the list to check details on its current installed driver version along with the latest driver version available.

Step 3: Select Drivers
Outbyte organizes all the devices into separate categories such as ‘Monitor and display’ or ‘Audio performance’. You can select which drivers you’d like to update first from these categories by ticking or unticking the boxes next to each device.
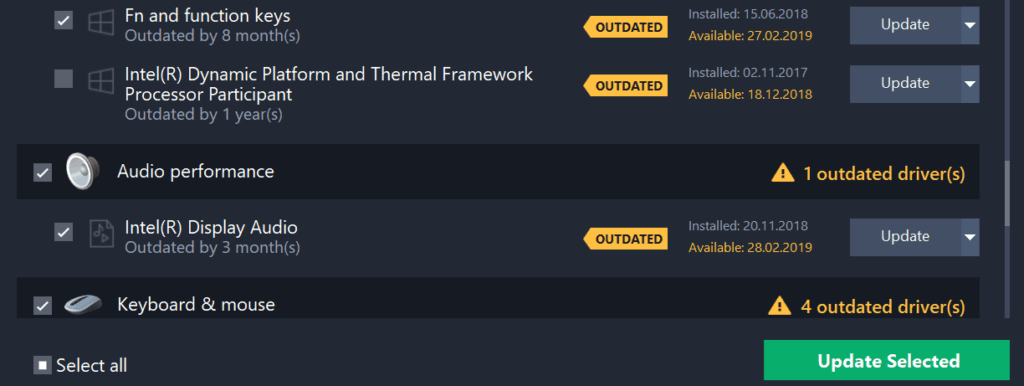
The advantage of this list is that you get to pick which drivers are the most important to update first. You can also just click on the ‘Select all’ option to update all the drivers on the list.
Step 4: Update
Once you’ve selected the drivers you’d like to update, click on the ‘Update Selected’ button in the bottom right corner.
If you haven’t yet registered your version of Outbyte, simply click on the upgrade button. It will ask you for an activation key which will be sent to you by email.
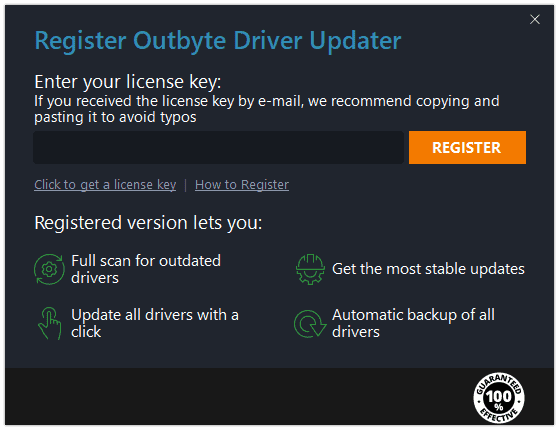
Once you’ve activated your Outbyte account, the program will start updating your drivers. The entire process typically takes less than 15 minutes to complete.
Conclusion
Updating drivers is an important task that needs to be performed regularly as it can improve the function of such devices as Webcam, USB ports, audio, display screen, graphics card, and more. From improving gaming experience to fixing incompatibility issues, this can make a lot of difference for PC users.
What’s best about using a tool like Outbyte is that it makes the whole process fast and easy so you won’t have to waste your time on technical, time-consuming, and tiresome tasks.